– 5 –
INSTALLING BASIC OVEN
The basic oven must be installed on legs or be mounted on a modular stand. Installations on concrete
bases or other supports restricting air circulation underneath the oven is not advisable and may void
the warranty.
Ovens Mounted on Casters
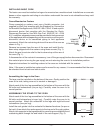
Ovens mounted on casters must use a flexible connector (not
supplied by Wolf) that complies with the Standard for Connectors
for Movable Gas Appliances, ANSI Z21.69 • CSA 6.16 and a quick-
disconnect device that complies with the Standard for Quick-
Disconnect Devices for Use With Gas Fuel, ANSI-Z21.41 • CSA
6.9. In addition, adequate means must be provided to limit movement
of the appliance without depending on the connector and the quick-
disconnect device or its associated piping to limit appliance
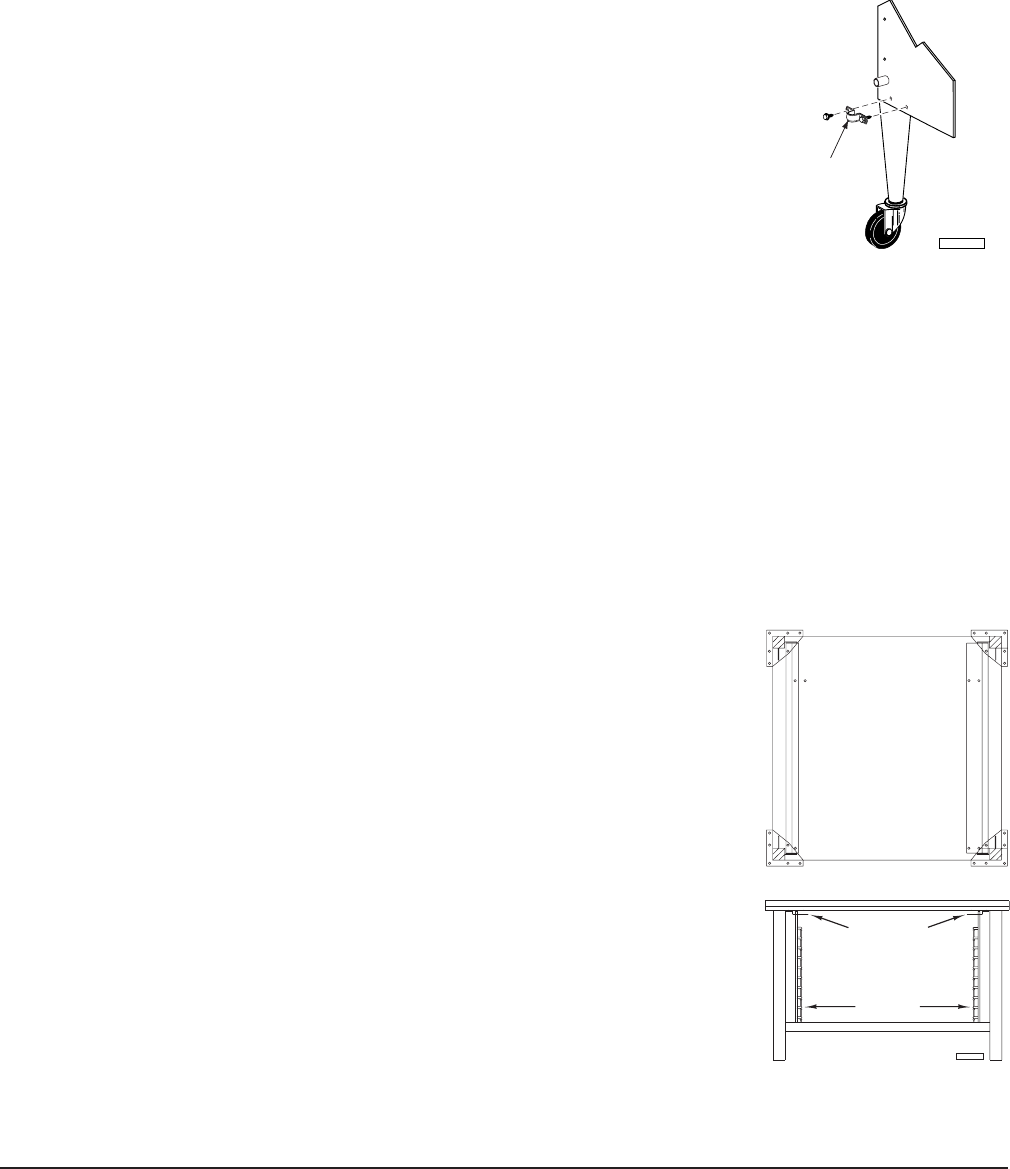
movement. Attach the restraining device at the rear of the oven as
shown in Fig. 1.
Remove two screws from the rear of the oven and install the tie-
down strap shipped with the casters using these screws (Fig. 1).
Attach the gas line strain relief to the tie-down strap at the rear of
the oven (Fig. 1).
If disconnection of the restraint is necessary, turn off the gas supply before disconnection. Reconnect
this restraint prior to turning the gas supply on and returning the oven to its installation position.
Separate instructions for installing casters to the oven are included with the casters.
Note: If the oven is installed on casters and is moved for any reason, it is recommended that the oven
be releveled front to back and side to side.
Assembling the Legs to the Oven
The legs must be installed on the bottom of the oven. Gently position the
oven on its side, taking care not to scratch or damage it.
Attach each of the four leg assemblies to the bottom of the oven with the
24 bolts and lockwashers (six per leg). Carefully raise the oven to its
normal position.
ASSEMBLING THE STAND TO THE OVEN
Attach each of the four leg assemblies to the bottom of the oven with the
24 bolts and lockwashers (six per leg). Carefully raise the oven to its
normal position. Attach the undershelf to the legs with eight bolts and
lockwashers (two per leg).
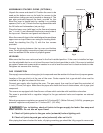
Install the rack guides into the undershelf at desired locations (for pan or
flat rack), then attach the rack supports to the top end of the rack guides.
Attach rack supports to the leg assembly by removing one middle bolt and
reattaching back through the end holes in the rack support (Fig. 2).
Fig. 1
CONNECT
GAS LINE
STRAIN RELIEF
HERE
PL-53563
Fig. 2
BACK
FRONT
RACK SUPPORT
RACK GUIDE
PL-56178


