


11
l
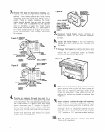
Drill holes
in the cabinet and attach it securely
to finish frame. Use ten ~10 x 1” wood
screws (four screws for each side and two
screws for the top; not included). Do not
overtighten screws or cabinet will distort and
provide a poor air seal between cabinet and
unit.
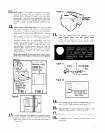
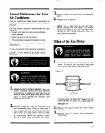
12
l
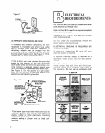
Insert plastic drain-cup spout
and metal holder
(on certain models) into hole at rear of cabinet,
as shown in Figure 8. Spout shou!d be facing
downward through hole. OPTIONAL: During
high humidity, condensate may drip from
the outside of your air conditioner onto the
ground below. If your air conditioner is
installed where this is undesirable, you can
direct the water to a more suitable spot by
simply attaching a 51’8” inside-diameter, thin
walled hose to the drain spout at rear of
cabinet (see Figure 9). On models without
plastic drain cup spout, use flashing as needed
to guide water.
Note the type of drain parts you have. Insert
drain cup according to instructions in Figure 8.
Figure 8
PLACE PLASTIC
DRAIN INTO HOLE
IN REAR OF
CABINET WITH
SPOUT DOWN
-PLACE DRAIN CUP
INTO METAL
I I
BRACKET AND
INSERT INTO
CABINET RAIL
SLOTS
TYPE 1
1 TYPE 2
Figure 9
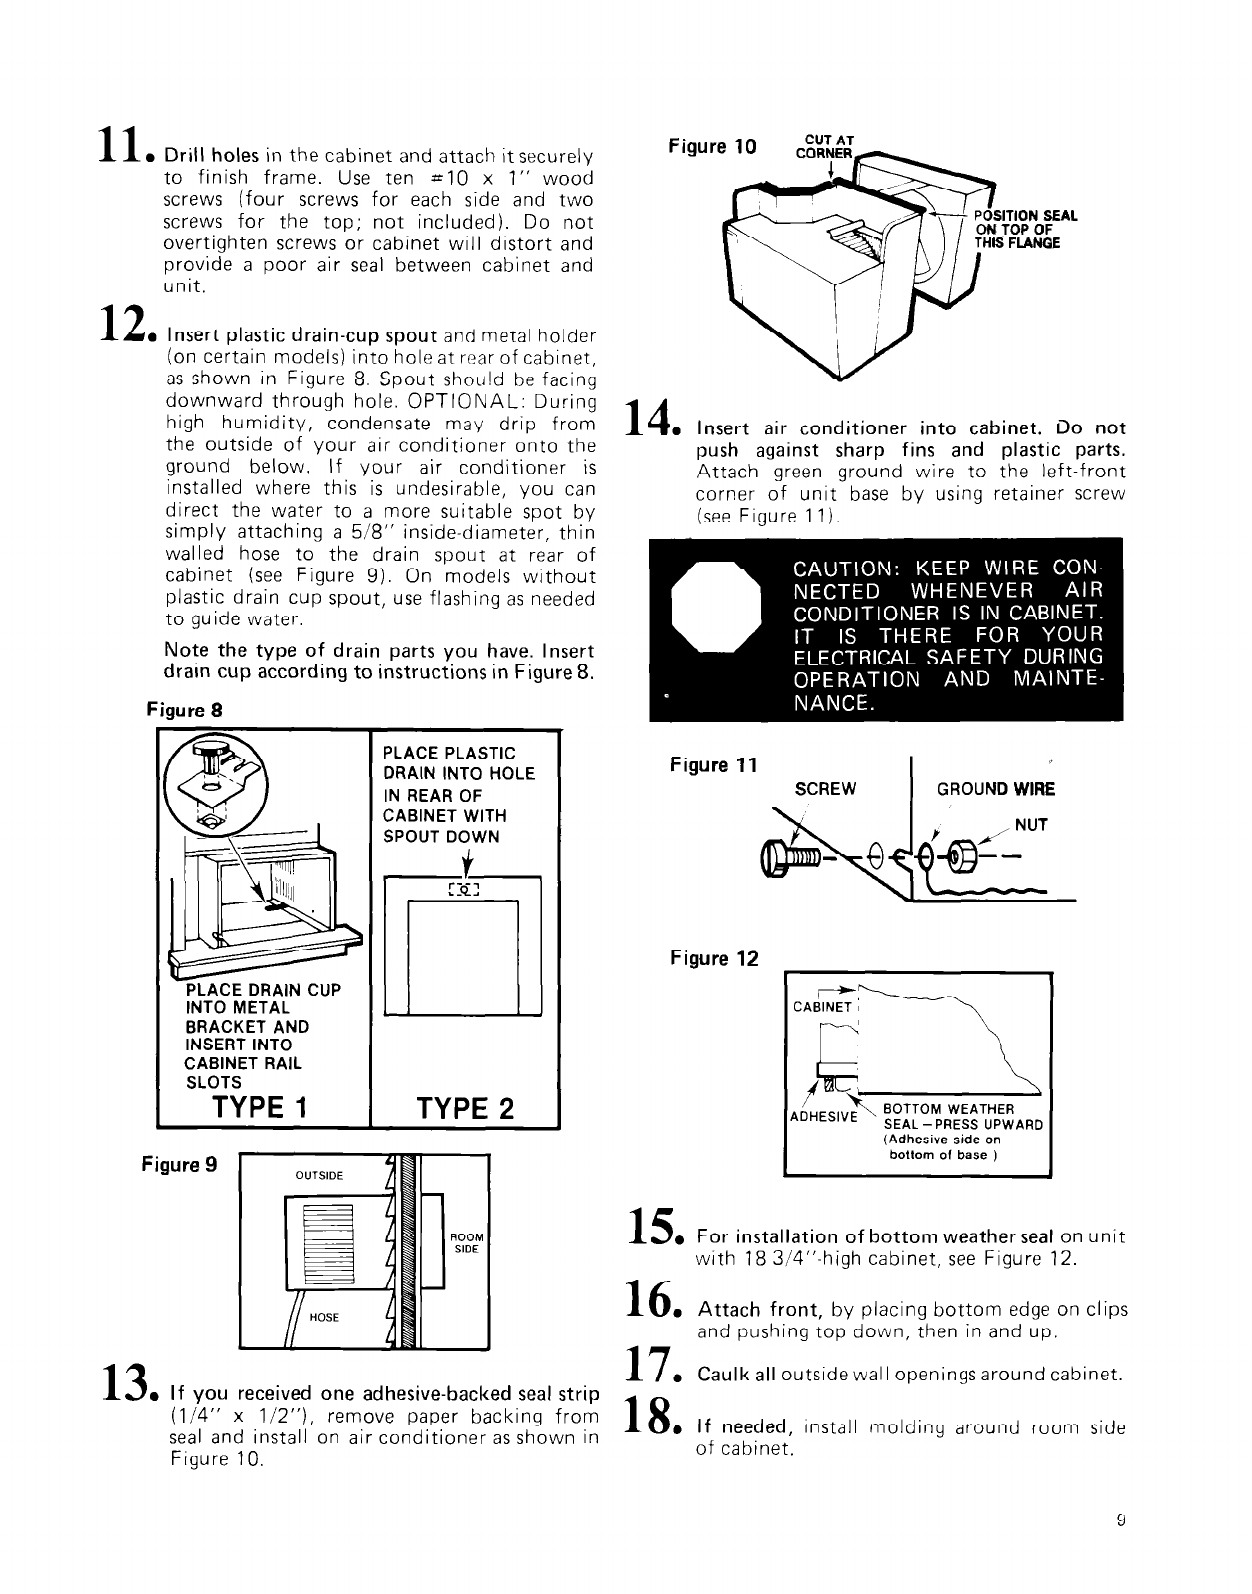
13
. If you received one adhesive-backed seal strip
(l/4”
x l/2”), remove paper backing from
seal and install on air conditioner as shown in
Figure 10.
14
l
Insert air conditioner into cabinet. Do not
push against sharp fins and plastic parts.
Attach green ground wire to the left-front
corner of unit base by using retainer screw
(see Figure 11).
Figure 11
SCREW
I
GROUND WIRE
Figure 12
BOTTOM WEATHER
SEAL -PRESS UPWARD
(Adhesive side on
bottom of base )
15
. For installation of bottom weather seal
on unit
with 18 3/4”-high cabinet, see Figure 12.
16
. Attach front,
by placing bottom edge on clips
and pushing top down, then in and up.
17
. Caulk all
outside wall openings around cabinet.
18
. If needed,
install molding around room side
of cabinet.
Y