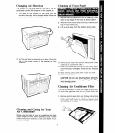
2. Clean filter, using a vacuum cleaner.
-OR-
3. If very dirty. wash filter with warm water and mild
detergent. Air dry thoroughly before replacing.
4. Replace elasttc band.
Annual Maintenance for Your
Air Conditioner
Your air conditioner needs annual maintenance to help
insure steady, top performance throughout the year.
Call the service company recommended by your
dealer to:
l
Inspect and clean the coils and condensate water
passages.
l
Check fan and oil the fan motor.
(The compressor IS sealed and needs no orlrng.)
Expense of annual inspection IS customer’s
responsrbilrty.
Do-It-Yourself Maintenance
If you are familiar with electrrcal appliances you can
do the cleaning and maintenance yourself. If you decide
to go ahead, follow these steps.
Remove front panel (See page 5.).
Pull control knobs straight off. Remove the control
plate.
Rem&e the green ground wrre. It IS attached with
a screw located on the bottom left side under the
control plate. (Save the screw to reattach the wire.)
Wrap the motor, electrical control box and
compressor terminals box In plastic film and
make
sure no water or other liquid gets inside any of
these parts.
It would damage insulation and cause
serrous problems.
5. Carefully clean and hose out the base, coils and
condensate pans. Clean at least once a year. or
more often if the condenser COIIS and pans collect
dirt, sand, leaves, insects or algae. Also, clean if you
detect an odor coming from the arr condrtroner. (A
good ttme to 011 the motor IS when you already have
the cabinet open. See instructions that follow.)
6
6. Remove plastic film from motor and electrical parts.
7. Replace unit in cabinet. (See Installation
Instructions.)
6. Reattach ground wire. Replace control plate and
knobs.
9. Replace front panel.
NOTE:
It IS best to wait 24 hours before starting the
unit agarn. This allows all areas to dry out. (The water
from rainfall or from normal operation does not harm
these components.)
Oiling the Fan Motor
Remove unit from cabinet (follow instructions under
Do-It-Yourself Maintenance.)
011
the fan motor following rnstructrons on the fan
motor. To add oil, pull out the 011 hole plug at each
end of the motor. (See Figure below.) Use SAE
number 20 OI! or an easy to use one-ounce capsule
of especially recommended 011 can be ordered from
your dealer. (Part no. 10943).
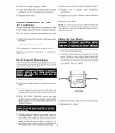
OIL PLUGS
3. Replace the plugs to keep dirt from motor bearings.
4. Replace untt in cabinet.


