


• Installation • Start-Up • Maintenance • Parts
Assemble Block
3f
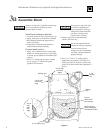
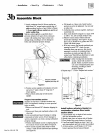
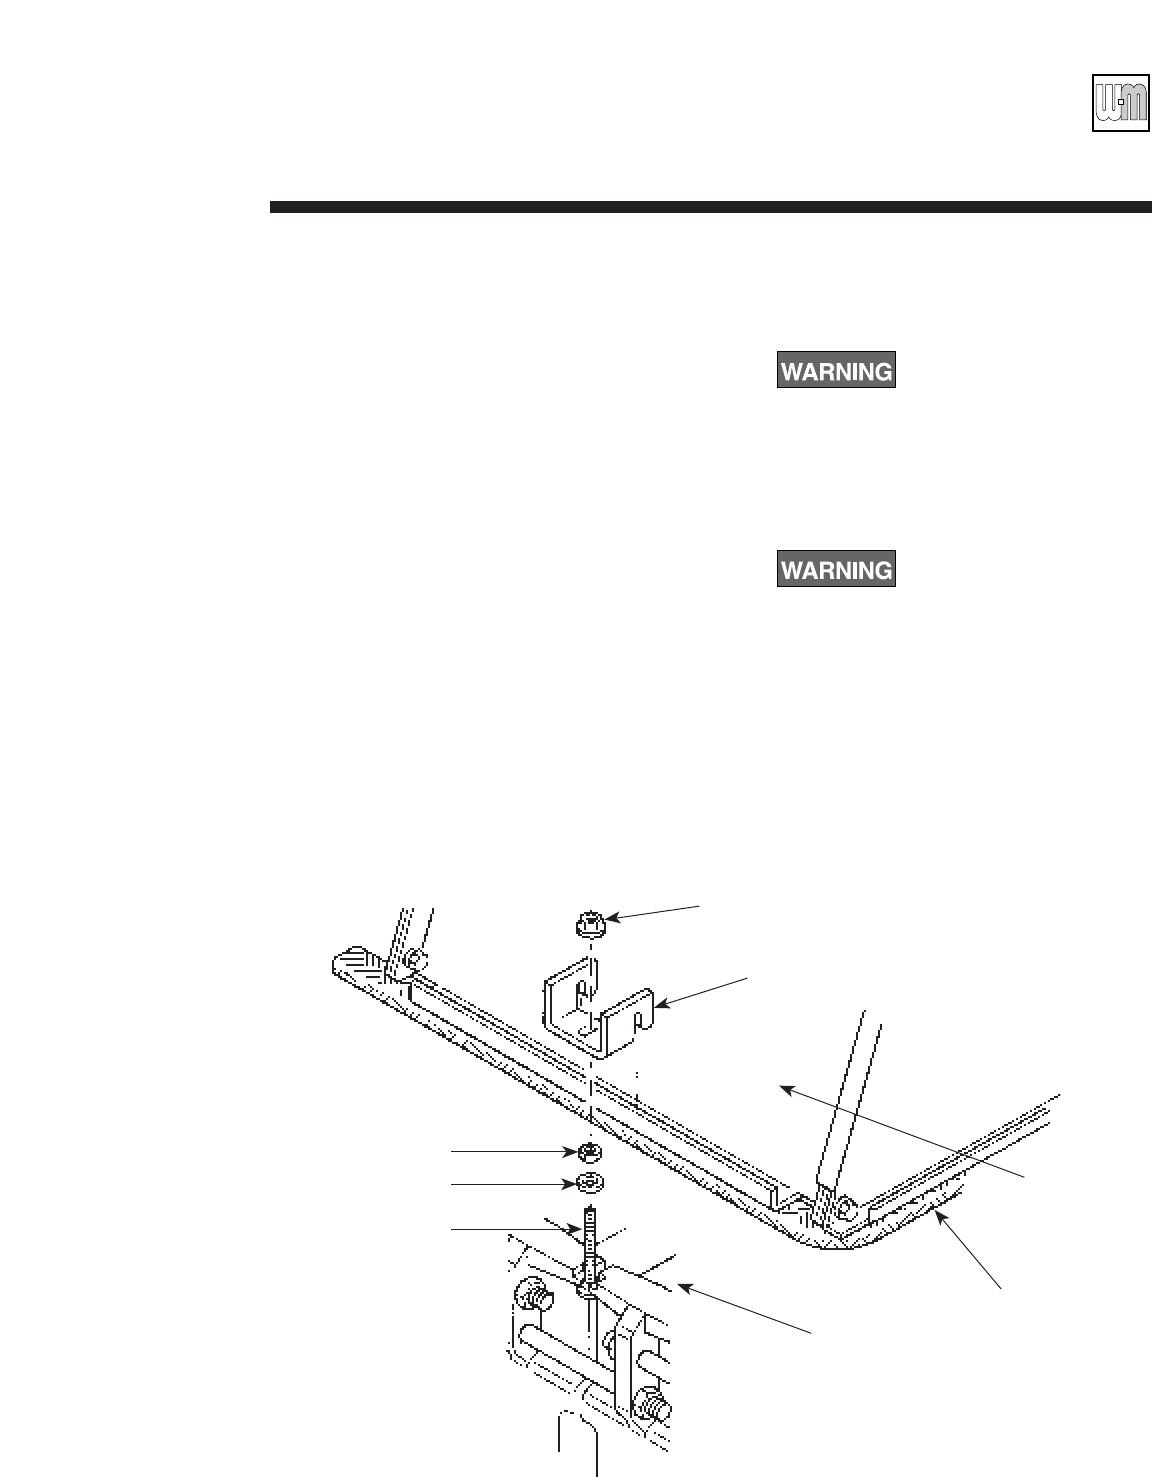
Install flue collector hood assembly:
1. Place hood on top of sections with open end
of hood tightly against flue collar. Make sure
flue collar gasket is in place, not broken, bent
or folded.
2. Install 5/16" x 2" carriage bolts, flat washers
and regular nuts on both sides of boiler
starting at back section joint, continuing at
each joint. See Figure 10. Tighten nuts.
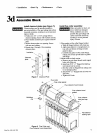
3. Fasten hood to sections and flue collar:
a. Slide holddown clip over carriage bolt and
flange on hood. Finger-tighten 5/16"
flanged nut on carriage bolt. See Figure 10.
Repeat for each clip. Where hood joint
interferes with clip installation, do not
install clip.
b. Install and finger-tighten six 5/16" x 1"
flanged bolts and flanged nuts joining hood
assembly to flue collar.
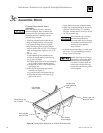
c. Center collector hood, making sure it is
tight against flue collar. Evenly tighten nuts
on holddown clips, being careful not to
distort hood.
d. Tighten six 5/16" x 1" flanged bolts and
flanged nuts on flue collar to 30 - 35 in.-lbs.
Overtightening bolts in flue
collector hood assembly will
cause gasket material to extrude,
causing possible flue gas
leakage and carbon monoxide
emissions, resulting in severe
personal injury or death.
4. Check gas-tight seal of flue collector hood and
flue collar.
Gas tight seal must be
maintained to prevent possible
flue gas leakage and carbon
monoxide emissions, resulting in
severe personal injury or death.
a. Open damper in flue collar.
b Check inside section assembly for any light
passing through unsealed areas.
c. Mark all unsealed areas.
d. At unsealed areas, check for damaged
gaskets, sealing rope not in place, loose
bolts or nuts, or missing holddown clips.
Correct all conditions and repeat step b. If
unsealed areas still exist, contact your
Weil-McLain distributor or sales office
before continuing installation.
Part No. 550-141-705
11
Regular nut
Flat washer
Carriage bolt
Boiler sections
Flat-stitched
sealing rope
Flue collector
hood
Holddown clip
Flanged nut
Figure 10 Holddown Clip Installation