


Please Do Not Return This Product To The Store. Call Us Directly! Our Trained Technicians Will Answer Your Questions and/or Ship Any Parts You May Need
You can reach us Toll Free at 1-888-827-3667 for Consumer Assistance or online at www.wayne-dalton.com
4
5
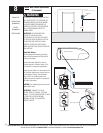
Mounting Opener End
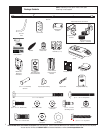
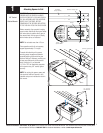
Tools Needed:
Power Drill
Hacksaw
1/8” Drill Bit
1/2” Socket
7/16” Socket
Ratchet Wrench
Adjustable Wrench
Tape Measure
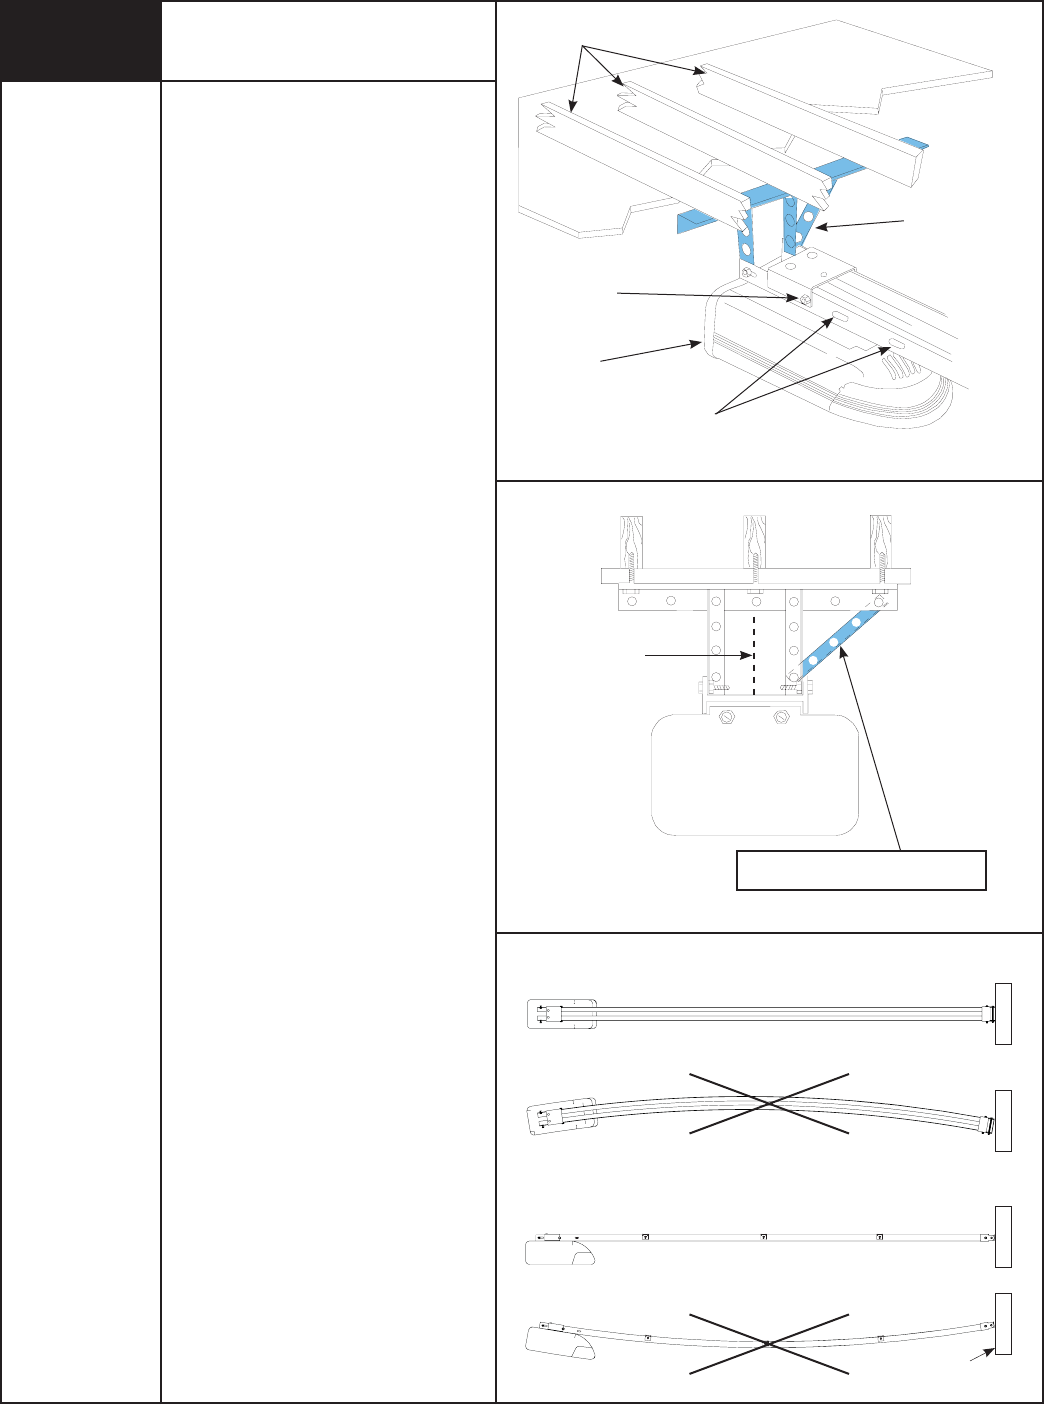
Perforated Angle
Iron (Not Supplied)
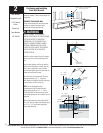
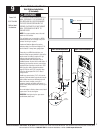
CAUTION: Do not use gear cap bolt or nut
for hanger attachment. This may cause
sprocket, chain or Belt misalignment,
resulting in damage to opener or possible
personal injury!
Align the center of opener’s rail assembly
with the center line previously marked on
the top section of the garage door to ensure
rail will be parallel with the direction of door
travel.
Using perforated angles (cut to proper
length) hang opener end from ceiling joist.
Be sure to locate and mount to ceiling joists,
as illustrated.
Pilot drill with 1/8” drill bit and use
1/4” x 1-1/2” lag screws (not supplied) to
ensure a rigid mount. Attach opener to
perforated angles using 5/16” x 3/4” bolts,
5/16” lock washer, and 5/16” nuts (not
supplied).
NOTE: Bracing should be at an angle to
provide rigid support.
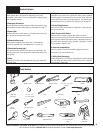
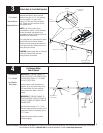
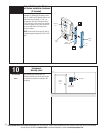
When opener is securely attached to
perforated angles, remove the 2” x 4” (used
to support rail assembly in Step 4) and
close the door.
NOTE: It is recommended that 10’ rails be
supported in the center to prevent sagging.
Opener rail should be aligned perpendicular
to the garage door when properly installed.
There should be no sagging of the rail in
any direction.
Ceiling Joist
Gear Cap
Nut/ Bolt
Opener
Cut Perforated
Angles to Fit
Alternate Hanger
Mounting Holes
Use angled brace to ensure rigid installation.
Center Line
Of Door
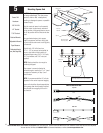
PROPER INSTALLATION
correct
incorrect
correct
incorrect
Top view
Side view
header