


23
7. Care and Maintenance — continued
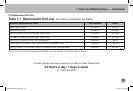
7.7b
Note: Use only Verilux Sanitizing Light Bulbs. Use of non-Verilux light bulbs can result
in damage to the unit. To order a replacement Verilux Sanitizing Light Bulb, refer to the
Replacement Part List on Table 7-1.
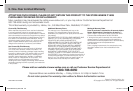
7.8 Sanitizing Light Bulb Disposal
If disposing of a Verilux Sanitizing Light Bulb, follow local regulations for proper
disposal. For more information, see www.lamprecycle.org or call 1-866-666-6850.
B
H I
F
E
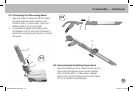
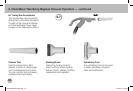
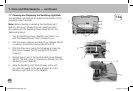
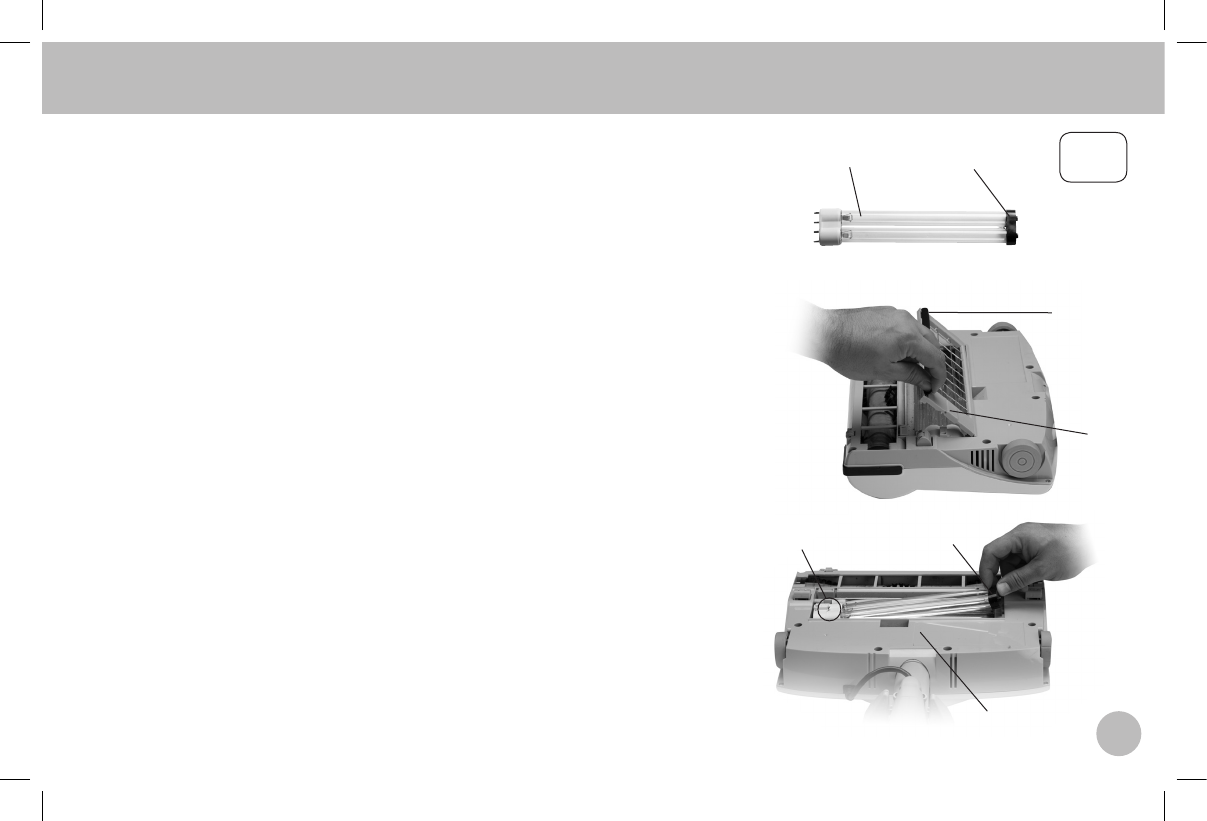
6. Should additional cleaning be required or if replacing the Sanitizing Light Bulb,
remove the Sanitizing Light Bulb (A) by depressing the Bulb Socket Tab (H)
with your thumb. Grasp the Bulb Cap Tab (I) with your other hand and lift the
Bulb Cap (G) and Sanitizing Light Bulb (A) away from the Power Head (B).
7. Gently grasp the Sanitizing Light Bulb (A) and remove from Bulb Socket.
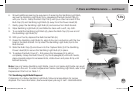
8. Wipe Sanitizing Light Bulb (A) and Reflector clean with a soft, dry cloth.
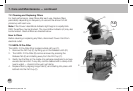
9. To re-install the Sanitizing Light Bulb (A), place the Bulb Cap (G) over end of
the Sanitizing Light Bulb (A).
10. With your thumb, depress the Bulb Socket Tab (H).
11. Grasp the Sanitizing Light Bulb (A), align its four pin conductors with the four
holes in the Bulb Socket. Firmly insert the Sanitizing Light Bulb (A) into the
Bulb Socket.
12. Slide the Bulb Cap (G) end down into the Capture Slots (I) of the Sanitizing
Power Head (B) to secure the Sanitizing Light Bulb (A) in place.
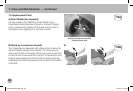
13. ToreplacetheBulbCover(F),rstassuretheSqueegee(E)isslidon
completely. Grasp the Bulb Cover (F) by the Squeegee (E) with both hands,
placeoppositeedgeintorecessedslots,rotatedownandpressrmlyuntil
latched securely.
A G
VH04-MAN-2012_Web.indd 23 12/12/12 3:37 PM