6 of 12
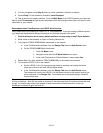
6. Associate each thermostat to the Controller.
a. Move to within three feet of the thermostat.
b. Right-click on the Thermostat icon and select “Properties”; in the lower right-hand corner
of the display, the status message “Loading status from the device” appears; wait until
the status message changes to “Done loading status.”
c. Switch to the “Device Associations” tab.
d. Select “Button #1” in the drop down menu.
e. Press the “Edit” button – a pop up appears.
f. Left-click on the Controller icon to make the association, then click on “Done” in the pop
up.
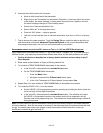
7. Test all devices for proper operation. From the Design Tab you should be able to right-click on
each thermostat and choose Advanced Thermostat Options to see current temperature data
and change modes (heat, cool, etc.) for each thermostat on your network.
P
ROGRAMMING USING LEVITON’S VIZIA RF+ INSTALLER TOOL (V1.1.0.0) AND USB Z-WAVE ADAPTER:
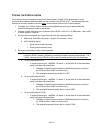
Setup steps below are created from version 1.1.0.0 of the Vizia RF+ Installer Tool. If you are running a
different version, your steps may be somewhat different than below, but the basic process is the same.
1. Confirm all devices to be added are at factory default and have not been setup in any Z-
Wave Network.
2. Either create a New Network or Open an Existing Network file.
3. To include the TZEMT400BB32MAA thermostats in the network:
a. In the Vizia RF+ software select the Include Device button.
b. On the TZEMT400BB32MAA thermostat:
i. Press the Menu button.
ii. Navigate to and select the Z-Wave Install menu option.
iii. At the “Add Thermostat to Z-Wave Network” prompt select Yes.
4. Repeat Step 3 for each additional TZEMT400BB32MAA to be added to the network.
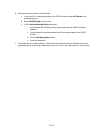
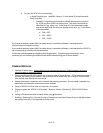
5. To include the VRC0P-1LW (+3) in the network:
a. Set the VRC0P-1LW to programming mode by pressing and holding the button (clear tab
on face of unit) until the light blinks amber.
b. In the Vizia RF+ software select the Include Device button. The software will confirm
the VRC0P-1LW has been included in the network and it will be displayed in the All
Devices node of the programming tree. The software will automatically assign a Node ID
during this process.
Note: It is best practice to give the thermostat a descriptive name when prompted, like Master Bedroom,
for future reference. Note that this name is not saved in the thermostat and will not be automatically read
into g! You should keep notes of the location of each thermostat and their Node IDs, as the only
identification available to g! is the Node ID.


