


PKG-SVX14A-EN 21
Installation Checklist
Reference the checklist below to verify all
steps required to successfully install a
deluxe self-contained unit are complete.
This checklist is intended to acquaint the
installing personnel with what is required
in the installation process. It does not
replace the detailed instructions detailed
in the applicable sections of this manual.
WARNING
Hazardous voltage!
Disconnect all electric power, including
remote disconnects before servicing.
Follow proper lockout/tagout procedures
to ensure the power can not be
inadvertently energized. Failure to
disconnect power before servicing
could result in death or serious
injury.
General Unit Requirements
Install and secure the ductwork to the
unit.
Check unit for shipping damage and
material shortage. Refer to the
Receiving Checklist.
Electrical Requirements
Verify that the electrical power supply
characteristics comply with the unit
nameplate specifications.
Inspect all control components; tighten
any loose connections.
Connect properly sized and protected
power supply wiring to a field supplied/
installed disconnect and unit power
terminal block, or to the optional unit
mounted disconnect switch.
Properly ground the unit.
Field Installed Control Wiring (Optional)
Complete the field wiring connections.
Note: All field installed wiring must
comply with NEC and applicable local
codes.
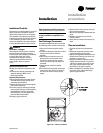
Fan Discharge Conversion
Complete the steps below to convert the
fan discharge from vertical to horizontal.
1. Remove all mid and top fan section
panels.
2. Loosen the brackets inside the unit that
clamp the mid and fan sections
together.
3. Remove the control box cover and
disconnect the motor power wires.
Feed wires up through the unit and
secure out of the way until rotation is
complete.
4. Rotate the fan section to desired
position.
5. Re-route the motor power wires back
to the control box. Ensure all wiring is
free and not routed over any sharp
edges.
6. Reconnect the motor power wires per
the unit wiring diagram.
7. Bolt and/or clamp all brackets back into
place.
8. Replace control box cover and all
exterior panels.
9. Verify the fan rotation and motor amp
draw.
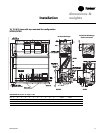
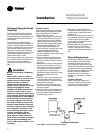
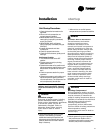
Plenum Installation
1. Uncrate the plenum and accessory
bag.
2. Rotate the evaporator blower to the
vertical discharge configuration.
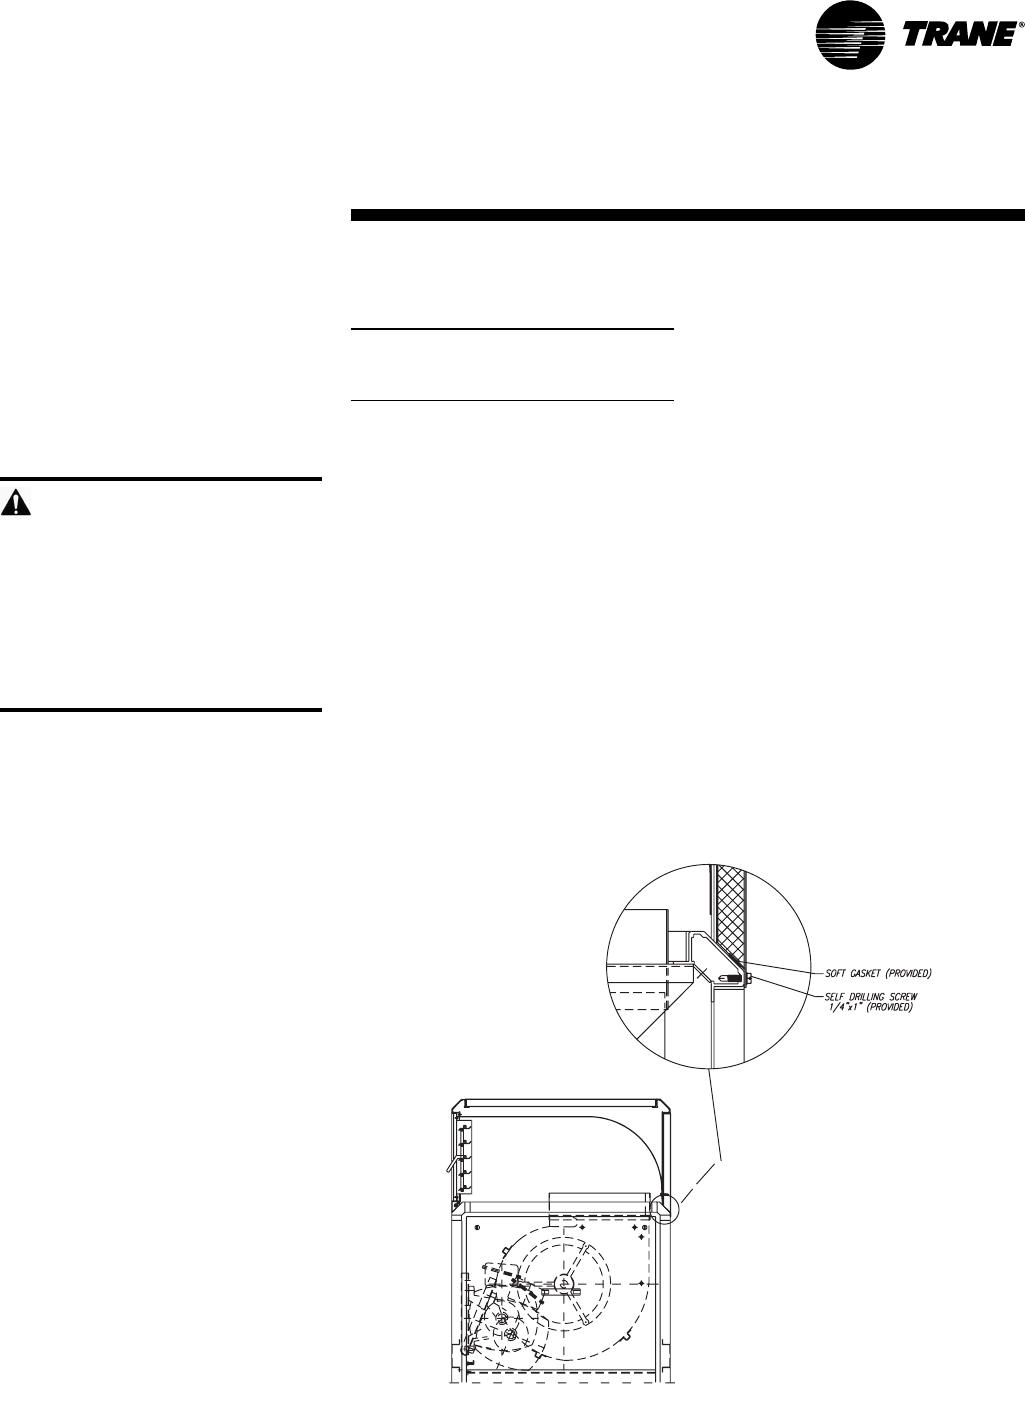
3. Apply the soft gasket provided around
the aluminum frame on top of the unit
as shown in Figure I-IP-1.
4. Using a screwdriver, tighten the self-
drilling screws as shown in Figure I-IP-
1. Be sure to tighten all screws on the
rear, right, and left sides through the
pilot holes on the plenum panels.
5. When installation is complete, adjust
the motor pulley and the discharge
grille for proper airflow.
installation
procedure
Installation
Figure I-IP-1. Plenum installation