– 141 –
Heat exchanger Partition plate
Fin guard
Motor base
Motor base
Reactor assembly
Valve fixing plate
Top plate
Top plate
Front panel
Front panel
Side cabinet
Side cabinet
Motor base Air outlet
Air outlet
cabinet
cabinet
Air outlet
cabinet
Top plate
Front panel
Side cabinet
14-2. Outdoor Unit
No.
1
Part name
Common
procedure
Procedure
XREQUIREMENTX
Be sure to put on the gloves at any process; otherwise an
injury will be caused by the parts, etc.
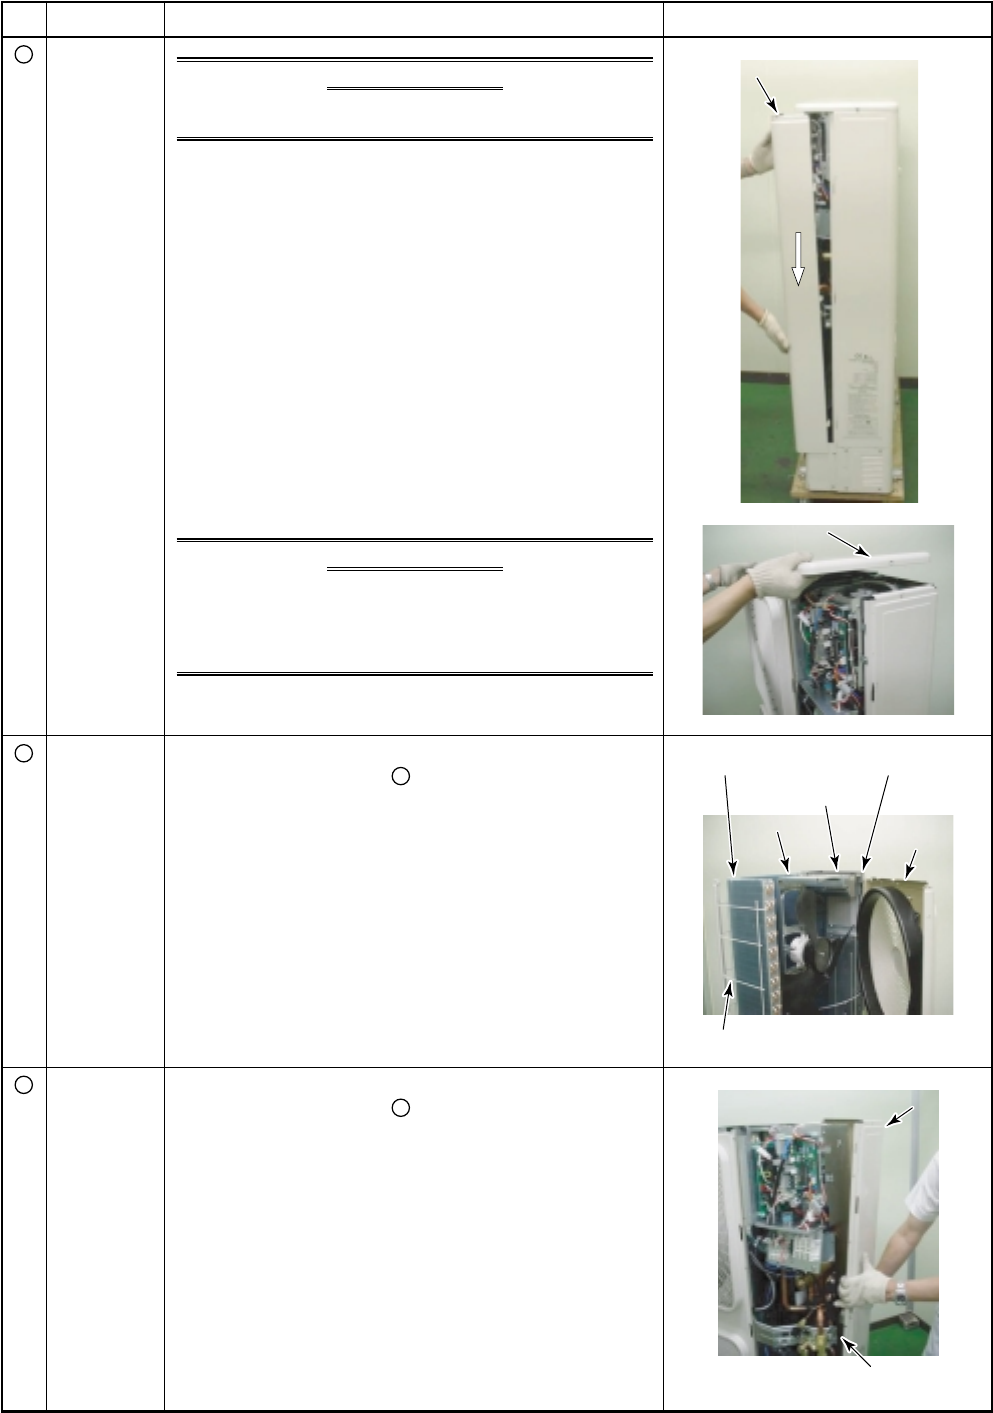
1. Detachment
1) Stop operation of the air conditioner and then turn off
switch of the breaker.
2) Remove the front panel.
(Hexagonal screws Ø4 × 10, 2 pcs.)
• Remove the screws and then remove the front panel
by pulling it downward.
3) Remove the power supply cable and the indoor/outdoor
connecting wire from the cord clamp and the terminal.
4) Remove the top plate.
(Hexagonal screws Ø4 × 10, 5 pcs.)
2. Attachment
1) Attach the top plate.
(Hexagonal screws Ø4 × 10, 5 pcs.)
2) Connect the power supply cable and the indoor/outdoor
connecting wire to the terminal and then fix them with
the cord clamp.
XREQUIREMENTX
For the power supply cable and the indoor/outdoor
connecting wire, be sure fix them using the bundling band
(procured locally) along the crossover pipe so that they do
not come to contact with the compressor, valve at gas side,
pipe at gas side and discharge pipe.
3) Attach the front panel.
(Hexagonal screws Ø4 × 10, 2 pcs.)
Remarks
1. Detachment
1) Carry out work of 1 of
1
.
2) Remove screws for the air outlet cabinet and the
partition board. (ST1T Ø4 × 8, 4 pcs.)
3) Remove screws for the air outlet cabinet and the bottom
plate. (Hexagonal screws Ø4 × 10, 2 pcs.)
4) Remove screws for the air outlet cabinet and the motor
base. (ST1T Ø4 × 8, 2 pcs.)
5) Remove screw for the air outlet cabinet and the heat
exchanger. (ST1T Ø4 × 8, 1 pc.)
6) Remove screws for the air outlet cabinet and the fin
guard. (Hexagonal screws Ø4 × 10, 2 pcs.)
7) Remove screws for the air outlet cabinet and the reactor
assembly. (ST1T Ø4 × 8, 2 pcs.)
1. Detachment
1) Carry out work of 1 of
1
.
2) Remove the screws which fix the inverter assembly and
the side cabinet. (ST1T Ø4 × 8, 2 pcs.)
3) Remove the screws which fix the side cabinet and the
valve fixing plate. (ST1T Ø4 × 8, 2 pcs.)
4) Remove screws which fix the side cabinet and the piping
panel (Rear). (Hexagonal screws Ø4 × 10, 2 pcs.)
5) Remove screw for the side cabinet and the bottom plate.
(Hexagonal screws Ø4 × 10, 1 pc.)
6) Remove screws for the side cabinet and the fin guard
(Heat exchanger). (Hexagonal screws Ø4 × 10, 5 pcs.)
Air outlet
cabinet
Side cabinet
2
3


