


13
B E G I N N E R
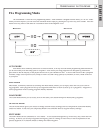
To make things easy to understand we have identifi ed 6 steps to fusing and slumping in your Hot Start Kiln. Here are a
few tips which should help you get started.
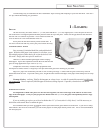
1 - LOADING
SHELVES
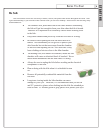
The kiln accessory kit comes with a 13” (33 cm) shelf and three 1” (2.5 cm) support posts. Place the posts on the bot-
tom of the kiln in a triangular pattern and then place the shelf on top of the posts. Make sure the gap between the shelf and
the kiln wall is as uniform as possible. Never load more than one
level of shelves in a kiln with elements in the lid.
Never place the kiln shelf directly on the bottom slab. It
will act as a heat sink and may cause your piece to heat unevenly.
THINFIRE SHELF PAPER
Your accessory kit included both kiln wash and thin shelf
paper. While the shelf paper is not required, it will allow you to
fi re multiple projects without having to re-coat the shelves with
kiln wash. Simply add a new piece to each load.
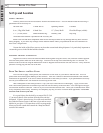
ThinFire is a heat-resistant lightweight ceramic impreg-
nated paper. It provides separation between the kiln shelf and the
glass in fi ring applications up to 1600 °F (871°C).
Compared to kiln wash, it reduces shelf preparation time
and improves surface release. A single layer will prevent molten glass from sticking to your shelf.
Edge curl: paper will sometimes pull into or curl over the glass edge. Contact with the glass surface may cause an
undesirable mark or haze. To prevent curling over, weight the outer corners and edges of the paper with small pieces of scrap
glass.
Cleanup & Safety:
on fi ring, ThinFire disintegrates to a dusty tissue. As with all ceramic fi ber material,
avoid breath-
ing residual dust
ing residual dust
. Wear a respirator (NIOSH approved for dusts) during disposal. If possible, clean shelves with HEPA
vacuum.
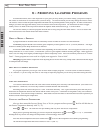
POSITIONING PIECES
It is important to make sure pieces are not too close together, too close to the edge of the shelf or to close to the
edge of the shelf paper.
If any of your projects are thicker than .2
5”
(6.5 mm)
the glass will expand beyond it’s origi-
nal footprint.
If you are working on a piece you wish to be thicker then .25” (6.5 mm) after it is fully fused, it will be necessary to
build dams with ceramic fi ber to contain the glass.
We recommend that you allow
at least
one inch of space between the glass and the lid of the kiln. If you have a slump
at least one inch of space between the glass and the lid of the kiln. If you have a slump at least
mold which is too tall to fi t on the shelf you can fi re the project on shelf paper directly on the slab. This is not recommended
full fused projects.
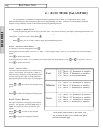
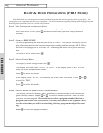
BASIC FIRING STEPS