


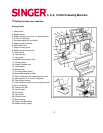
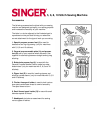
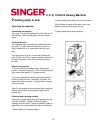
5, 6, 8, 10 Stitch Sewing Machine
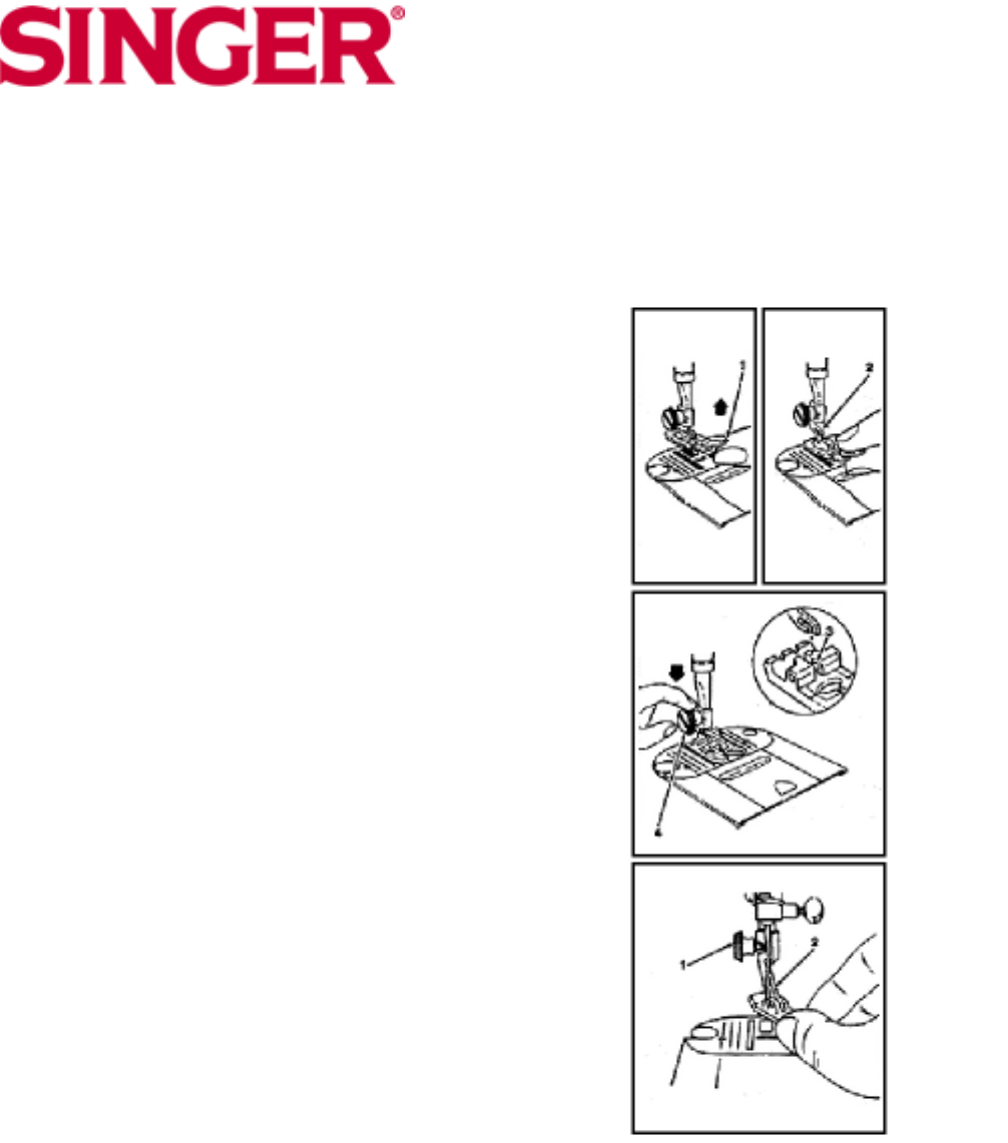
Changing snap-on presser feet (B), (D), (J),
(L)
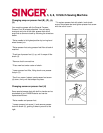
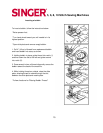
Your machine comes with the General Purpose
Presser Foot (B) already attached. You can easily
change to any one of the other presser feet which
snap onto a common shank by following the directions
below.
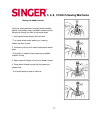
* Raise needle to its highest position by turning hand
wheel toward you.
* Raise presser foot using presser foot lifter at back of
machine.
* Push toe of presser foot (1) up, until it snaps off the
shank (2).
* Remove foot from machine.
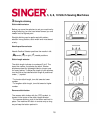
* Place new foot under center of shank.
* Lower presser foot lifter, fitting shank over presser
foot pin (3).
* Don't turn screw. Instead, push presser foot screw
(4) down, firmly until foot snaps into place.
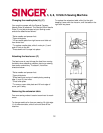
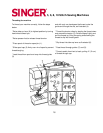
Changing screw-on presser feet (H)
Some special presser feet with built-in shanks can be
purchased at your SINGER dealer and can be
replaced as follows:
* Raise needle and presser foot.
* Loosen presser hot screw (1) and remove presser
foot with shank (2), guiding it toward you and to the
right.
* To replace presser foot with shank, hook shank
around the presser bar and tighten presser foot screw
with the use of a coin.
11