


5, 6, 8, 10 Stitch Sewing Machine
2 Getting ready to sew
Operating the machine
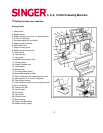
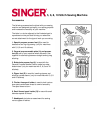
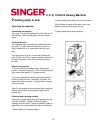
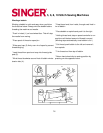
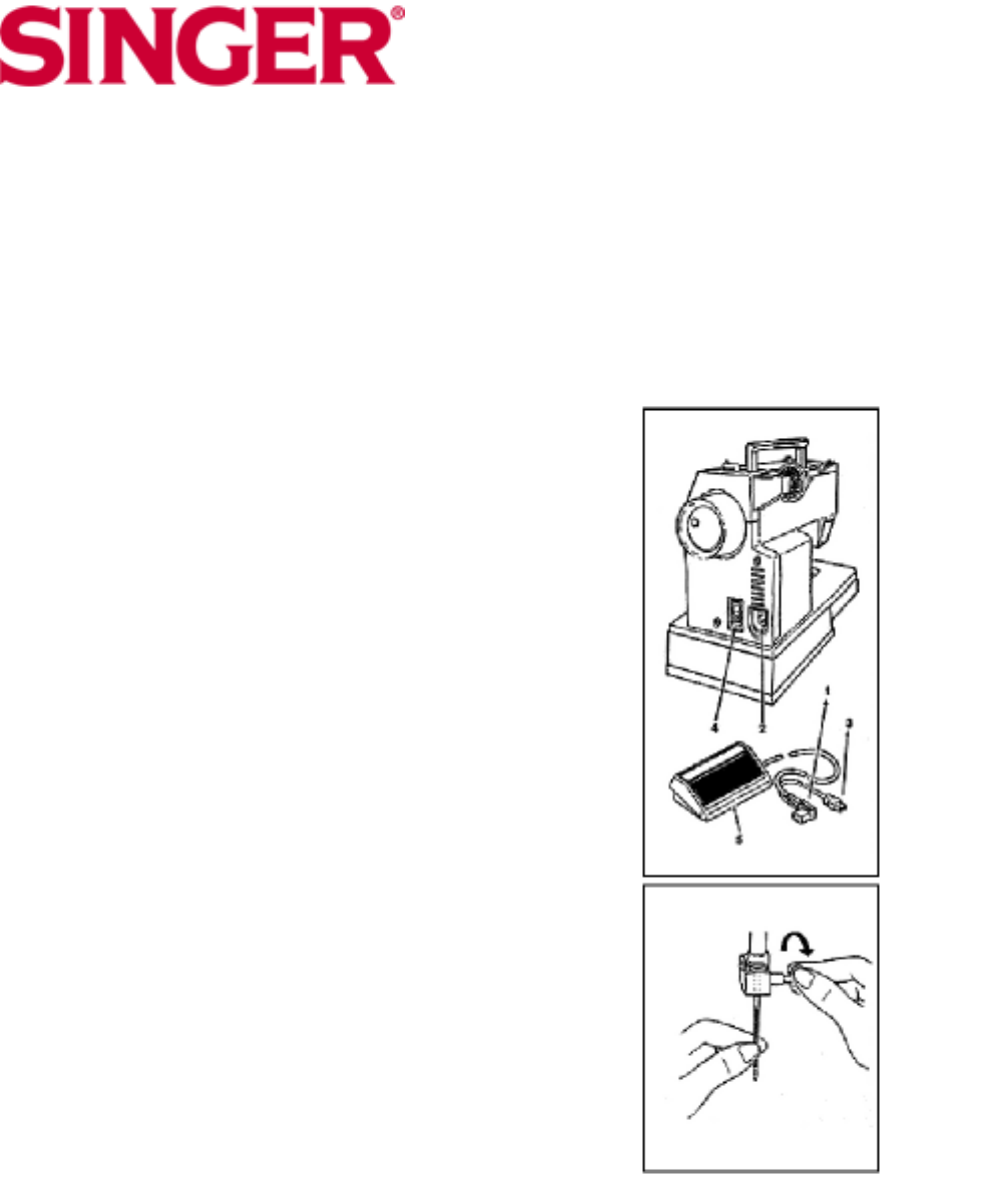
Connecting the machine
Push plug (1) into the receptacle (2) at the right end of
the machine. Then connect plug (3) to your socket
outlet.
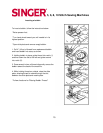
For North America
This appliance has a polarized (one blade wider than
the other). To reduce the risk of electric shock, this
plug is intended to m in a polarized outlet only one
way.
If the plug does not fit fully in the outlet, reverse the
plug. If it still does not fit, contact a qualified electrician
to install the proper outlet. Do not modify the plug in
any way.
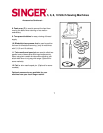
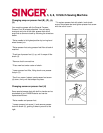
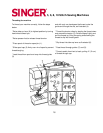
Running the machine
To turn on machine and sewing light, press upper
portion "I" of power switch (4). To turn off machine and
light, press lower portion "0" of power switch.
To run the machine and control speed press the foot
control (5) with your foot. The harder you press, the
faster the machine will sew. To stop machine, remove
foot from control.
Note: Do not operate machine without fabric under the
presser foot as this may damage the feed and the
presser foot.
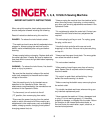
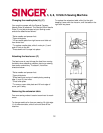
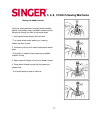
Choosing and changing needles
Important: For best results from your sewing machine,
use only SINGER * needles. Check the needle
package, and the Fabric, Thread and Needle Table on
page 16 for the correct needle and fabric combination.
* Raise needle to its highest position.
* Loosen needle clamp screw and remove needle.
* With flat side of needle to the back, insert new
needle up into clamp as far as it will go.
* Tighten needle clamp screw securely.
10