


12 13
Fig. 21
Fig. 19
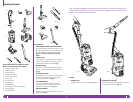
Quick
Cord Release
Lower Cord
Storage Clip
StorageDust-Away
™
Hard Floor Attachment - Use and Care
Fig. 18
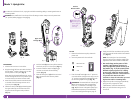
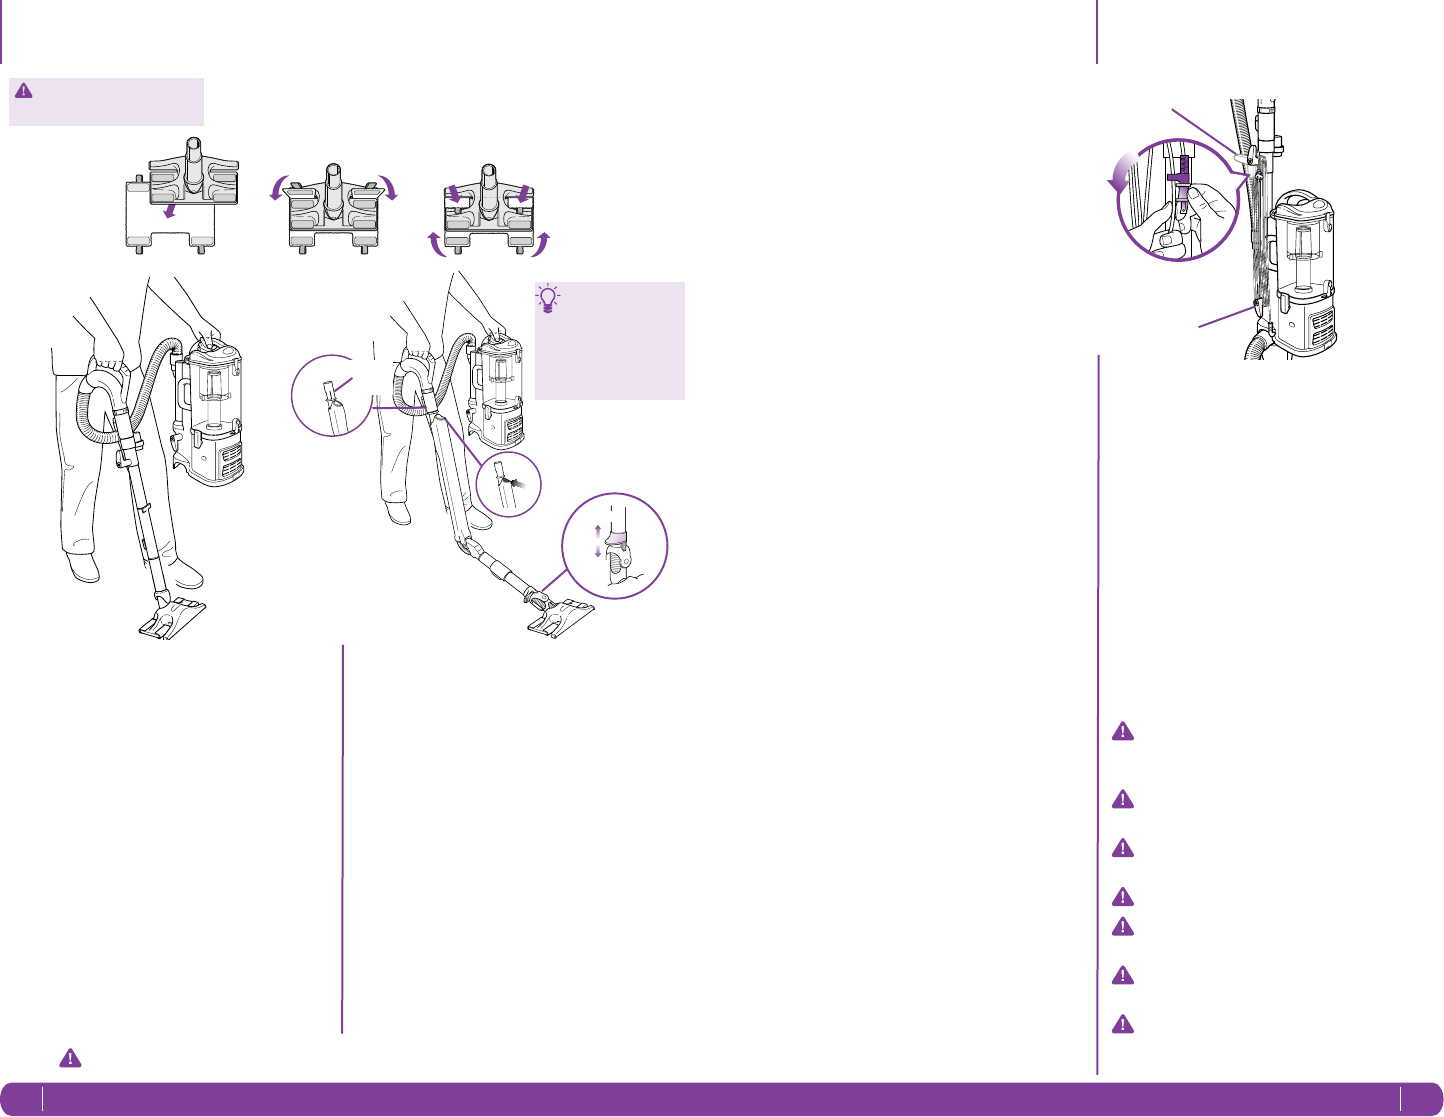
STORE YOUR VACUUM SAFELY
1 Convert your vacuum back to upright vac mode.
2 Rotate the upper quick cord release to its upright
position and coil the power cord loosely around
the two clips. Clip the plug onto the cord to
secure. (Fig. 21)
3 Store the dusting brush and the crevice tool on the
mounts on the accessory holder.
4 Store your vacuum cleaner safely in a cool dry
area where it will not be a hazard, will not get
damaged and
will not cause damage to anyone or anything.
NOTE: Empty dust cup after cleaning and prior
to storing. (See “Maintenance” section for
instructions.)
To reduce the risk of electric shock, unplug the
unit before performing any cleaning, maintenance,
or troubleshooting checks.
Reassemble all parts securely before operating
vacuum.
DO NOT operate the vacuum without the pre-
motor filters and dust cup in place.
DO NOT operate the vacuum with WET filters.
IMPORTANT: Make sure all filters are completely
dry before inserting back into vacuum.
WARNING: Never insert sharp objects into any
opening to clear an obstruction.
IMPORTANT: Damages caused while clearing
or attempting to clear blockages are not covered
under your product’s limited warranty.
IMPORTANT: Use only in
Portable Lift-Away
®
mode.
Aligning
Rib
a
b
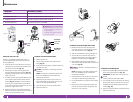
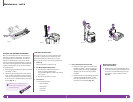
ATTACH PAD
Slip two of the tabs between the suction nozzle
and the Dust-Away
™
base and attach them to
the front fasteners on the base. Then pull the
other two tabs tightly around to the back fasteners
on the base. For best results, ensure that the pad
is flat against the bottom surface and secured
tightly. (Fig. 18)
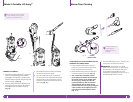
USING THE DUST-AWAY™ WITH THE
EXTENSION WAND
1 Press the extension wand release button and pull
the extension wand up. (Refer to page 10,
Fig. 15-b)
2 Attach Dust-Away™ hard floor attachment onto
the end of the extension wand. (Fig. 19)
3 Press the On/Off switch to the “I” position to
turn the suction motor on and begin cleaning
all hard surfaces.
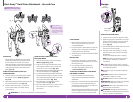
USING THE DUST-AWAY™ WITH THE
BACKSAVER WAND
1 Press the release button and pull the handle up.
(Refer to page 10,Fig. 15-a)
2 Align the rib at the top of the Backsaver wand
with the groove inside the vacuum handle and
attach it until it clicks in place. (Fig. 20 a)
3 Attach Dust-Away™ hard floor attachment onto
the end of the Backsaver wand. (Fig. 20)
4 To use the Dust-Away™ hard floor attachment
with the backsaver wand, you should first lock the
swivel mechanism by pressing down on the collar
near the base of the wand. (Fig. 20 b)
5
Press the Button on the Backsaver wand to
activate the Backsaver. (Fig. 20 c)
6 Press the On/Off switch to the “I” position to turn
the suction motor on and begin cleaning all
hard surfaces.
CARE FOR PADS
1 Wash the pads separately with warm water
either in the washing machine or by hand
using liquid detergent.
2 Do not use bleach or fabric softeners as they may
damage or leave a coating that will reduce the
cleaning performance of the pads.
3 Tumble dry low or line dry to extend the life of the
micro-fiber fabric.
REPLACE PADS
1 For best floor cleaning results, we recommend
replacing your micro-fiber pads every 3-4 months
following normal use.
2 You can find and purchase replacement
micro-fiber dusting pads and accessories
at www.sharkclean.com
TO REPLACE THE MOTORIZED FLOOR BRUSH
FOR UPRIGHT CLEANING
1 Press the red release at the bottom of the
extension wand
and remove the hard floor
attachment.
2 Replace the canister back onto the motorized floor
brush and re-insert the handle with extension
wand back into the top of the vacuum body until
you hear these click into place.
When attaching the motorized floor brush, ensure
that the locking mechanism is fully locked in place
to ensure electrical connection has been made.
Fig. 20
c
The DustAway™
nozzle has a locking
feature which allows
you to lock the nozzle
when you do not want
it to swivel.
Lock
Unlock
IMPORTANT: Do not use to clean damp floors or wet/sticky messes.