


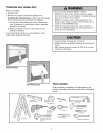

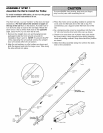
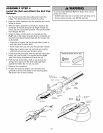
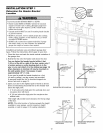
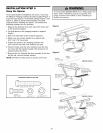

ASSEMBLY STEP 5
Set the Tension
• Insert a screwdriver tip into one of the nut ring slots and
brace it firmly against the trolley.
• Place a 7/16" open end wrench on the square end.
Rotate the nut about 1/4 turn until the spring releases
and snaps the nut ring against the trolley.
This sets the spring to optimum belt tension.
You have now finished assembling your garage door
opener. Please read the following warnings before
proceeding to the installation section.
Square
End
Trolley
Slot
uare End
Nut Rin(
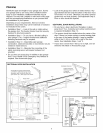
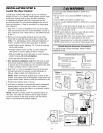
INSTALLATION
IMPORTANT INSTALLATION INSTRUCTIONS
To reduce the risk of SEVERE INJURY or DEATH:
1.READAND FOLLOWALL INSTALLATIONWARNINGSAND
INSTRUCTIONS.
2. Install garagedoor opener ONLYon properly balancedand
lubricated garagedoor. An improperly balanceddoor may not
reversewhen required and could result in SEVEREINJURYor
DEATH.
3. ALL repairsto cables,spring assembliesand other hardware
MUSTbe madeby a trained door systemstechnician BEFORE
installing opener.
4. DisableALL locks and removeALL ropes connectedto
garagedoor BEFOREinstalling openerto avoid entanglement.
5. Install garagedoor opener 7 feet (2.13 m) or more above
floor.
6. Mount emergency releasehandle6 feet (1.83 m) abovefloor.
7. NEVERconnect garage door openerto powersource until
instructed to do so.
8. NEVERwear watches, rings or looseclothing while
installing or servicing opener.Theycould be caught in
garage door or openermechanisms.
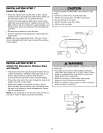
9. Install wall-mounted garage door control:
• within sight of the garage door.
• out of reach of children at minimum height of 5 feet
(1.5 m).
• away from ALL moving parts of the door.
10. Placeentrapment warning label on wall next to garage door
control.
11. Placemanual release/safetyreversetest label in plain view
on inside of garage door.
12. Uponcompletion of installation, test safety reversalsystem.
Door MUSTreverseon contact with a 1-1/2" (3.8 cm) high
object (or a 2x4 laid flat) on the floor.
11