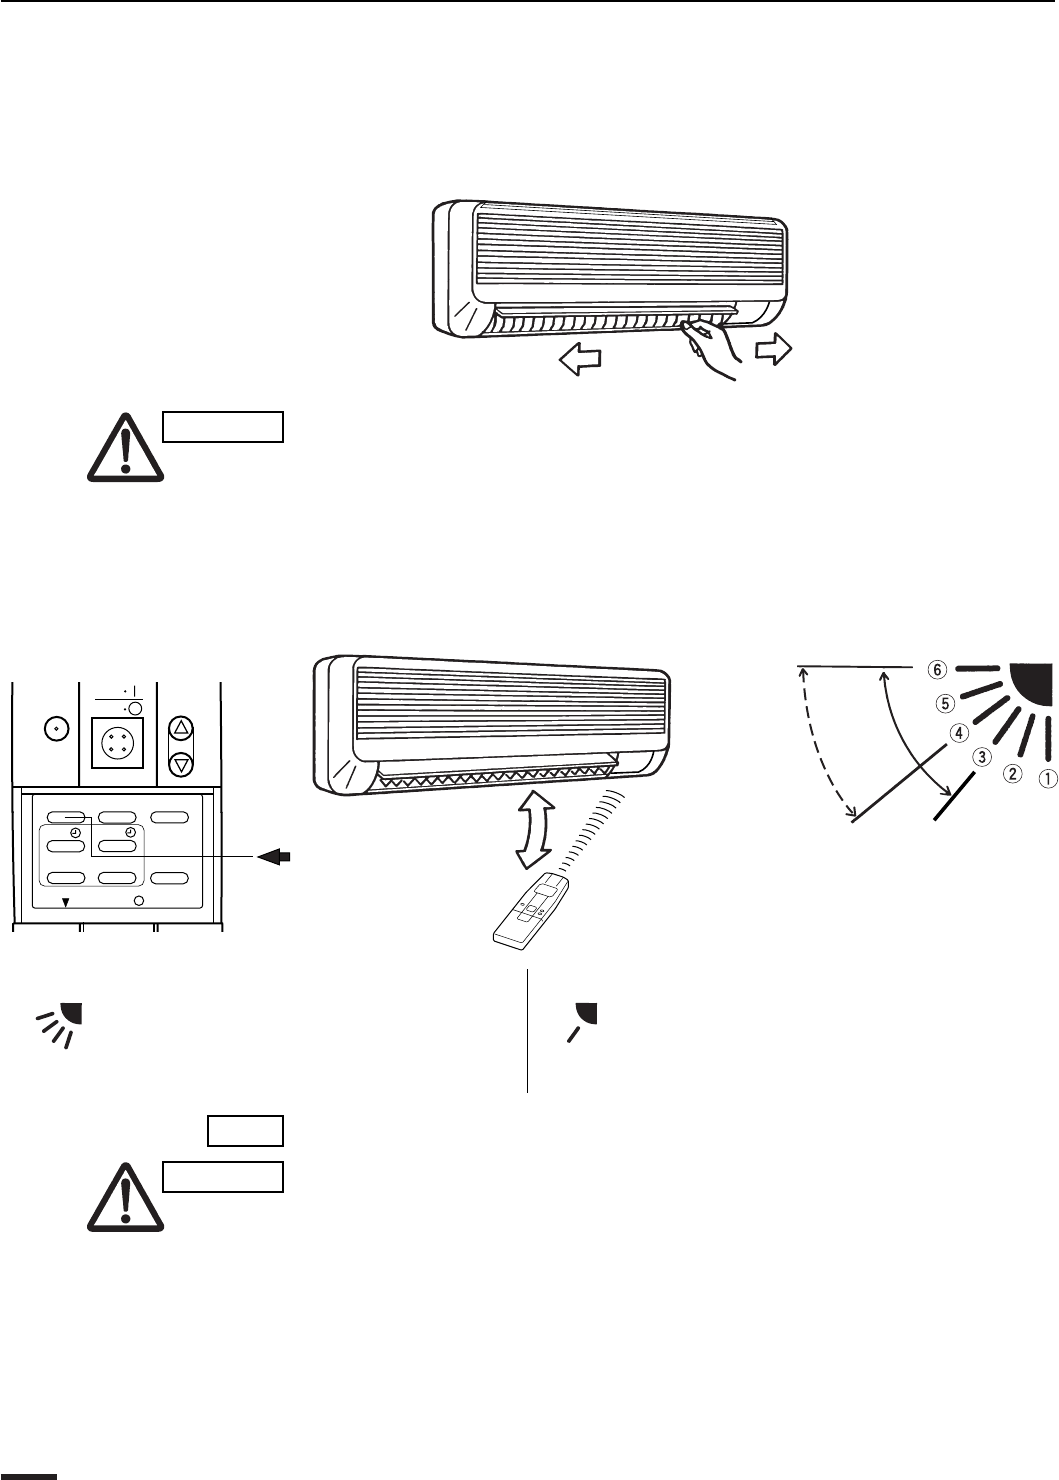
Adjusting the Airflow Direction
1. Horizontal The horizontal airflow can be adjusted by moving the vertical vanes with
your hands to the left or right.
CAUTION
When the humidity is high, the vertical vanes should be in the front
position during the cooling or drying operation. If the vertical vanes are
positioned all of the way to the right or left, condensation may begin to
form around the air vent and drip down.
2. Vertical The vertical airflow can be adjusted by moving the flap with the remote
control unit. Do not move the flap with your hands. Confirm that the remote
control unit has been turned on. Use the FLAP button to set either the
sweep function or one of the six airflow direction settings.
(The maximum capacity is obtained at the position at 4.)
A. Sweep function B. Setting the airflow manually
The flap starts moving up and down to
deliver air over the sweep range.
Referring to the above illustration, use
the FLAP button to set the airflow
direction within the range used during
the cooling, or drying operation.
NOTE
•
The flap automatically closes when the unit is off.
CAUTION
•
Use the FLAP button on the remote control to adjust the position of the
flap. If you move the flap by hand, the flap position according to the
remote control and the actual flap position may no longer match. If this
should happen, shut off the unit, wait for the flap to close, and then turn
on the unit again; the flap position will now be normal again.
•
Do not have the flap pointed down during cooling operation.
Condensation may begin to form around the air vent and drip down.
COOL
and
DRY
(Recommended
operating
range)
SWEEP
1HR.
TIMER
ON
OFF
TEMP.
FAN SPEED
MODEFLAP
ON OFF
SET
CANCEL
NIGHT
SETBACK
ACL
BATTERIES
18 OI-330-18EG
oi330000


