


GROUNDED
OUTLET BOX
FIGURE B
METAL
SCREW
ADAPTER
GROUNDING
TAB
GROUNDED
OUTLET BOX
FIGURE A
GROUNDING BLADE
IS LONGEST OF THE
THREE BLADES
Grounding Instructions
This appliance must be grounded. If it should malfunction or breakdown, grounding provides a path of least resistance for
electric current to reduce the risk of electric shock. This appliance is equipped with a cord having an equipment-grounding
conductor and grounding plug. The plug must be plugged into an appropriate outlet that is properly installed and grounded
in accordance with all local codes and ordinances.
DANGER
Improper connection of an equipment-grounding conductor can result in risk of electric shock. Check with a qualified electrician
or service person if you are in doubt as to whether the outlet is properly grounded. Do not modify the plug provided with the
appliance. If it will not fit the outlet, have proper outlet installed by a qualified technician.
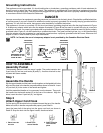
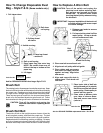
This appliance is for use on a nominal 120 volt circuit and has a grounding plug that looks like the plug illustrated in Figure
A. A temporary adapter which looks like the adapter illustrated in Figure B may be used to connect this plug to a two-pole
receptacle, as shown, if a properly grounded outlet is not available. The temporary adapter should be used only until a properly
grounded outlet, Figure A, can be installed by a qualified electrician. The green colored rigid ear, lug, or the like extending
from the adapter must be connected to a permanent ground such as a properly grounded outlet box cover. Whenever the
adapter is used, it must be held in place by a metal screw.
NOTE: In Canada, the use of a temporary adapter is not permitted by the Canadian Electrical Code.
HOW TO ASSEMBLE
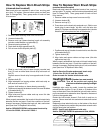
Assembly Packet
The assembly packet is with the ownerʼs guide. The packet contains two
2-part bolts (A) and two cord hooks (B) and (C). An extra drive belt is also
included with some models.
Step 1
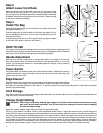
Assemble the Handle
Slip the upper handle and the lower handle together so the handle bolt holes
align and the slots in the handle are positioned as shown in Detail A. Insert
a 2-part bolt (A) in the center of the handle and tighten.
Hold the assembled handle so it curves away from the cleaner. Then push
the handle into the handle socket (D) at the rear of the cleaner. Align the
holes, insert the other 2-part bolt (A), and tighten.
Step 2
Attach Upper Cord Hook
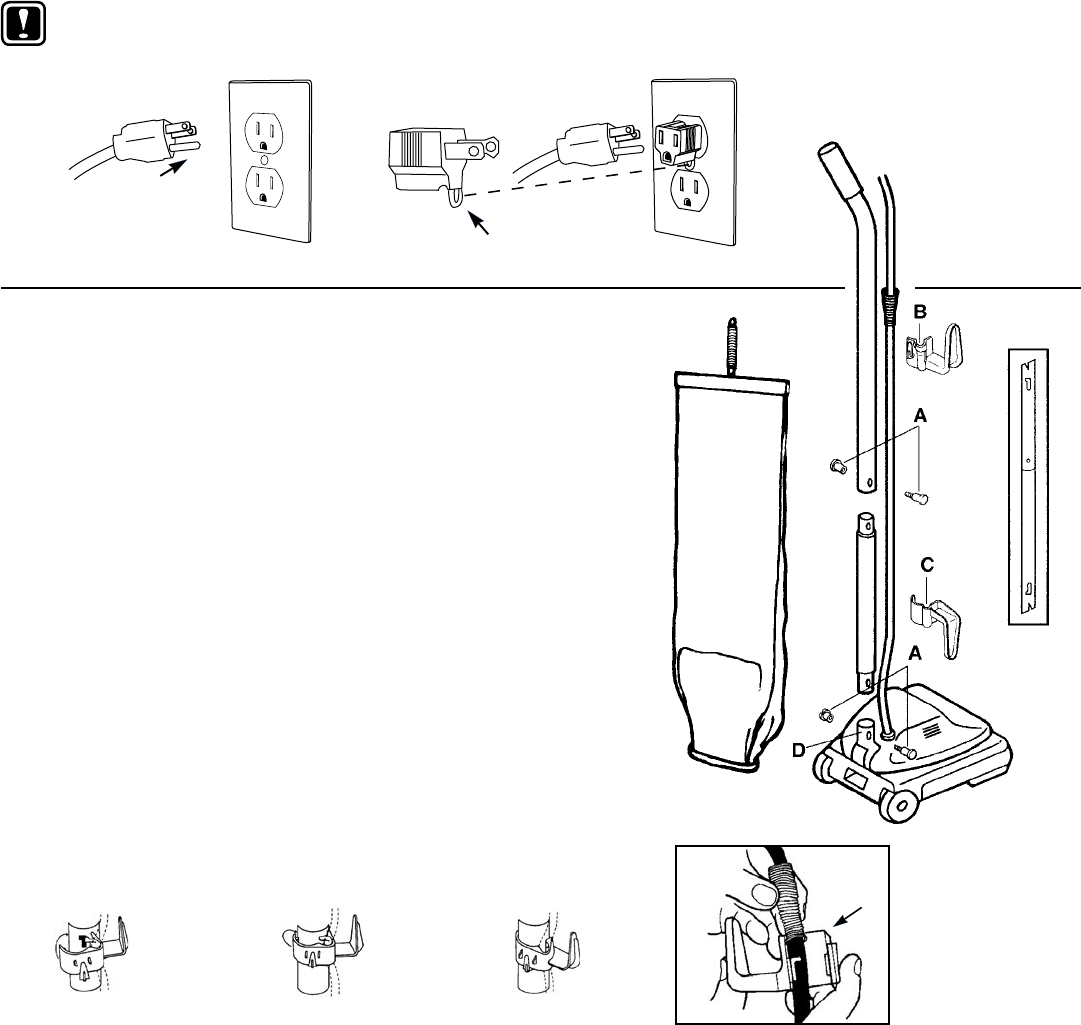
Pull the spring on the electrical cord upward toward the top of the handle.
Make sure slots in handle are positioned properly, see Detail A.
Insert the lower half of the spring into the upper cord hook, as shown in
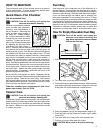
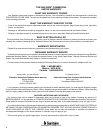
Detail B. Snap the hook into the upper handle, directions below.
3
3. SNAP opposite
inner tab into
place
1. Place inner tab
into slot
2. Press hook
around handle
B
Detail B
Detail A