


2
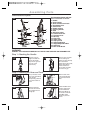
Assembling Parts
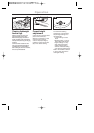
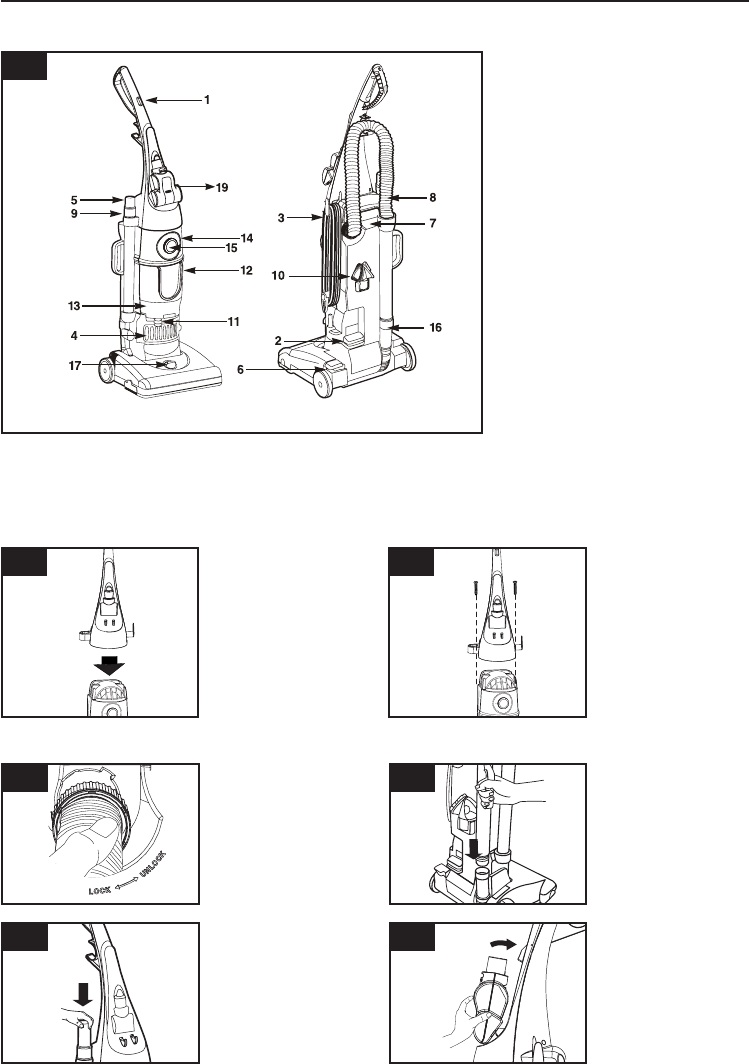
Identifications of parts
The assembled cleaner will look
like the illustration to the left.
1. Handle
2. Power switch
3. Quick release cord hook
4. Post-Motor Filter
5. Crevice tool
6. Handle release
7. Carrying handle
8. Hose
9. Extension wand
10. Combination tool
11. Cyclone-Lever
12. Dirt Cup
13. Filter Cup
14. Upper Tank
15. Cap Cyclone
16. Hose Wand Base
17. Height Adjustment Dial
18. Hose Clip
19. Mini Turbo Brush
WARNING!
OPERATE THE VACUUM CLEANER ONLY AT THE VOLTAGE SPECIFIED ON THE NAMEPLATE.
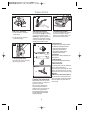
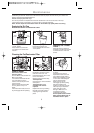
Step 1. Attaching the Handle
Stand the vacuum
upright and slide the
base of the handle
firmly into the grooves
at the top of the
vacuum body.
Insert the screw provided
into the existing hole.
Tighten the screw securely
with a screwdriver.
Before securing the handle,
please check that the
handle is fitted to the
vacuum body and make
sure there’s no gap.
1-1
1-2 1-3
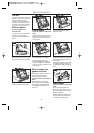
Step 2. Attaching the Hose and Tools
Slide the extension
wand and the crevice
tool together into the
storage clip.
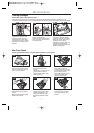
Attach the Mini Turbo
Brush by putting the
rib at the bottom of
Mini Turbo Brush on
two hooks of Handle.
Snap Mini Turbo
Brush into place as
shown.
1-6 1-7
Line up the tabs on the
base of the Twist Snap
Hose with the
corresponding notches
on the hose collar as
shown.
Slide the end of the
hose wand with tabs
into the Hose Wand
Base.
1-4 1-5
Front
Back