


16
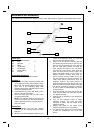
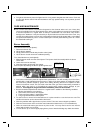
Rotisserie Kit Assembly
The rotisserie kit is packed in the barbecue trolley carton. Specifications subject to change without prior notice.
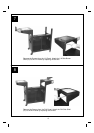
PARTS LIST:
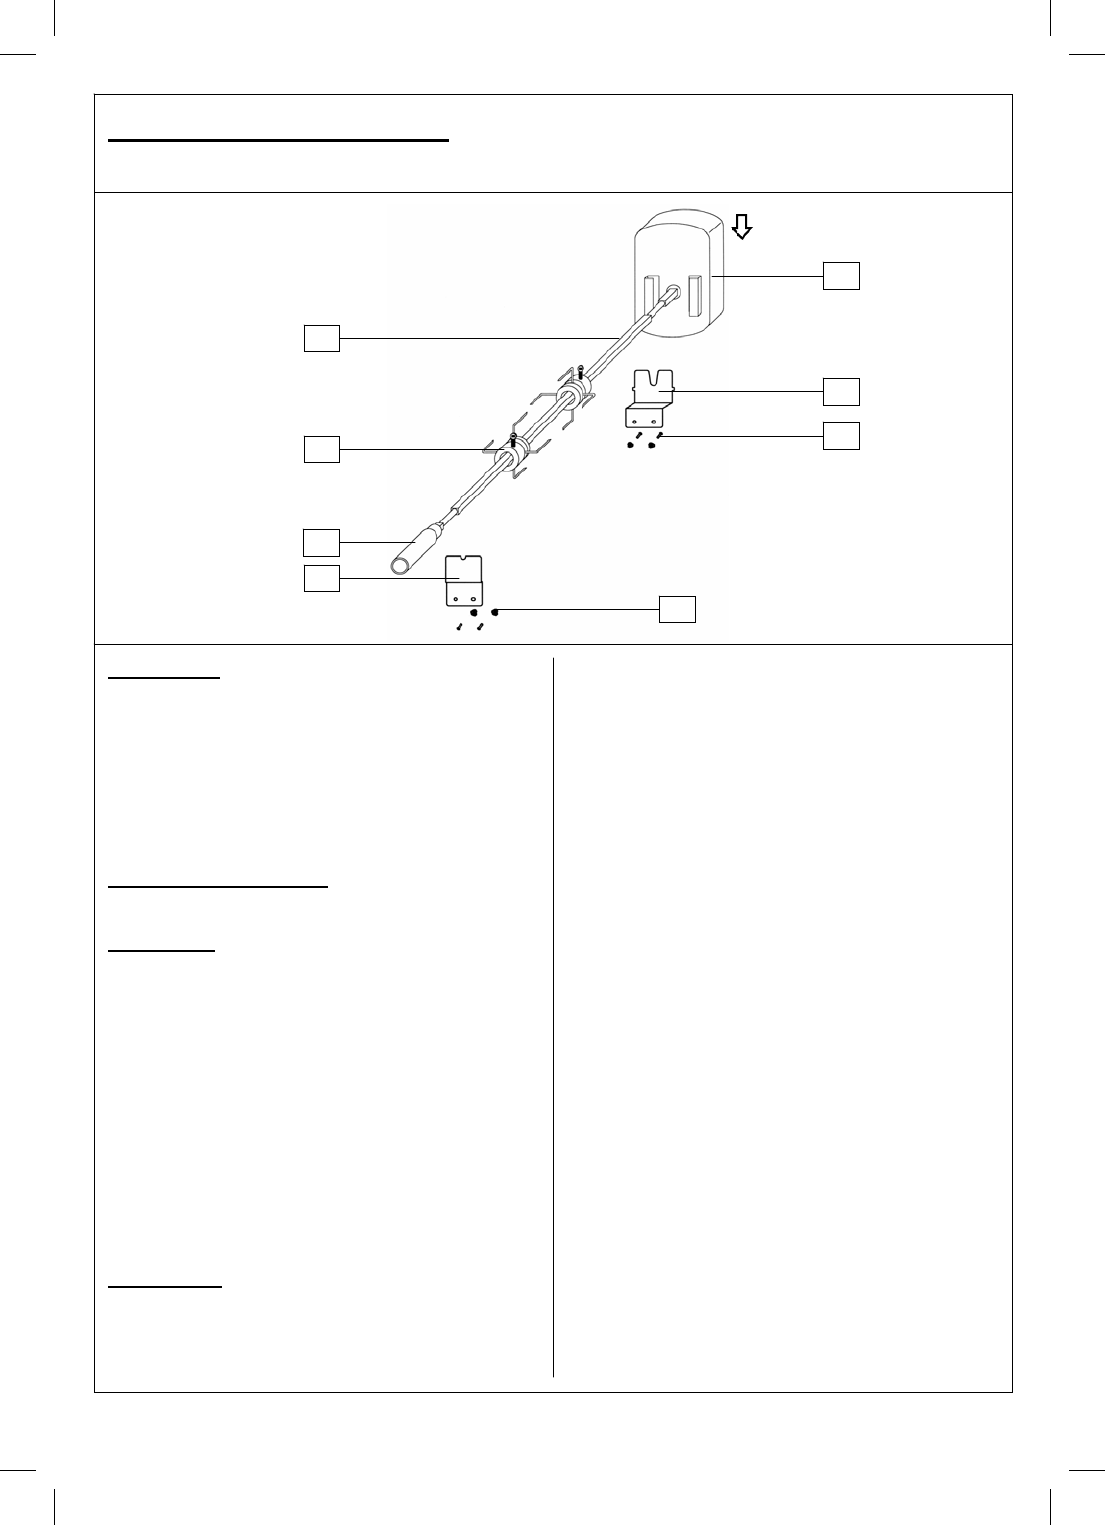
D1 Rotisserie Handle 1
D2 Fork 2
D3 Spit Rod 1
D4 Motor 1
D5 L/H Bracket 1
D6 R/H Bracket 1
E7 Screw, M5x10 4
E8 Nut, M5 4
OTHER REQUIREMENTS:
2 D-Size Batteries (1.5V) (Not Included)
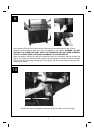
ASSEMBLY:
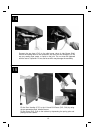
1. Mount the R/H motor mounting bracket (D6)
on the right hand side of the barbecue body.
Mount the L/H mounting bracket (D5) on the
other side of the barbeque body. Both
brackets should point outwards from the outer
sides of the barbecue body.
2. Insert batteries into motor. N.B. Motor can be
also run using 3V DC adaptor.
3. Slide the motor (D4) onto the R/H motor
mounting bracket (D6).
NOTE: The rotisserie motor should never be
used in the event of rain. We recommend the
motor is detached from the mounting bracket
when not
in use.
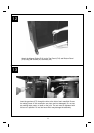
OPERATION:
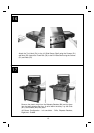
1. Carefully remove the cast iron cooking
surfaces and the warming basket from the
barbecue.
2. Slide the ceramic briquettes baskets to the
centre of the barbecue body. It is over this
area that the meat will be cooked.
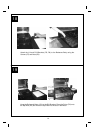
3. Slide one of the spit forks onto the spit rod
and tighten its thumb screw to secure it into
place. Insert the pointed end of the spit rod
into the meat being cooked and slide the
meat towards the centre of the rod. Make
sure the fork is fully into the meat. Slide the
other fork onto the rod, into the meat, and
tighten the thumb screw once in place. For
optimal rotisserie cooking, food must be
placed securely onto the middle of the spit
rod and balanced so that the rotisserie can
rotate freely without interference from any
barbecue surfaces. Any loose sections of
meat should be secured so they do not hang
down and interfere with the rotation of the spit
rod. Do not overload the rotisserie. A chicken
or joint of meat of approximately 2kg should
be the maximum.
4. Insert the pointed end of the spit rod into the
motor. Lay the other end of the spit rod onto
the opposite bracket.
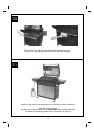
5. Light the grill as specified in your barbecue’s
instructions.
6. Turn on the rotisserie motor to begin
rotisserie cooking. The hood has been
designed so that it may be closed during
rotisserie cooking.
7. Always cook foods on the lowest flame
setting to avoid burning or overcooking.
8. The handle of the spit rod can be unscrewed
to allow for simultaneous use of the side
burner.
D3
D2
D5
D4
D6
D1
E7
E8