


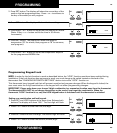
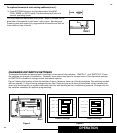


To replace thermostat onto wiring subbase (cont.):
3. Press SYSTEM button to put the thermostat into HEAT,
COOL, EMER, or AUTO mode. The thermostat will return to
normal operating mode.
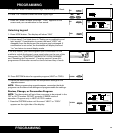
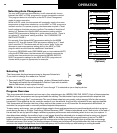
You may reset the thermostat at any time. Reset is located on the
back side of thermostat in the lower, right corner. See diagram.
Pressing reset will erase ALL programmed information as well as
time clock and day of week.
10
RESET
SYSTEM
31
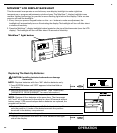
CHANGING DIP SWITCH SETTINGS
Thermostat functions are determined by settings on two sets of dip switches: "SWITCH 1" and "SWITCH 2". These
dip switches are pre-set at installation. However, some users may want to change some of the dip switch settings
on SWITCH 2 to enable or change certain thermostat options.
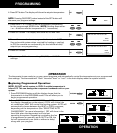
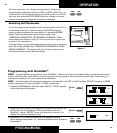
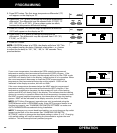
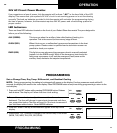
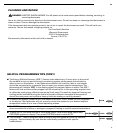
Figure 3 shows the location of the dip switches. Figure 4 shows a close-up of the dip switches. Dip switches marked
with an asterisk (*) should not be changed by the user. These are pre-set at time of installation by the installer and
must only be changed by a certified contractor familiar with heating and air conditioning systems. Change only the
dip switches necessary for options programming.
OFFLOCK ON
AUTO CHG OFF ON
DEAD BAND 5˚
3˚
NOT USED
SWITCH 2
Figure 4
RESET
- + - +
- + - +
SWITCH 1
SWITCH 2
DIP SWITCHES
OFF
OFF
OFF
OFF
ON
ON
ON
ON
MAIN
REM 1
REM 2
REM 3
SWITCH 1
Figure 3
*
*
*
*
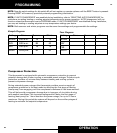
Default Settings Default Settings
OPERATION