6
7
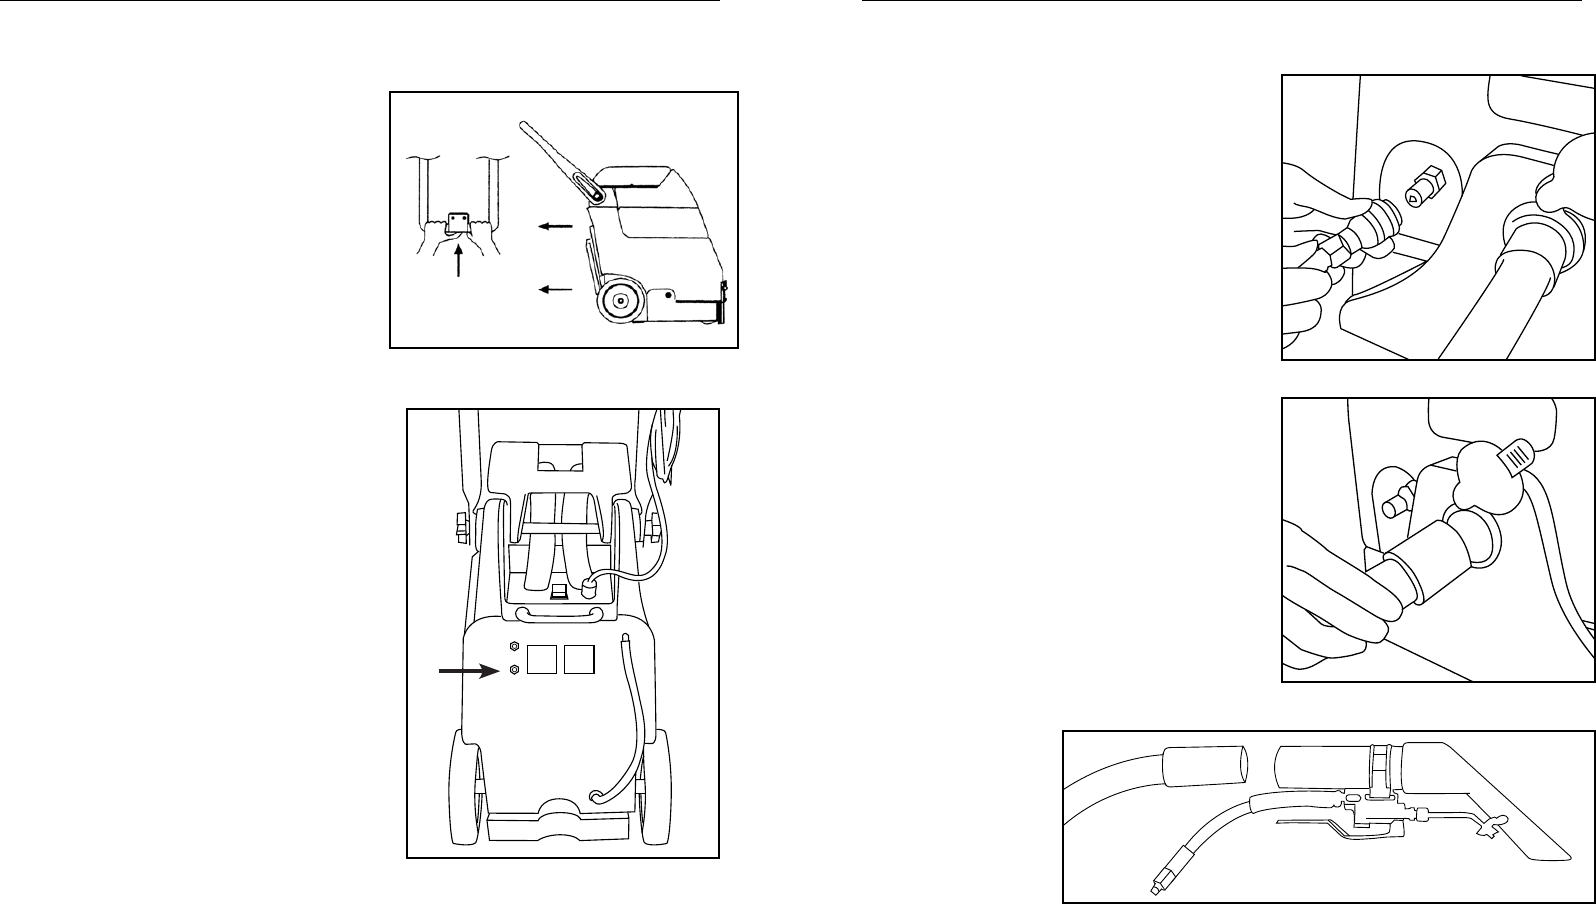
• Connect accessory hose to hose coupler
(fig 1) and hose port (fig 2) located at front of
machine.
• Connect accessory tool to coupler and hose
cuff on the other end of the hose (fig 3).
• Turn main power switch on.
• To clean stairs or upholstery, squeeze trigger
on accessory tool to release solution.
Release trigger and continue to pull tool
over surface to pick up excess solution.
Note: When cleaning upholstery, always
check cleaning instructions sewn in
furniture by the manufacturer.
• After cleaning, squeeze trigger for ve
seconds after turning main power switch off
to relieve water pressure from tool before
disconnecting hose.
Operation Attachment Cleaning
For Safety: Do not operate machine unless
operator manual is read and understood.
• Vacuum carpet thoroughly and remove
other debris.
• Turn main power switch on.
• To begin cleaning carpets, push button on
handle with thumbs and slowly pull machine
backward (fig 1).
• Release handle button at end of path and
continue to pull machine backward to pick
up excess solution.
• Tip machine back on wheels and push
machine forward to begin next path.
While operating the machine
• Overlap each path by 2 inches.
• Work away from outlet and power cord to
prevent cord damage.
• Periodically check for excessive foam
buildup in recovery tank.
Attention: Excessive foam buildup will not
activate the float shut-off screen.
• If brush stops, the circuit breaker may have
been tripped. Unplug power cord and
check brush for obstruction. Push brush
reset button to resume (fig 2).
• To clean heavily soiled areas, repeat cleaning
path from a different direction.
• When the unit is no longer dispensing
cleaning solution or the recovery tank is
full, empty the recovery tank and fill
solution tank (see “Draining Tanks”).
Figure 1
Figure 1
Figure 2
Figure 2
Figure 3


