


Regency
®
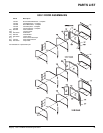
U38-1 ULTIMATE Freestanding Gas Stove
21
NORMAL OPERATING
SOUNDS OF
GAS APPLIANCES
It is possible that you will hear some sounds
from your gas appliance. This is perfectly normal
due to the fact that there are various gauges
and types of steel used within your appliance.
Listed below are some examples. All are normal
operating sounds and should not be considered
as defects in your appliance.
Blower:
Regency
®
gas appliances use high tech blowers
to push heated air farther into the room. It is not
unusual for the fan to make a "whirring" sound
when ON. This sound will increase or decrease
in volume depending on the speed setting of
your fan speed control.
Burner Tray:
The burner tray is positioned directly under the
burner tube(s) and logs and is made of a differ-
ent gauge material from the rest of the fi rebox
and body. Therefore, the varying thicknesses of
steel will expand and contract at slightly different
rates which can cause "ticking" and "cracking"
sounds. You should also be aware that as there
are temperature changes within the unit these
sounds will likely re-occur. Again, this is normal
for steel fi reboxes.
Blower Thermodisc:
When this thermally activated switch turns ON
it will create a small "clicking" sound. This is the
switch contacts closing and is normal.
Pilot Flame:
While the pilot fl ame is on it can make a very
slight "whisper" sound.
Gas Control Valve:
As the gas control valve turns ON and OFF, a
dull clicking sound may be audible, this is normal
operation of a gas regulator or valve.
Unit Body/Firebox:
Different types and thicknesses of steel will
expand and contract at different rates resulting
in some "cracking" and "ticking" sounds will be
heard throughout the cycling process.
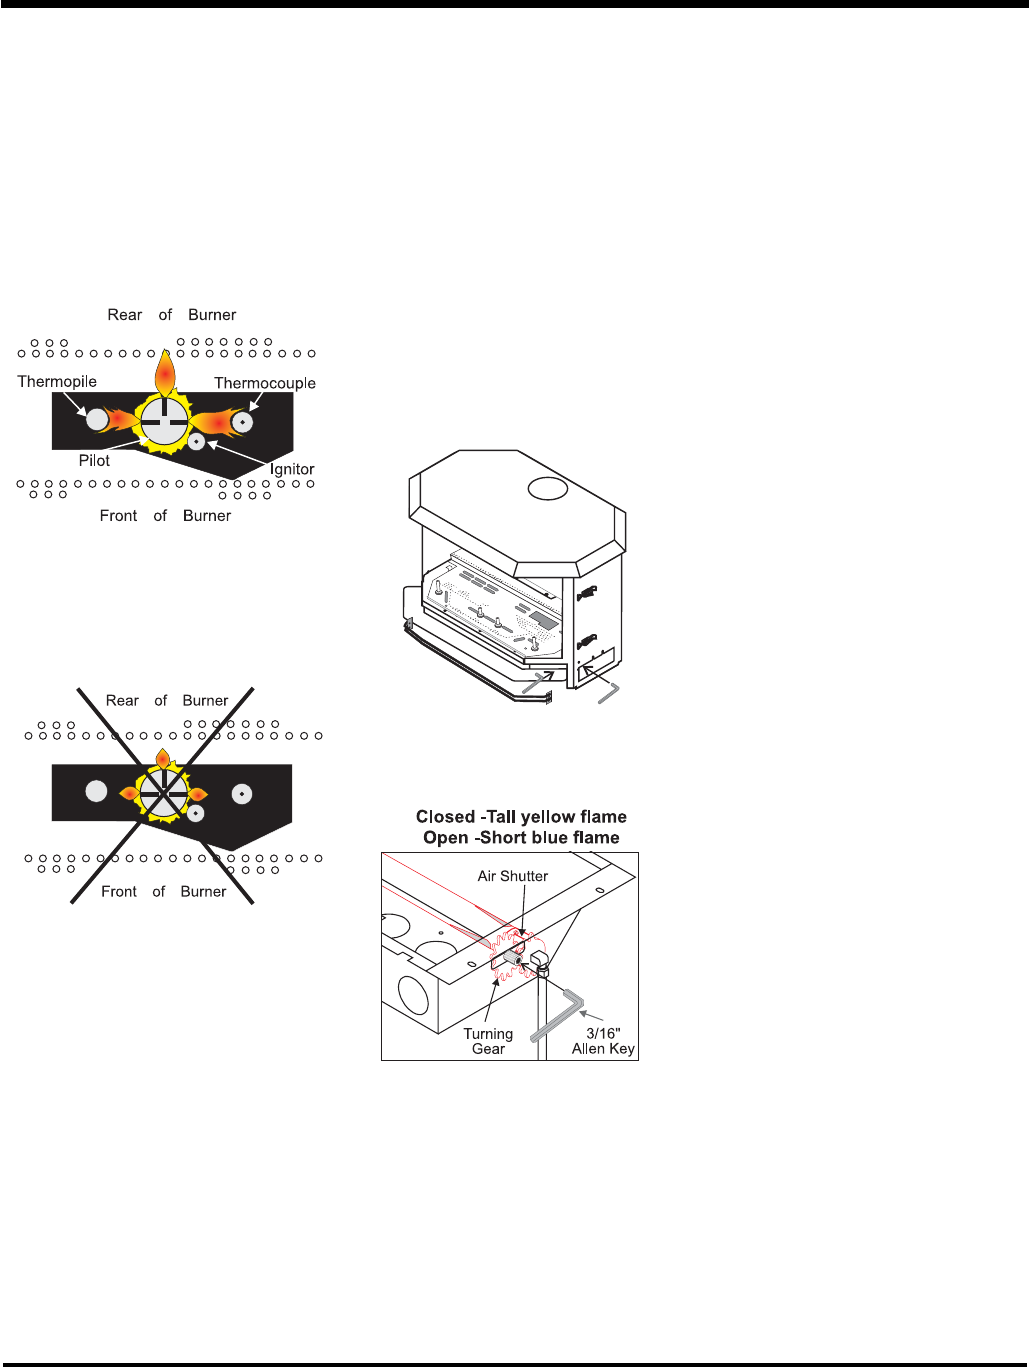
AERATION
ADJUSTMENT
The burner aeration is factory set but may need
adjusting due to either the local gas supply or
altitude.
U38-1 with 40,000 Btu/h
U38-NG1 Natural Gas: 1/4" open
U38-LP1 Propane: 1/2" open
U38-1 with 30,000 Btu/h
U38-NG1 Natural Gas 3/16" open
U38-LP1 Propane 3/8" open
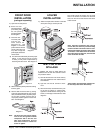
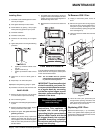
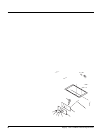
The aeration adjustment gears are located on
the right side of the burner box and can be ac-
cessed from the side or from the front when the
louvers are removed.
To adjust the aeration: use the allen key to turn
the turning gear which will adjust the air shutter.
Open the air shutter for a blue fl ame or close it
for a yellower fl ame.
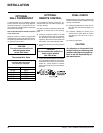
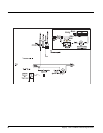
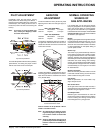
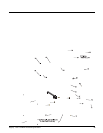
Top View of pilot fl ame
Top View of pilot fl ame
OPERATING INSTRUCTIONS
PILOT ADJUSTMENT
Periodically check the pilot fl ames. Correct
fl ame pattern has three strong blue fl ames: 1
fl owing around the thermopile and 1 around the
thermocouple, and 1 fl owing across the rear of
the burner (it does not have to be touching the
burner).
Note: If you have an incorrect fl ame pat-
tern, contact your Regency
®
dealer
for further instructions.
Incorrect fl ame pattern will have small, probably
yellow fl ames, not coming into proper contact
with the rear of the burner or thermopile.
Clockwise to open,
counter-clockwise to close.
Caution: Carbon will be produced if the air
shutter is closed too much.
Note: Any damage due to carboning result-
ing from improperly setting the aera-
tion controls is NOT covered under
warranty.
Note: Aeration Adjustment should only be
performed by an authorized Regency
®
Installer at the time of installation or
service.