


14 Regency
®
U38-1 ULTIMATE Freestanding Gas Stove
INSTALLATION
C)02-44
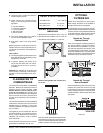
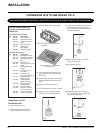
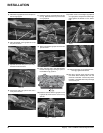
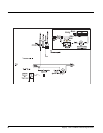
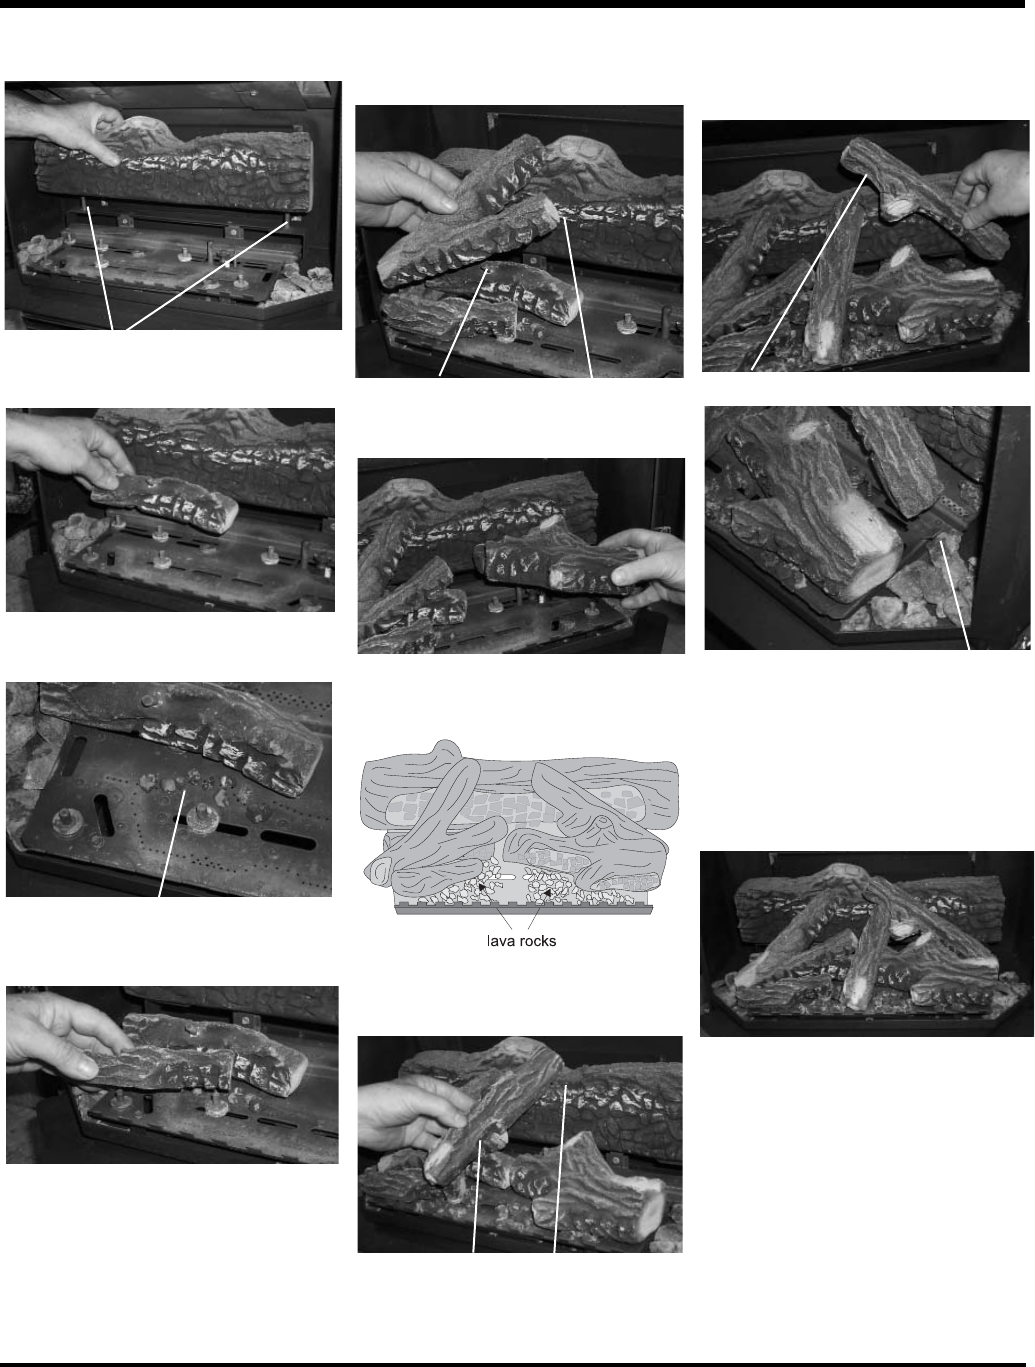
Pins on Rear Log Support
A)02-65
B)02-56
3) Place Rear Log A)02-65 on the two pins on
the rear log support.
4) Place the Middle Left Log B)02-56 on the
two pins as shown.
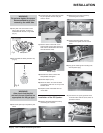
5) Sprinkle some lava rock just in front of B)
02-56 on the burner holes.
lava rock
B)02-56
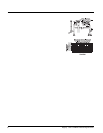
6) Place Front Left Log C)02-44 onto the 2
front pins as shown.
Cutout
Pin
D)02-46
B)02-56
A)02-65
7) Place the Left Top Log D)02-46 on the pin
on Log B)02-56 and on top of the cutout
on Log A)02-65.
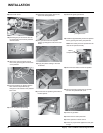
E)02-45
C)02-44
8) Place Front Right Log E)02-45 on the two
pins as shown.
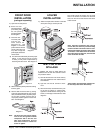
9) Place the lava rock in the area between
the left and right logs, leaving a space in
the middle for log (F) 02-47.
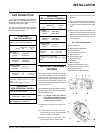
CutoutNotch
F)02-47
E)02-45
A)02-65
10) Place the notch in Center Log F)02-47 over
Log E)02-45 and across the cutout on Log
A)02-65.
Notch
E)02-45
Bracket
A)02-65
The bottom right edge of Log G)02-48 must
sit snugly against the bracket
Side View
G)02-48
E)02-45
F)02-47
11) Position notch in Front Right Log G)02-48
on Log F)02-47 and push the bottom right
edge against the bracket on the burner
tray.
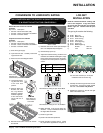
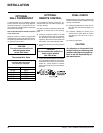
G)02-48
12) Test fi re to ensure proper light off (make
sure fl ame fl ows smoothly from one end
of burner to the other. If there is any fl ame
hesitation, check that area for any blockage
of the burner port.
F)02-47
E)02-45
A)02-65
G)02-48
D)02-46
B)02-56
C)02-44