


Regency
®
U39 ULTIMATE Direct Vent Freestanding Gas Stove
21
INSTALLATION
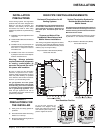
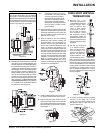
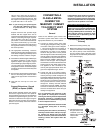
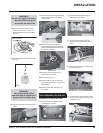
Using a level, make sure the support is
vertical. If the support extends above the
roof, cut it fl ush with the top of the roof. Nail
the support to the frame opening using (8)
3" spiral nails or #8 x 1-1/2" screws.
Note: If you are using a 6" square support
you may fi nd it diffi cult to screw it
in place because it is fairly small
inside.
Simpson Dura-Vent has provided angle
brackets with this support which can be
screwed to the outside of the support box and
nailed to surrounding framing as required.
Use a minimum of four #8 x 1/2" screws
per bracket. In some cases these brackets
may need to be trimmed (e.g.: to fi t under
a fl ashing). Place the Finish Collar around
the support and fasten it to the ceiling using
the screws provided.
3) Use appropriate roof fl ashing. Place the
fl ashing under the upper shingles and on top
of the lower shingles approximately half of
the fl ashing should be under the shingles.
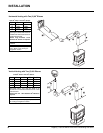
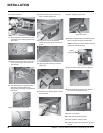
4) Assemble the desired lengths of Black Pipe
and Elbows necessary to reach from the
appliance adaptor up through the support
box and fl ashing to proper height as per Dia.
12, local codes or the "Rigid Pipe Venting
Arrangements" section. Ensure that all pipe
and elbow connections are in their fully twist
lock position.
5) Ensure vent is vertical and secure fl ashing to
the roof with roofi ng nails. Slide the storm
collar over the pipe section and seal with a
mastic.
6) Twist lock the vent cap on to the last
section.
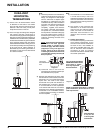
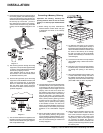
Support Extensions - Round
(RDSE) or Square (SQSE)
Steep pitched cathedral ceilings may require
the use of a support extension. This piece fi ts
down inside the support and can be adjusted to
increase the support's length by up to 22". The
extension is attached to the support using the
eight metal screws provided. Be sure there is
at least a 2 inch overlap where the extension
joins the support.
CONVERTING A
CLASS-A METAL
CHIMNEY OR
MASONRY CHIMNEY
TO A DIRECT VENT
SYSTEM
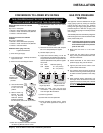
General
There are two different types of direct vent
conversion systems listed below. Follow the
appropriate directions for your installation.
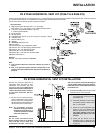
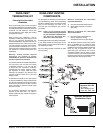
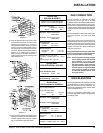
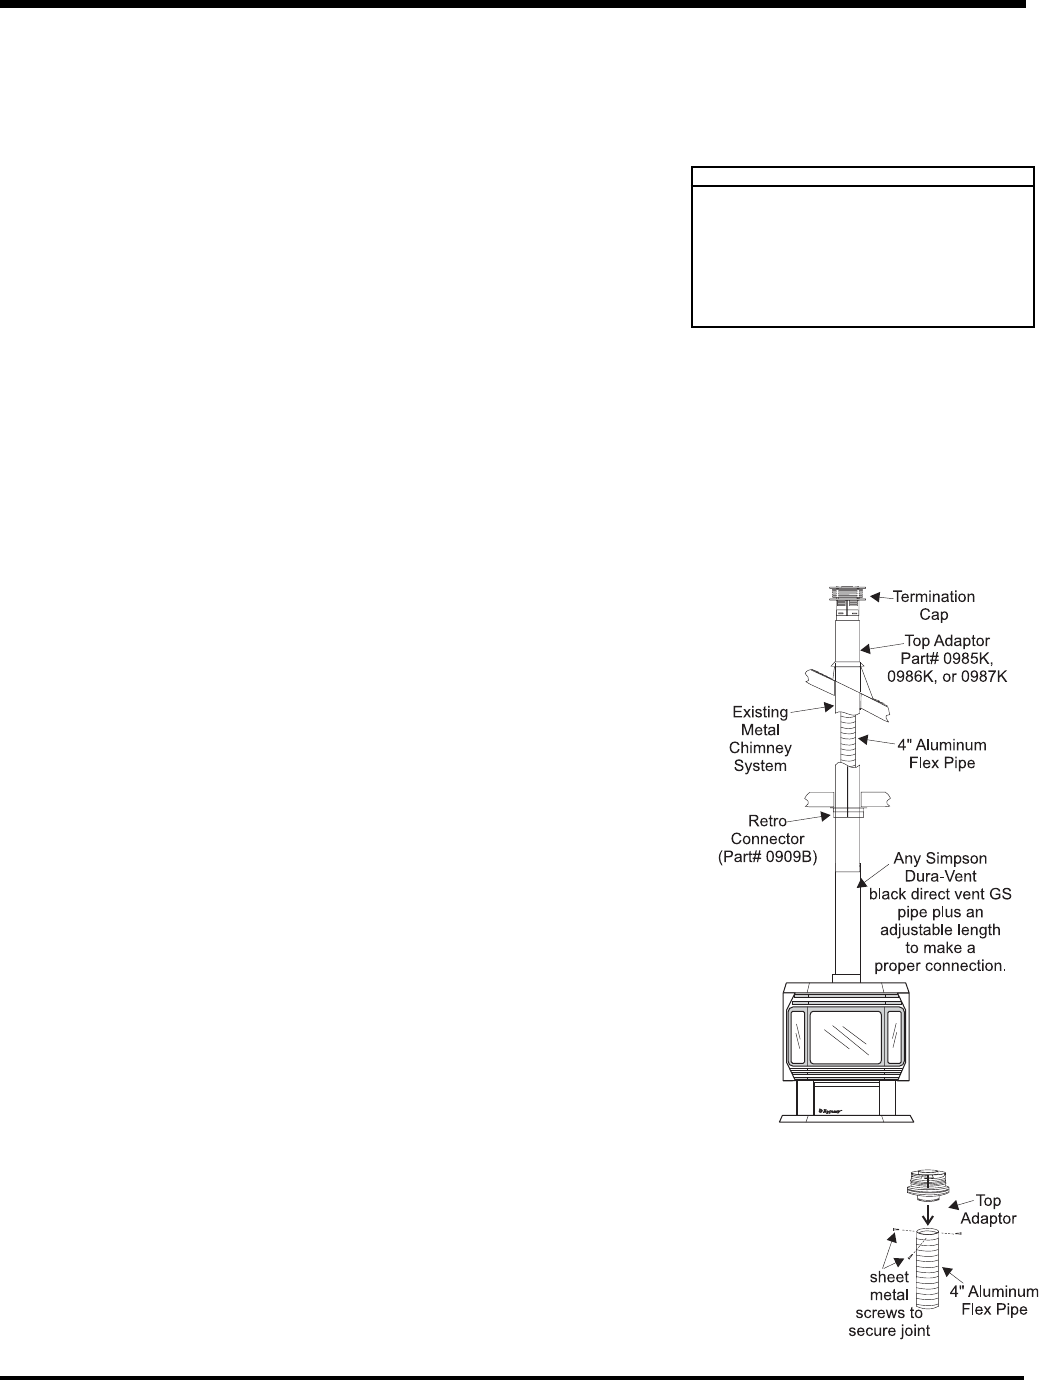
A) Through an existing factory built metal
chimney going through the ceiling: A typical
conversion of this type is shown in diagram
1. The concept of direct vent conversion is
to connect an adaptor to an Underwriters
Laboratories (UL) listed 4 inch diameter
aluminum fl ex pipe which is then passed
down through the center of the existing metal
chimney system. Three sizes of Top Adaptors
are available from Simpson Dura-Vent. The
Retro Connector (909B) is attached to the
bottom of the fl ex pipe. The Top Adaptor
and the Retro Connector are attached to the
existing chimney with sheet metal screws.
The appliance is then connected to the
chimney with appropriate black direct vent
pipe and an adjustable length section.
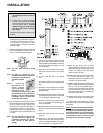
B) Through the wall of an existing masonry
chimney: A typical conversion of an existing
masonry chimney is shown in Diagram 6. A
Top Adaptor (985K) and Flashing are used at
the top of the masonry chimney. The 4 inch
aluminum liner is connected to the adaptor
and is passed down the chimney and out
through the masonry wall and attached
to the Retro Connector (909B). The Retro
Connector is attached to the masonry wall
and then connected to the direct vent pipe
leading to the appliance.
Prior to installation and connection of the
vent system to a factory-built or masonry
chimney, the chimney must be inspected and
thoroughly cleaned by a qualifi ed service
person, such as a certifi ed chimney sweep
or home inspection service.
The direct vent system must not be connected
to a damaged factory-built or masonry
chimney.
For factory built, zero clearance, and masonry
chimneys cleanout doors and caps or plugs
for cleanout tee fi ttings and ash dumps
shall be secured in place and sealed before
installing a Direct Vent system within the
chimney.
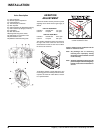
3) Connect the end of the
fl ex pipe section to the
underside of the Top
Adaptor using 3 sheet
metal screws.
Diagram 2.
Diagram 1
Diagram 2
If the appliance shuts off during operation,
contact a qualified service person to
determine if a negative pressure and/or leaky
chimney condition exists. Do not operate the
appliance until the problem is corrected.
Approved for US Installations Only
The use of an existing chimney as an air
intake is not covered under the ANSI Z21.88b-
1999, CSA 2.33b-M99 test methods and the
resulting ITS/WHI product certifi cation. The
code Authority Having Jurisdiction must
be consulted prior to proceeding with this
installation method.
Converting a Factory Built Metal
Chimney
1) Remove the existing chimney cap.
2) Measure the distance from the top end of the
chimney to the bottom of the ceiling support
box, add 3" (76mm) to this measurement,
and cut a section of the 4" fl ex pipe to that
length (the fl ex should already be extended
to its nominal length).