


Regency P33-3 Zero Clearance Direct Vent Gas Fireplace
INSTALLATION
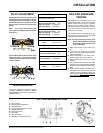
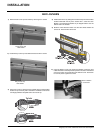
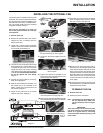
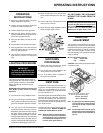
6) Place the Bottom Frame near the hinges, and fl ip down the hinges
from the Bottom Face Plate. Secure the hinges in place to the Bottom
Frame, using 2x #8 Self Tapping Phillips screws per hinge.
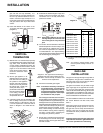
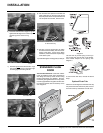
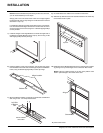
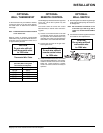
NOTE: Should the fi nished wall protrude beyond the face of the unit,
you can accommodate up to 1/2" depth.
Simply push in the Full Screen Door Frame until it aligns against
the fi nished wall. Secure Top Flange of Full Screen Door Frame as
described in step 4 b).
For the Bottom Flange of the Full Screen Door Frame, push the bot-
tom of the Frame until it aligns with the wall. Use the inner cut-outs to
secure the base of the Frame using the 2 x #8 Self Tapping Phillips
screws provided.
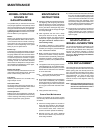
Bottom Grill
Hinge Location
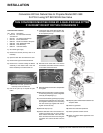
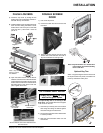
7) Mount the Burner ON/OFF Control Box to the left side of the Bottom
Grill using 2 x #8 - 1/4" Philips Head Screws.
Burner ON/OFF
Control Box
Left Side
of Bottom
Grill
5) Install the Hinges to the Hinge Brackets on the left and right side of
the Bottom Faceplate Bracket (seen in step 2), secure using 2 x #8
Self Tapping Philips screws per hinge.
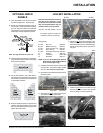
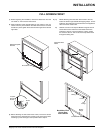
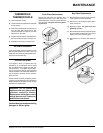
9) Slide the Top Grill into the louver brackets located on the inside top
of the fi rebox. Push in place.
10) Install the Left and Right Side Screen Doors in the fully open position
by placing over top of the hinges on the Full Screen Door Frame.
NOTE: Failure to install the doors in the fully open position could
result in paint damage to the surface of the door.
Top Grill
Hinge
Screen Door
11) Close screen doors.
8) Re-install Glass Door. Refer to the manual for instructions.