


12
Regency E21 Gas Fireplace Insert
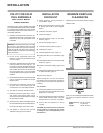
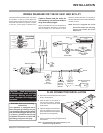
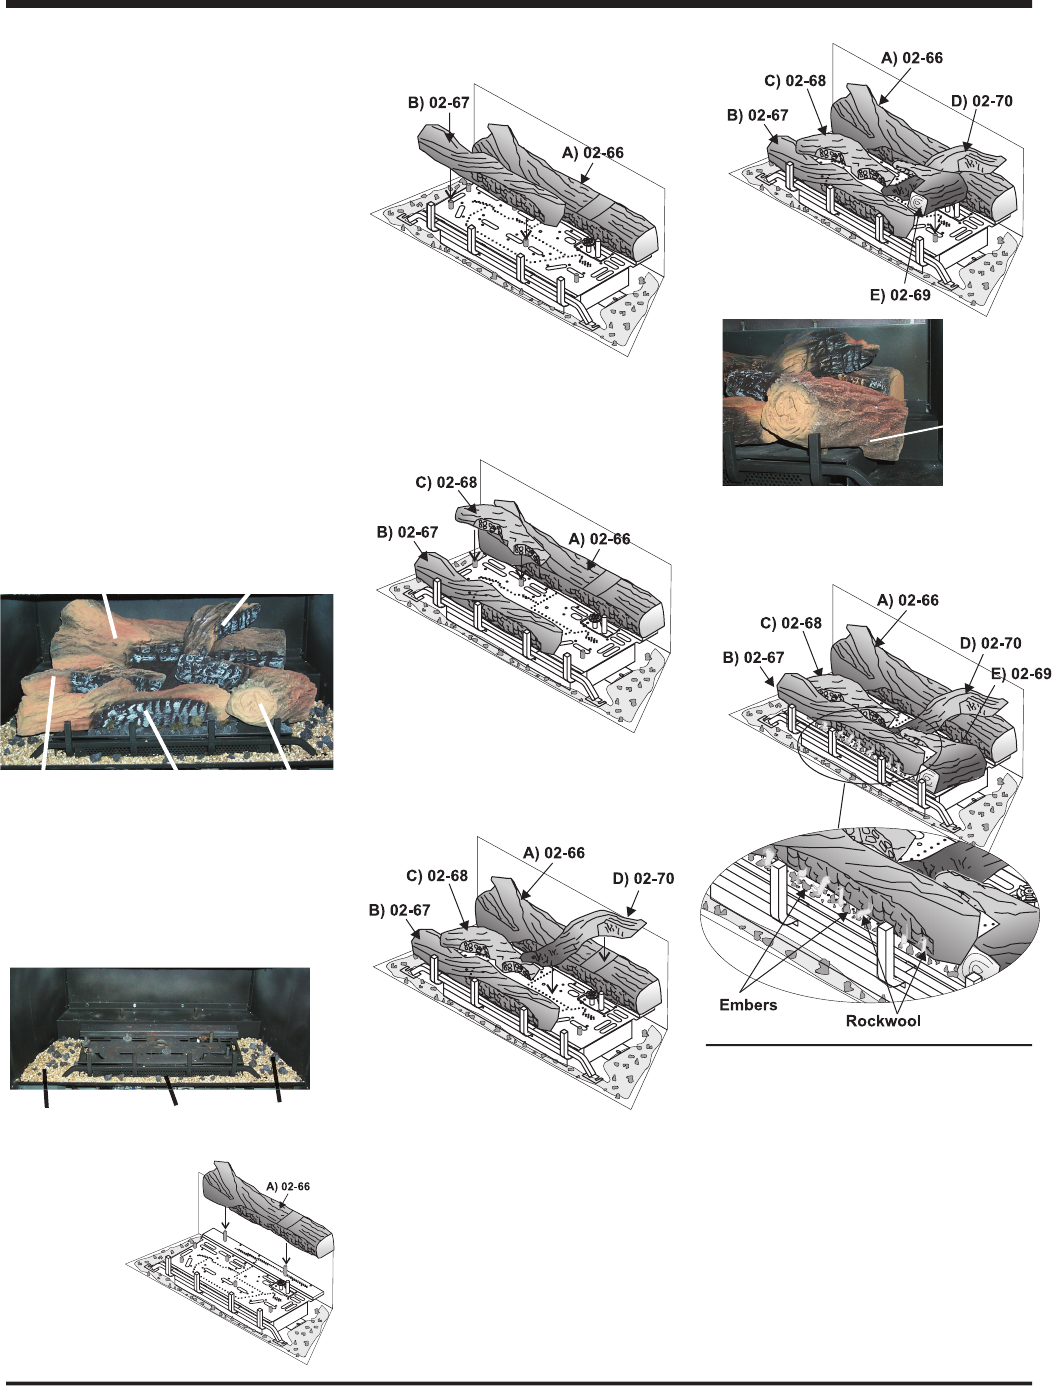
The front bottom of Log D)02-70 sits snugly
between Logs C) 02-68 and Log B)02-67.
INSTALLATION
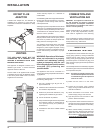
7)
Place the embers on the front lip of the
burner as shown below.
8)
Place pieces of rockwool on the front lip of
the burner as shown below.
4)
Place the Front Left Log B) 02-67 on the 2
front pins.
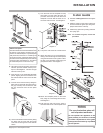
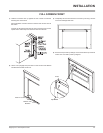
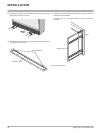
FACEPLATE & TRIM
INSTALLATION
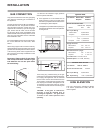
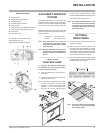
1)
Lay the faceplate panels fl at, face down on
something soft so they don't scratch.
2)
Take the top faceplate and align the holes
in it with the holes in the side panels. Using
the screws provided, attach from the top of
the panel (the holes in the top panel are
slightly larger than the holes in the side
panel to facilitate easier installation). See
diagram 1.
Hint:
Don't tighten the trim to
the bottom of the faceplate side panels with
the screws provided. See diagram 1.
E)02-69
Cutout
fi ts over
the right
edge of
the burner
tray.
6)
Position the Middle Left Log C) 02-68 onto
the 2 pins as shown below. The left edge
of the log fi ts into a notch on the Front Left
Log B) 02-67
9)
Place the Front Right Log E) 02-69 onto the
front right pin and the cutout on the bottom
right side of the log snugly against the right
edge of the burner tray.
Vermiculite
& Embers
Vermiculite &
Embers
Vermiculite
& Embers
Vermiculite &
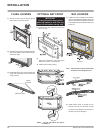
LOG SET
INSTALLATION
Read the instructions below carefully and
refer to the diagrams. If logs are broken
do not use the unit until they are replaced.
Broken logs can interfere with the pilot
operation.
The gas log kit (set# 532-930) contains
the following:
a)
02-66 Rear Log
b)
02-67 Front Left Log
c)
02-68 Middle Left Log
d)
02-70 Middle Right Log
e)
02-69 Front Right Log
f)
Embers
g)
Vermiculite
h)
Rockwool
Note: Install Optional Brick Panels prior to
installing logs.
1)
Carefully remove the logs from the box and
unwrap them. The logs are fragile, handle
with care -
do not force into position.
The "02" refer numbers (i.e. 02-66) are
molded into the rear of each log.
2)
Sprinkle the vermiculite around the fi rebox
base. Take some of the embers (approx. 1/3
of the bag) and sprinkle over the vermiculite.
3)
Place the
Rear Log
A) 02-66
on the 2
pins on the
rear log
support and
carefully
p u s h
down.
A)02-66
A)02-66
B)02-67
B)02-67
C)02-68
D)02-70
D)02-70
E)02-69
E)02-69
5)
Place the Middle Right Log D) 02-70 into the
cutout on Rear Log A) 02-66 and the bottom
front of Log D)02-70 snugly between Logs
C) 02-68 and Log B)02-67.
NOTE: Keep the gasket on the front edge
of the fi rebox clear of vermiculite.