


6
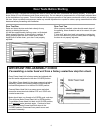
Step 1: Attaching Motor Power Head Unit to Rail
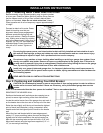
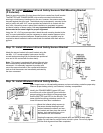
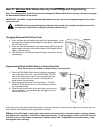
Before assembly, align sprocket/coupling cogs to match notches
of driver gear. Rotate the Motor Spline to position Driver Gear so
that the nearest notch in Driver Gear is directly behind Motor
Spline, as illustrated. Note: Do not rotate more than ½ turn.
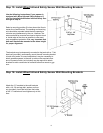
Place opposite end of rail on temporary support approximately 6”
in height.
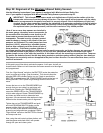
Proceed to attach rail to motor Power
Head Unit making sure that pre-
alignment allows proper engagement
between sprocket/coupling cog and
driver gear notches. Realign as neces-
sary, making sure to keep any rotation
only to the nearest notch. Using four (4)
supplied 1/4”-20 x 5/8” hex head bolts,
assemble Motor Power Head Unit to
rails with a 3/8” socket. Tighten se-
curely.
Do not plug the opener power cord into electrical outlet until fully installed and instructed to do so in
this manual. Door springs, pulleys and cables are under extreme tension and can cause severe injury.
Do not attempt to adjust or repair. Call a professional door service company.
Do not wear rings, watches or loose clothing when installing or servicing a garage door system. Use a
sturdy, non-metallic step ladder. Remove all ropes or cords attached to the garage door. Failure to do
so may result in personal injury due to entanglement. Disable all existing locking devices on the garage
door, by securing lock/latch to inside face of door with suitable screw.
Install only on a properly balanced garage door. An improperly balanced door could cause severe in-
jury. Have a qualified service person make repairs to cables, spring assemblies and other hardware be-
fore installing opener.
READ AND FOLLOW ALL INSTALLATION INSTRUCTIONS
Step 2: Positioning and Installing Front Wall Bracket
CAUTION: Do not attempt to loosen or remove any portion of door spring system in order to reinforce
header wall or to mount wall bracket. If these are necessary, call a professional garage door service
person.
Note: it is recommended that the door opener be installed 7 feet or more above the door.
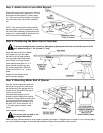
REINFORCE THE HEADER WALL
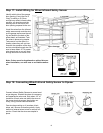
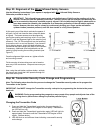
Reinforce the header wall (wall above door opening) as re-
quired, to ensure rigid mounting of the front wall bracket.
Locate the vertical center line of the garage door and mark it
on the header above the door and on the top rail of the door.
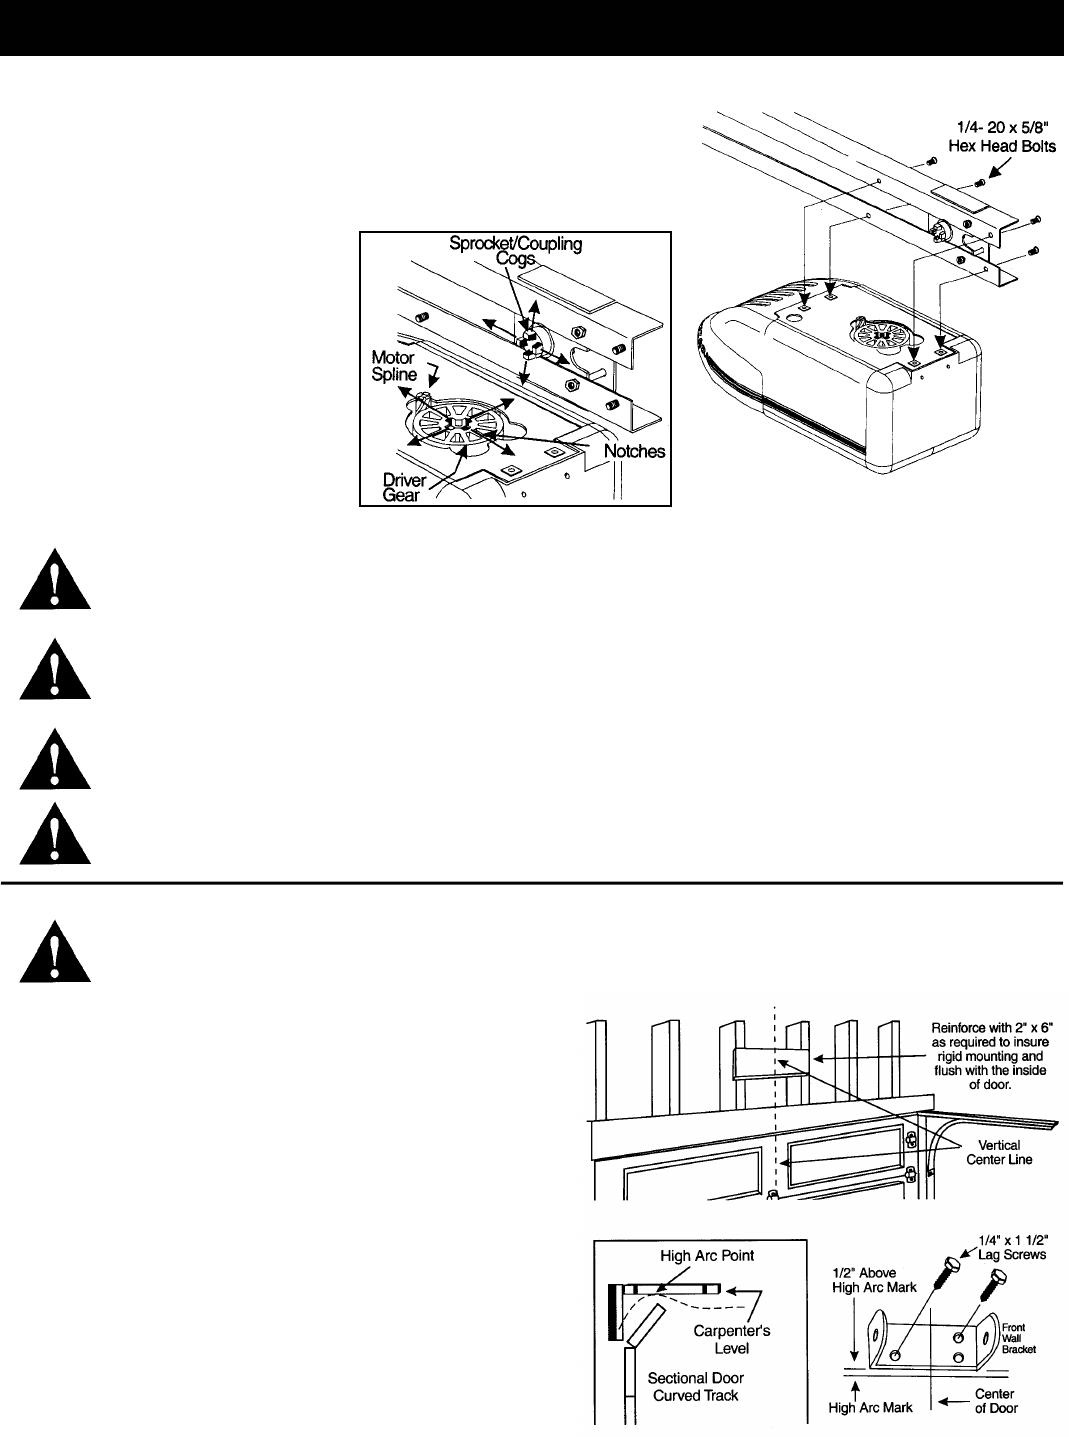
Raise the door slightly until the top rail reaches the highest
point of travel (see illustration); using a carpenter’s level,
transfer and mark the highest point of travel on the header
wall.
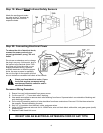
Mount the front wall bracket with its lower edge approxi-
mately 1/2” (room permitting) above the mark showing the
highest point of travel centered on the vertical center line.
Mark the two mounting holes and pre-drill with a 3/16” drill.
Mount wall bracket using the lag screws supplied (1/4” x 1-
1/2”) to ensure rigid mounting.
INSTALLATION INSTRUCTIONS