


3 L80-029 Rev 5 10/07
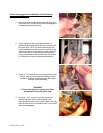
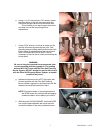
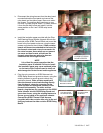
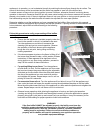
e. Using a 1 1/16” wrench and a 7/8” wrench, loosen
the brass fitting on the top of the gas valve and
disconnect the gas valve from the manifold inlet.
This will allow you to drop the gas valve down
and keep it out of the way during burner
replacement.
f. Using a 5/16” wrench, nut driver or screw gun bit,
remove all burners by removing the (2 ea.) self
threading screws holding them into the burner rack.
Retain these for reinstallation of the new burners.
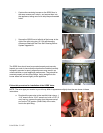
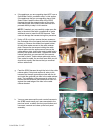
Note: On models MG2 and SGH50, it will be
necessary to remove the air collars surrounding the
burner head.
WARNING
Be sure to keep the removed burners separate from
burners supplied with the upgrade kit. The existing
burners WILL NOT work with the Pitco Self-Cleaning
Burner System. DO NOT attempt to use the old burners
with the Pitco Self-Cleaning Burner System: an unsafe
condition may occur.
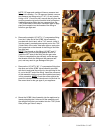
g. Replace the burners to the LEFT of the pilot with
burners supplied with the Pitco Self-Cleaning
Burner System upgrade kit, securing them with the
fasteners removed and retained in step f.
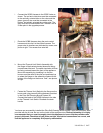
NOTE: Pre-tap the holes on mounting bracket on
the SCBS runner arm with the two self tapping
screws provided in the kit before you install it.
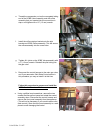
h. With the ports FACING INWARD, insert the SCBS
Arm into the space between the burner venturis
and orifice holders of the newly installed burners.