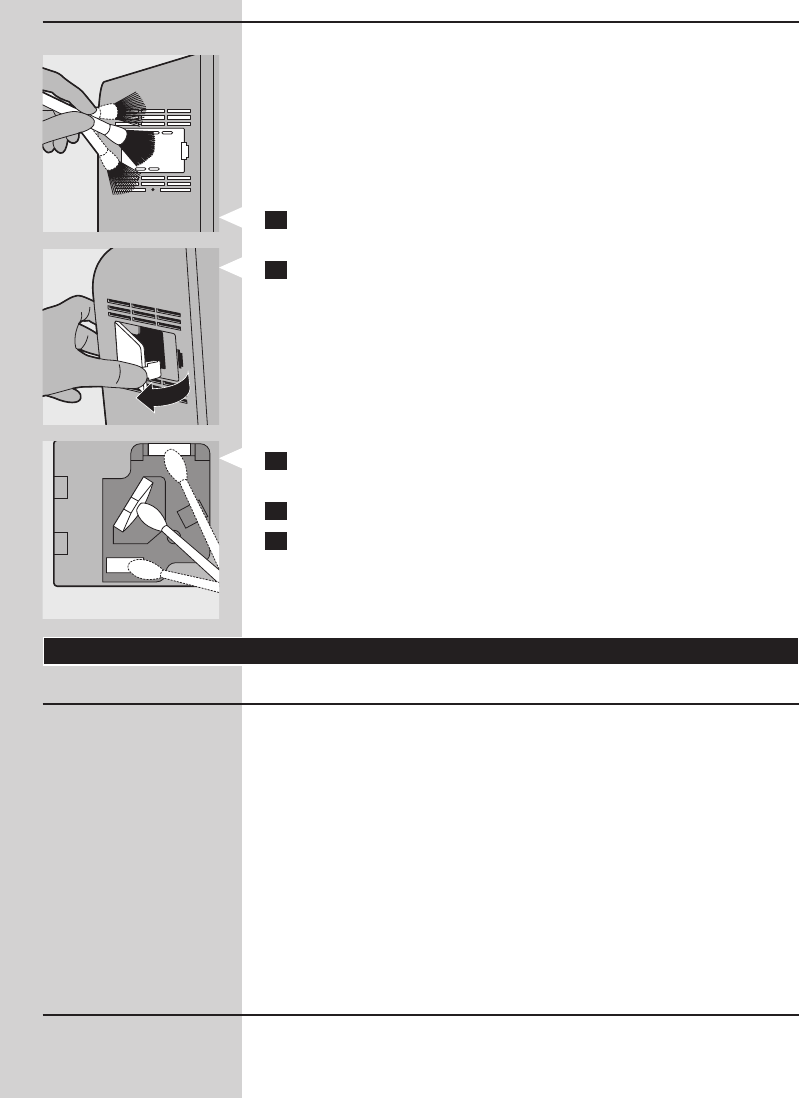
Clean the air quality sensor every 2 months for optimal functioning of
the appliance. Clean it more frequently if you use the appliance in a dusty
environment.
Note: When the humidity level in the room is very high, it is possible that
condensation develops on the air quality sensor. As a result, the AIR QUALITY
light on the control panel and the air quality light ring may indicate that the air
quality is bad even though the air quality is good. In this case you have to clean
the air quality sensor or use one of the manual speed settings.
1 Clean the air quality sensor inlet and the air quality sensor
outlet with a soft brush.
2 Remove the air quality sensor cover.
3 Clean the air quality sensor, the dust inlet and the dust outlet with a
lightly moistened cotton swab.
4 Dry them with a dry cotton swab.
5 Reattach the air quality sensor cover.
This appliance is equipped with the Healthy air protect lock to ensure that
the lters are in optimal condition when the appliance is operating.
When one of the lters is almost full and has to be cleaned or replaced,
the appropriate lter replacement light starts to ash. When you do not
replace lter 2, lter 3 and/or lter 4, the appliance stops operating and the
appliance is locked.
When the appliance is locked, the lter replacement light of the lter
concerned lights up on continuously.
Note: Only replace a lter when the corresponding lter replacement
light ashes. If you replace the lter before the lter replacement light starts
ashing, the lifetime counter will not be reset but will continue counting the
lifetime of the previous lter. As a result, the lter replacement light will start
ashing much too soon.
The lter replacement lights indicate which lter has to be cleaned or
replaced.
16


