


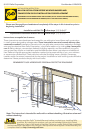

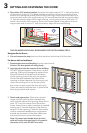
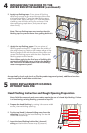

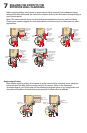
F. Check the interior reveal. 0DNHVXUH
the measurement from the interior face
of the door to the interior face of the
wall is equal at several points around
the door.
Note: If dimensions are not equal,
check to make sure the fins are folded
out to 90° at all points.
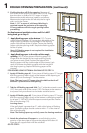
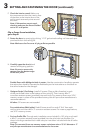
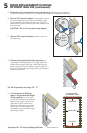
*Fasten the door WRRSHQLQJE\GULYLQJJDOYDQL]HGURRŵQJQDLOLQWRHDFKSUH
punched hole in the nailing fin.
Note: Make sure the fin corner is lying as flat as possible
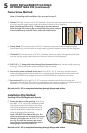
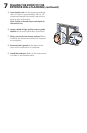
H. Carefully open the door(s) and
remove all shipping spacers.
Note: Be sure to remove the
spacers from the bottom edge
of the door panel.
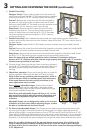
Double Doors with Multipoint latch in center:
Use the construction handle to operate
the active door handle. Operate the flushbolts per the instructions on the label on
the strike located on the astragal.
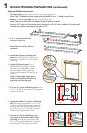
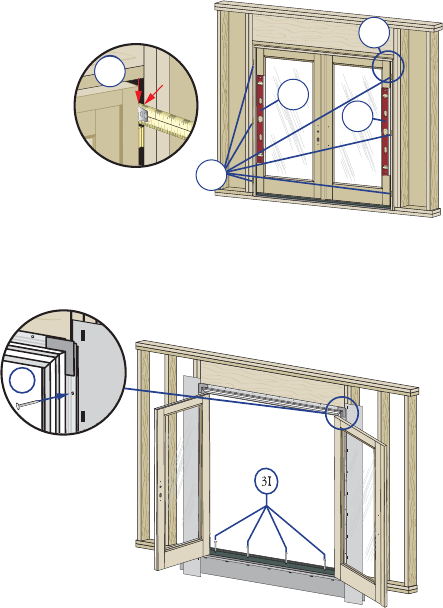
I.
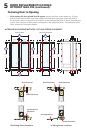
Designer Series® Out-Swing: Install sill screws. Place a dab of sealant in each
RIWKHSUHGULOOHGKROHVLQWKHERWWRPRIWKHXQLWVLOO7KHQLQVHUWD[
FRUURVLRQUHVLVWDQWVFUHZSURYLGHGLQWRHDFKKROH)RUPDVRQU\ŶRRUVXVD
PDVRQU\VFUHZLQSODFHRIWKHSURYLGHGVFUHZSLORWGULOOSHUVFUHZPDQXIDFWXUHUőV
recommendations.
All other: Sill screws are not needed.
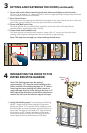
For combinations (Multi-wide): 3UHGULOOIUDPHDWPXOOLRQHQGVIURPHDFK
PXOOLRQMRLQWDQGLQVHUW[FRUURVLRQUHVLVWDQWVFUHZV)RUPDVRQU\DSSOLFDWLRQV
XVHPDVRQU\VFUHZV
J. For Low Profile Sills: 7KURXJKHDFKLQVWDOODWLRQVFUHZKROHGULOODSLORWDQGLQVWDOO
D[FRUURVLRQUHVLVWDQWVFUHZSURYLGHGLQWRWKHSLORWKROHLQWRWKHŶRRU)RU
doors including a standard lock install tubs per instruction included with the sill strike
package.
Note: For concrete floors use masonry screws a minimum size of 3/16" diameter x 3"
and pilot per manufacturer’s recommendations for the screw.
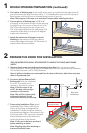
3
SETTING AND FASTENING THE DOOR (continued):
Interior
3D
3D
3D
3E
1
20
30 40 50 60 70
2
3
INCHES
mm
3E
3F
3F
3E
3E
3E
3G
Clip or Frame Screw Installation,
go to Step 5I