


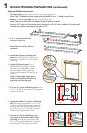
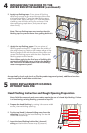

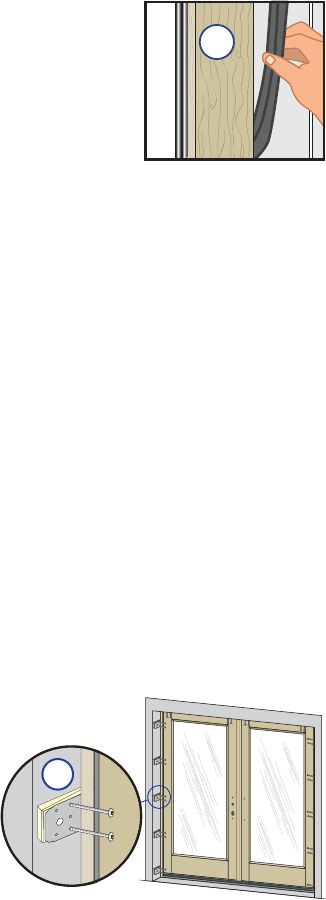
Installation Clip Method:
See Step 2C for Clip Application Details
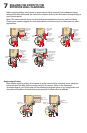
P. Fasten the door to the opening by driving
WZR[FRUURVLRQUHVLVWDQWVFUHZV
into the pre-punched holes in the clips.
If the clips are bent and fastened to the
interior stud/block, install the screws as
close to the bend as possible.
Note: DO NOT shim above the door. For
masonry openings use two masonry screws
that are a minimum size of 3/16" x 1-1/2"
per clip. Pre-drill the masonry per screw
manufacturer’s recommendations before
attempting to drive the screws in.
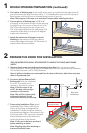
Frame Screw Method:
Note: If installing with installation clips, proceed to step P.
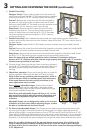
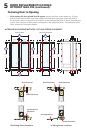
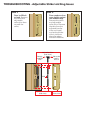
J. Jambs'ULOODQGFRXQWHUVLQNGLDPHWHUFOHDUDQFHKROHVWKURXJKWKHGRRUIUDPHRQO\
and not into the rough opening at the locations shown on the diagrams.
Note: Out-Swing Doors Only - If choosing to locate clearance
holes through the frame to be concealed by door panel; remove
frame weatherstrip and drill holes under the weatherstrip.
5F
5P
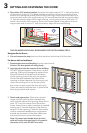
K. Frame Head'ULOODQGFRXQWHUVLQNGLDPHWHUFOHDUDQFHKROHVWKURXJKWKHGRRU
frame head only and not into the rough opening at the locations shown on the diagrams.
L. Threshold'ULOODQGFRXQWHUVLQNGLDPHWHUFOHDUDQFHKROHVWKURXJKWKHWKUHVKROG
but not into the rough opening at the locations shown on the diagrams
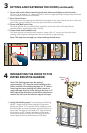
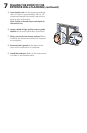
0Drill 1/8" x 1" deep pilot holes through the clearance holes and into the rough opening
framing in the head, jambs and threshold of the unit frame.
N. Secure the jambs and head of the door.'ULYH[FRUURVLRQUHVLVWDQWZRRG
screws through the door frame and shim, into the rough framing. Drive the screws until
snug but DO NOT over-tighten the screws. DO NOT bend or bow the unit frame.
O. Secure the sillE\GULYLQJ[FRUURVLRQUHVLVWDQWZRRGVFUHZWKURXJKWKH
WKUHVKROGLQWRWKHŶRRU)RUPDVRQU\DSSOLFDWLRQVXVHPDVRQU\VFUHZVDPLQLPXPRI
GLDPHWHU[DQGSLORWGULOOSHUVFUHZPDQXIDFWXUHUőVUHFRPPHQGDWLRQV
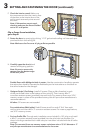
Go back to 3H - 3P to complete fastening through hinges and strikes.
5
DOOR REPLACEMENT IN SIDING
WITHOUT NAIL FIN (continued):
Go back to 3H - 3P to complete fastening through hinges and strikes.
5J