INSTALLATION INSTRUCTION -
NAIL FIN INSTALLATION BEFORE WEATHER BARRIER AND
FRAME SCREW OR CLIP INSTALLATION FOR REPLACEMENT
ALUMINUM-CLAD EXTERIOR HINGED PATIO DOORS (PELLA® PROLINE AND DESIGNER SERIES®)
ALUMINUM-CLAD EXTERIOR ENTRY DOORS (PELLA® AND ARCHITECT SERIES®)
Part Number: 81DU0100
© 2011 Pella Corporation
Instrucciones en español en el reverso.
These instructions were developed and tested for use with typical wood frame wall construction
in a wall system designed to manage water. These instructions are not to be used with any other
construction method. Installation instructions for use with other construction methods or multiple
units may be obtained from Pella Corporation, a local Pella retailer or by visiting http://www.pella.
com. Building designs, construction methods, building materials, and site conditions unique to
your project may require an installation method different from these instructions and additional
care. Determining the appropriate installation method is the responsibility of you, your architect
or construction professional. Check with the individual (building owner, architect, contractor,
installer and/or consumer) responsible for the project in addition to local building code officials to
determine if these products comply with local codes.
REMEMBER TO USE APPROPRIATE PERSONAL PROTECTIVE EQUIPMENT.
Always read the Pella
®
Limited Warranty before purchasing or installing Pella
products. By installing this product, you are acknowledging that this Limited
Warranty is part of the terms of the sale. Failure to comply with all Pella installation
and maintenance instructions may void your Pella product warranty. See Limited Warranty for
complete details at http://warranty.pella.com.
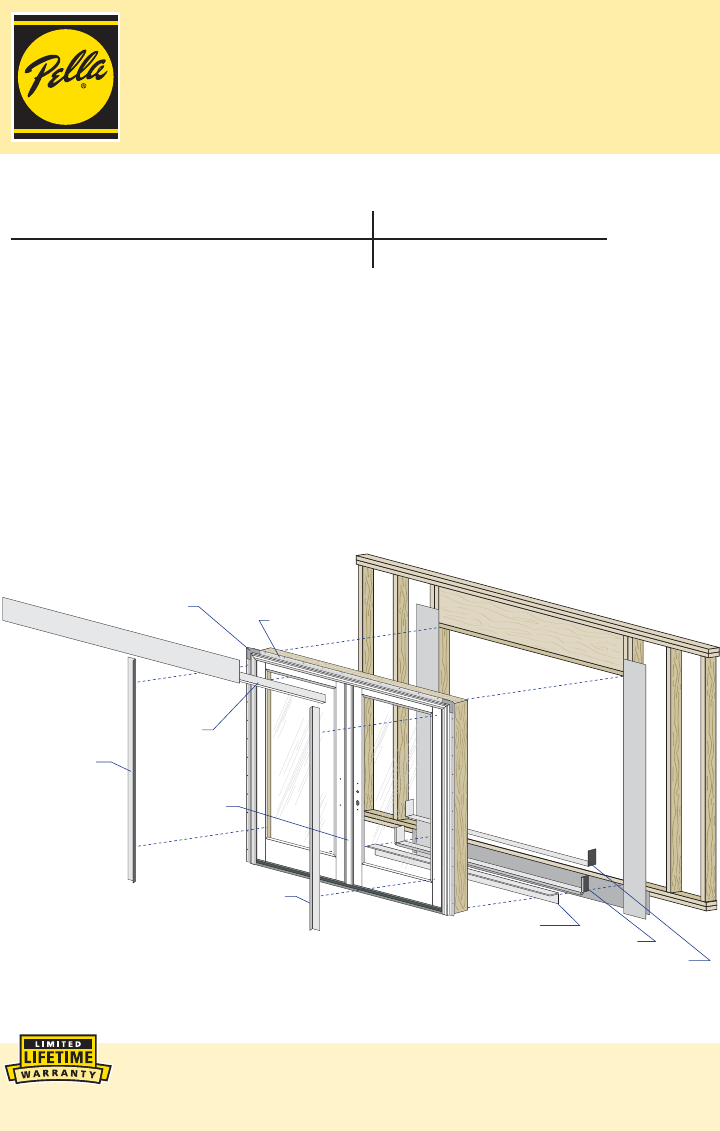
9"
F
l
a
s
h
i
n
g
P
a
p
e
r
9"
F
l
a
s
h
i
n
g
P
a
p
e
r
9" Flashing Paper
Sill Flashing Tape #2
Sill Flashing Tape #1
Sill Support
Top
Flashing
Tape
Fin
Corner
Side
Flashing
Tape
Astragal
Side
Flashing
Tape
Nailing Fin
9" wide Flashing Paper
Note: This instruction is intended for walls with or without sheathing. Illustrations show wall
without sheathing.
Please read thoroughly and understand completely all the steps in this instruction prior to
beginning installation.
Installation with Nail Fin follow steps 1, 2, 3, 4, 6, 7
Replacement Installation Without Nail Fin
follow steps 1, 2, 3, 5, 6, 7


