


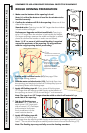
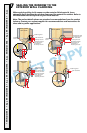
A. Units that do not have pre-applied
fin corners: Cut four pieces of
flashing tape 1-1/2" long. Apply one
piece of flashing tape to each end of
the sill fin so that it extends 1-1/2" past
the end of the sill fin. Apply one piece
of flashing tape to the bottom end
of each flexible fin, beginning 1-1/2"
from the end of the fin, and lapping
over the flashing tape that extends
from the end of the sill fin.
3
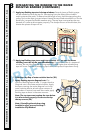
INTEGRATING THE WINDOW TO THE WATER
RESISTIVE BARRIER
Î
TU
Î
OE
ŘWINDOWS Ř ALL WINDOWS Ř ALL WINDOWS Ř ALL WINDOWS Ř ALL WINDOWS ŘALL
Î
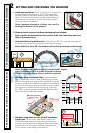
B. Apply side flashing tape. Cut two pieces of flashing
tape 4" longer than the frame height of the window.
Apply one piece 1/2" up onto the frame cladding over
the nailing fin and onto the water resistive barrier to
each side. The tape should extend 2" above the top of
the window and 2" below the bottom of the window.
Press the tape down firmly while folding down the
excess tape at the top and bottom of the window.
Note: DO NOT tape or seal the bottom nailing fin.
C. Apply top flashing tape. Cut a piece of
flashing tape long enough to go across the
top of the window and extend at least 1"
past the side flashing tape on both sides.
Apply the tape 1/2" up onto the frame
cladding over the top nailing fin as shown.
Fold the overlapping tape down, and press
all tape down firmly.
Î
Î
Ó
Ó
'JYFE
&YUSVEFE'JO
2I
2J
3A
3A
3B
3B
3C
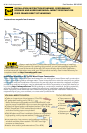
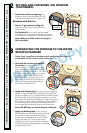
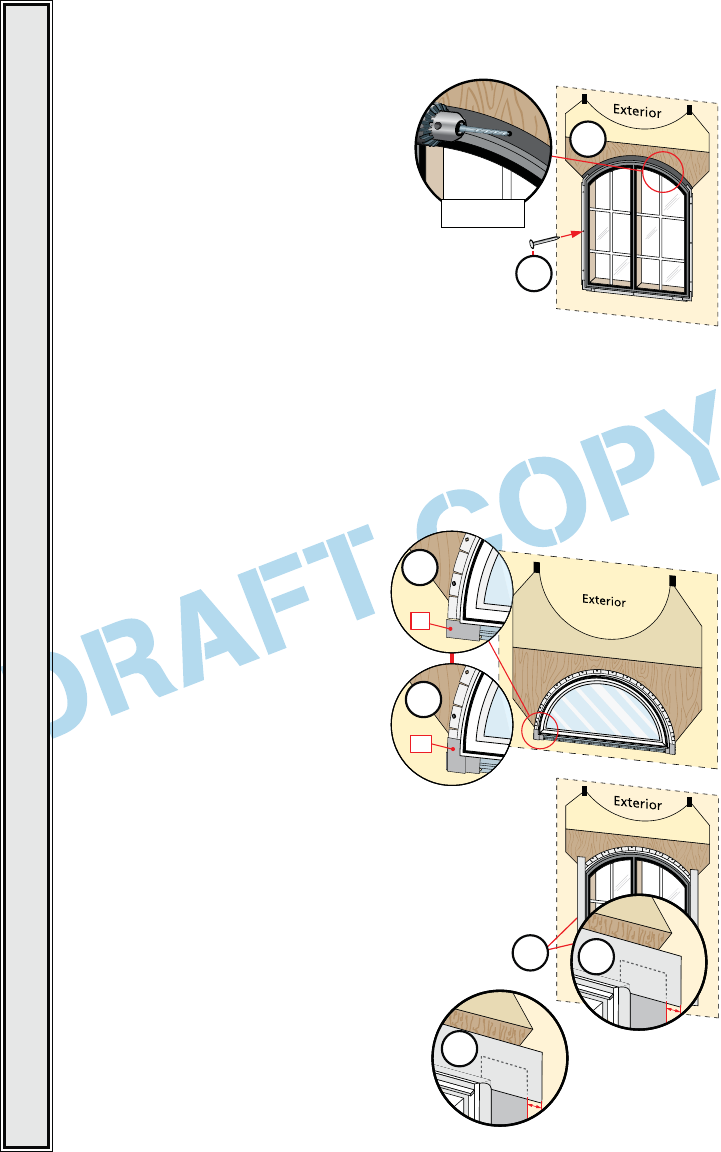
I. Fasten the window to opening. On
windows with a fixed extruded fin, drill
1/8 diameter holes in the fin every 12".
Windows with Nail Fin:
J. Drive a 2" galvanized roofing nail
into each of the pre-punched and pre-
drilled holes.
For flexible fin: Drive nails until the head
contacts the fin, however do not sink the head.
This allows for movement of building materials.
Note: Make sure all fin corners are lying as
flat as possible.
2
SETTING AND FASTENING THE WINDOW
(CONTINUED)
Note: Step 3 applies to windows with installation fins used in
combination with a water resistive barrier.