


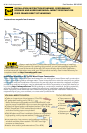
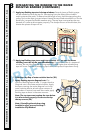
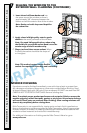
F. Insert the window from the exterior of the building. Place the bottom of
the window on the spacers at the bottom of the opening, then tilt the top into
position. Center the window between the sides of the opening to allow clearance
for shimming.
Windows with nail fin: Insert one roofing nail in the first hole from the corner on
each end of the top nailing fin. These are used to hold the window in place while
shimming it plumb and square.
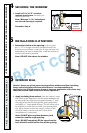
Windows using screws through the frame: Position the window so the exterior
face of the frame extends 3/4" on the exterior wall material to allow for the
application of backer rod and sealant (See illustrations in Step 7 for sealant
details). Center window between the sides of the opening to allow clearance for
shimming and insert one #10 x 3-1/2" screw into each of the top clearance holes.
This will hold the window in place while shimming it plumb and square.
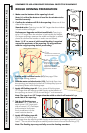
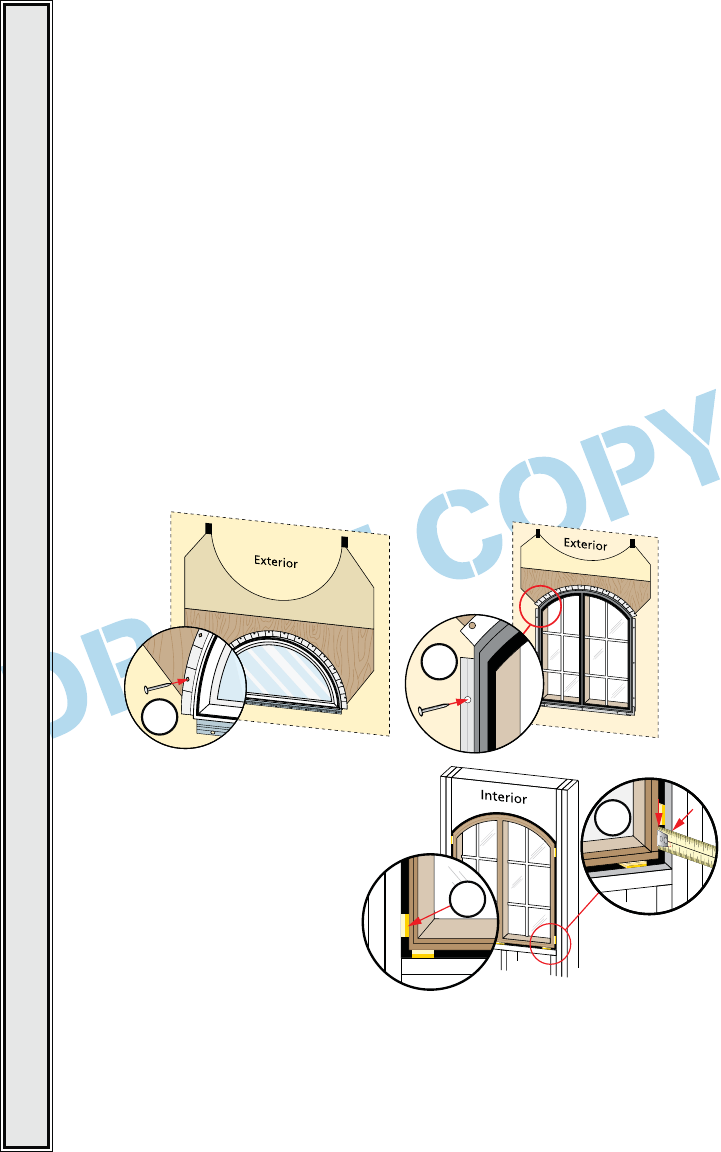
Window with Installation Clips: Position the window so the exterior face of
the frame extends 3/4" on the exterior wall material to allow for the application
of backer rod and sealant (See illustrations in Step 7 for sealant details). Center
window between the sides of the opening to allow clearance for shimming and
insert one #6 x 1-1/2" or longer screw into one hole in each of the top corner
clips. This will hold the window in place while shimming it plumb and square.
Note: For masonry openings use 3/16" x 1-1/2" masonry screw.
2
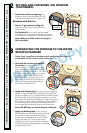
SETTING AND FASTENING THE WINDOW
(CONTINUED)
TWO OR MORE PEOPLE WILL BE REQUIRED FOR THE FOLLOWING STEPS.
ŘWINDOWS Ř ALL WINDOWS Ř ALL WINDOWS Ř ALL WINDOWS Ř ALL WINDOWS ŘALL
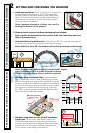
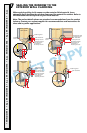
G. Plumb and square the window. Place
shims 1" from the bottom and top of the
window between the window and the sides
of the opening. Keep shims back 1/2"
from the interior face of the window.
Adjust the shims as required to
plumb and square the window in
the opening. If the frame height
exceeds 53", place shims at the
midpoint of the window sides.
Note: DO NOT shim above the
window or in the space between the
spacers at the bottom of the window. DO NOT over shim.
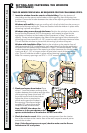
H. Check the interior reveal. Make sure the measurement from the interior
face of the window to the interior face of the wall is equal at several points
around the window.
Note: If the dimensions are not equal, check to make sure the fins are
folded out to 90˚ at all points.
2E
2E
2F
2F
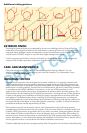
1
20
30 40
50
60
70
2
3
INCHES
mm
2G
2H