


C3432M-F (6/08) 35
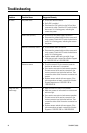
Image too light Installation error • Check DIP switch settings.
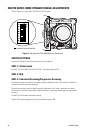
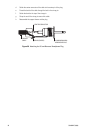
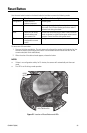
• Use a service connector to check camera operation.
Connect one end of the service connector to the
service connector input inside the back box. Then
connect the other end of the service connector to a
monitor.
• Replace camera module with new camera. If the
new camera does not work, contact Pelco Product
Support at 1-559-292-1981 or 1-800-289-9100.
Image only
displayed in
black and white
Color level setting • Check DIP switch settings.
• Use a service connector to check camera operation.
Connect one end of the service connector to the
service connector input inside the back box. Then
connect the other end of the service connector to a
monitor.
• Replace camera module with new camera. If the
new camera does not work, contact Pelco Product
Support at 1-559-292-1981 or 1-800-289-9100.
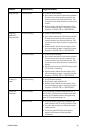
IR cut filter setting • Check DIP switch settings.
• Use a service connector to check camera operation.
Connect one end of the service connector to the
service connector input inside the back box. Then
connect the other end of the service connector to a
monitor.
• Add direct light to camera. Wait 30 seconds to see
if IR cut filter is functioning.
• Replace camera module with new camera. If the
new camera does not work, contact Pelco Product
Support at 1-559-292-1981 or 1-800-289-9100.
Flickering in
image
Flickerless setting • Check DIP switch settings.
• Check power supply specifications.
• Replace camera module with new camera. If the
new camera does not work, contact Pelco Product
Support at 1-559-292-1981 or 1-800-289-9100.
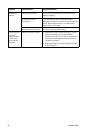
Camera not
discovered
No camera power Verify the camera is powered correctly with PoE or
with 24 VAC. Confirm power consumption with Web
interface of PoE-capable switch or through blinking
green LED during camera power up.
Network conflict • Verify the camera is physically connected to the
same network as the PC running the Device Utility.
• The utility will not work on a network that blocks
multicast traffic.
• Confirm the green LED blinks when power is
applied to the camera, indicating network
connectivity.
Problem Possible Cause Suggested Remedy