4 Pelco Manual C1901M (4/99)
D
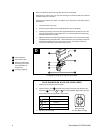
Changing the Plug on an Auto Iris Lens Cable
2
3
4
1
1
2
3
4
Cover (supplied)
Auto-iris lens cable
Rib (If the cable is thick
and the plug cover does
not seat properly, cut
away this rib.)
Lens plug (supplied)
42
13
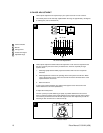
Pin # DC-servo Lens
Pin 3: Drive (+)
Pin 1: Control (-)
Pin 2: Control (+)
Pin 4: Drive (-) (Ground)
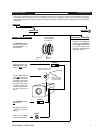
PLUG CHANGE ON AUTO IRIS LENS CABLE
1. Remove the old lens plug from the cable.
2. Remove the plug cover , add heat shrink tubing to the wires and solder the lens
cable wires to the pins thru on the plug supplied. Apply heat to the heat
shrink tubing. The pin assignments are as follows:
3. Put the cover on the plug.
1 4
1
2
3
4
2
1
Auto Iris Plug
Pin-out (Back of Plug)
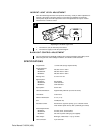
Be sure to attach the lens mount cap when the lens is not mounted.
When using an auto-iris lens, use only a DC-driven type or a direct current drive coil with a
resistance value over 150 ohms.
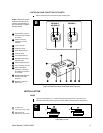
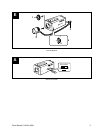
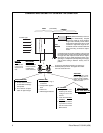
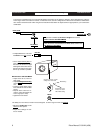
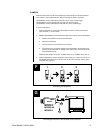
When using an auto-iris lens, attach it as follows. For a manual lens, omit step 3. Refer to
Illustration E.
1. Unscrew the lens mount cap.
2. Screw in the lens. Make sure the C/CS adjustment ring is set properly.
3. Check the plug wiring on the lens cable against Illustration D and the pin-outs in the
“Plug Change on Auto-Iris Lens Cable” box. If you need to replace the existing plug,
follow the instructions in the box.
4. Adjust the backfocus. Follow the appropriate instructions in the “Lens/Camera Setup
and Backfocusing” Information Box. These instructions cover the setting of the CCD
IRIS switch (Illustration A in the owner’s manual). Also, if necessary, refer to the
“Camera/Lens Geometry-General Information” sheet.
1
2
3
4


