


10
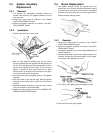
7. Install new brushes by reversing procedure.
8. Reinstall agitator holder and agitator pulley completely.
9. Reinstall the agitator shaft, end cap and E-clip.
10. Position belt over agitator pulley on the agitator.
11. Reinstall agitator and lower plate.
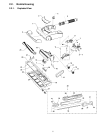
3.5. Nozzle Housing Replacement
3.5.1. Removal
1. Remove the lower plate as outlined in the LOWER
PLATE REMOVAL/INSTALLATION section.
2. Remove agitator assembly as outlined in the respective
sections.
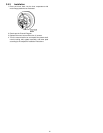
3. Remove upper body by removing four (4) screws.
4. Remove nozzle hose from upper body.
5. Carefully turn vacuum over. Remove motor case by
removing four (4) screws.
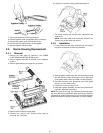
6. Lift up on the nozzle housing, plastic shaft side first.
7. The nozzle housing can now be easily rotated from the
motor shaft.
NOTE: If the motor case cover is removed, DO NOT turn
vacuum over as the motor may fall out.
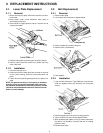
3.5.2. Installation
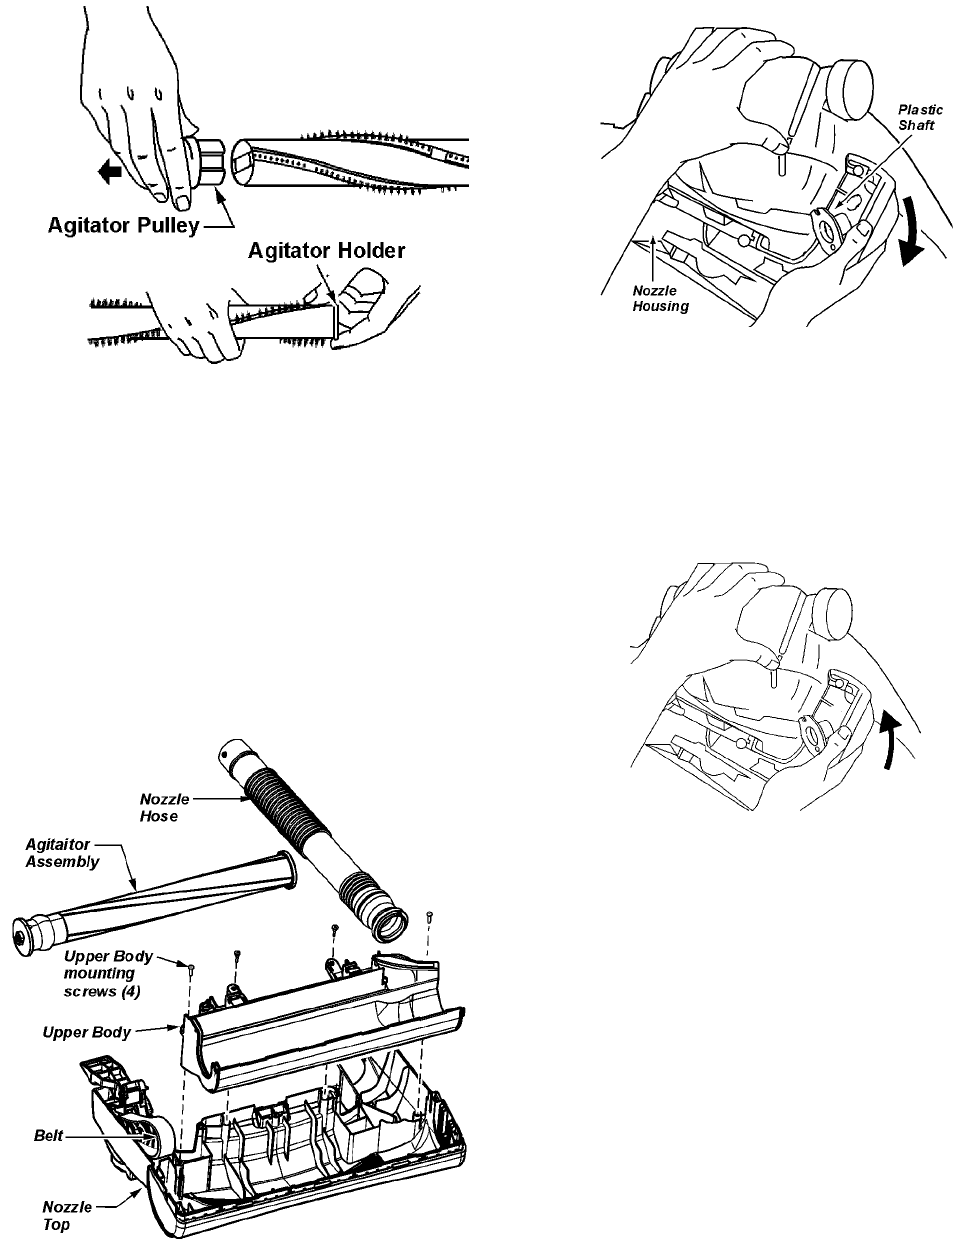
1. Fit the nozzle from the motor shaft side first, and rotate it
into place on the dust container as illustrated.
2. Slide the plastic shaft through the nozzle housing and into
the dust container. Make sure that the slot on the bottom
of the plastic shaft is down and fitted onto the projection.
3. Re-install the motor case. Be carefull not to over tighten
the four (4) motor case screws.
4. Carefully turn vacuum cleaner over.
5. Install belt, agitator assembly, and the lower plate accord-
ing to the respective instructions.
NOTE: For general servicing, it is necessary to eliminate pinch-
ing of any wire during reassembly. After servicing any electrical
component or electrical enclosure, the unit should be reassem-
bled and checked for dielectric breakdown or current leakage.