


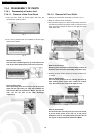
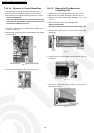
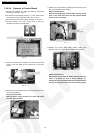

13.4.2.1. Removal of Cabinet Top Plate
and Cabinet Front Plate
1. Unscrew the screws (three: two on the right side and one on
the left side as you faces) and the Cabinet Top Plate.
2. Unscrew the screws (six: three on the upper side and
another three on the lower side) on the Cabinet Top Plate.
Fig. 1
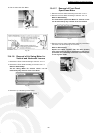
3. Release the hooks (four: two on the right and another two
on the left as you faces) for the Cabinet Front Plate and
remove the Front Plate by holding it up a little.
Fig. 2
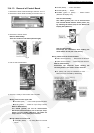
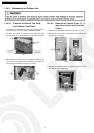
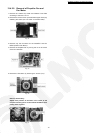
13.4.2.2. Removal of Control Cover (2- / 3-
way valve Covers and Terminal
Cover)
1. Remove the Front Grille according to the item 13.5.1.2.
2. Remove the screw (one) on the Control Cover and remove
it by sliding it downward.
Fig. 3
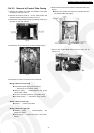
3. Remove the Terminal Cover by removing the screws (two)
and releasing the hooks (two).
Fig. 4
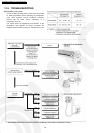
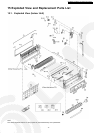
13.4.2. Disassembly of Outdoor Unit
70
CS-TE9DKE CU-TE9DKE / CS-TE12DKE CU-TE12DKE