


12
Chimney Installation:
Do not connect this unit to a chimney flue serving another appliance. Do not connect to any
air distribution duct or system
.
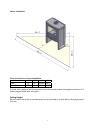
The SCAN A10 stove is listed for installation as a vertically top or rear vented stove using a listed
class A (UL103HT) for Canada (CAN/ULC-S629) factory built chimney exiting through the
ceiling/attic/roof. The inside diameter of the chimney, connector pipe must not be smaller than 6”
(152 cm) diameter. Single wall 24 gauge MSG (0.58 – 0.71 mm) and adapter must not be smaller
than 6” (152 mm), may be used in the room where the stove is installed, follow the chimney
manufacturer’s instruction for installation of chimney and chimney adapter. In Canada, where
passage through wall, or partition of combustible construction is desired, the installation shall
conform to CAN/CSA B365.
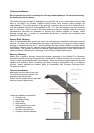
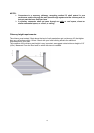
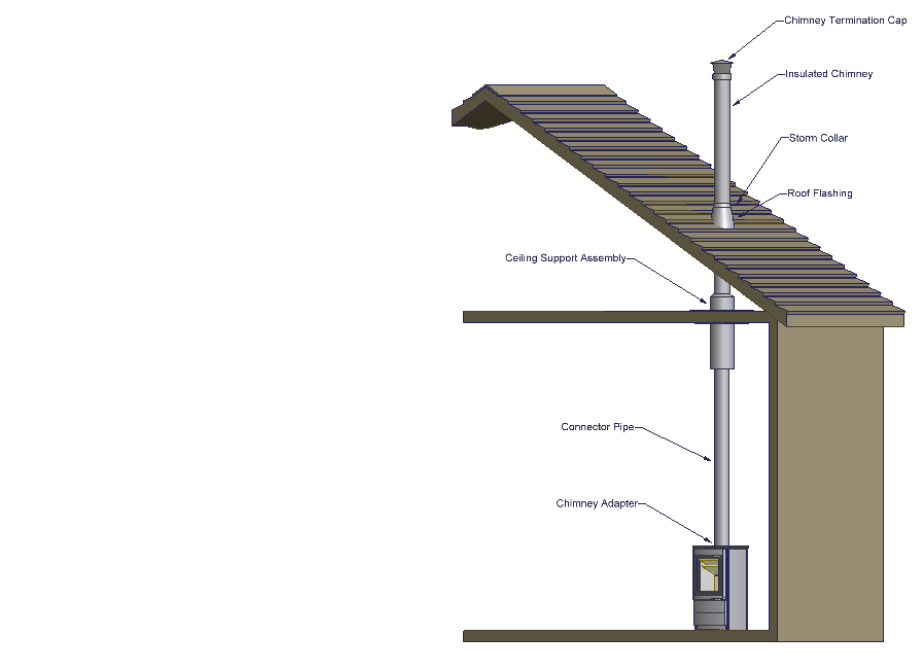
Factory Built Chimney
When a metal prefabricated chimney is used, the manufacturer’s installation instructions must be
followed. You must also purchase (from the same manufacturer) and install the ceiling support
package or wall pass-through and “T” section package, fire stops (where needed), insulation shield,
roof flashing, chimney cap, etc. Maintain proper clearance to the structure as recommended by the
manufacturer. The chimney must be the required height above the roof or other obstructions for
safety and proper draft operation. See page 15 for Chimney Height Requirements.
Masonry Chimney
Ensure that a masonry chimney meets the minimum standards of the National Fire Protection
Association (NFPA) by having it inspected by a professional. Make sure there are no cracks, loose
mortar or other signs of deterioration and blockage. Have the chimney cleaned before the stove is
installed and operated. When connecting the stove through a combustible wall to a masonry
chimney, special methods are needed. Refer to Combustible Wall Chimney Connector Pass-
Throughs on page 14.
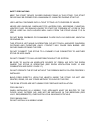
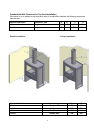
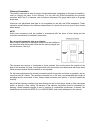
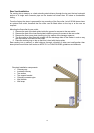
Top vent installation
Mounting of the flue collar for top vent.
Turn the flue collar around and fix the
brackets under the top plate.
Tighten the two screws with the delivered
hexagon spanner (tighten well)
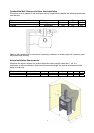
Required installation components:
•
Chimney cap
• Insulated chimney
• Storm collar
• Roof flashing
•
Ceiling support box or joist
shield/fire stop spacer
•
Chimney connector pipe
•
Chimney connector adapter