


WS-415-71 / 09.07.00
9
1. Move the fireplace into position. Try to center the ex-
haust flue of the fireplace, midpoint between two joists to
prevent having to cut them. Use a plumb bob to line up the
centre.
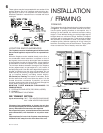
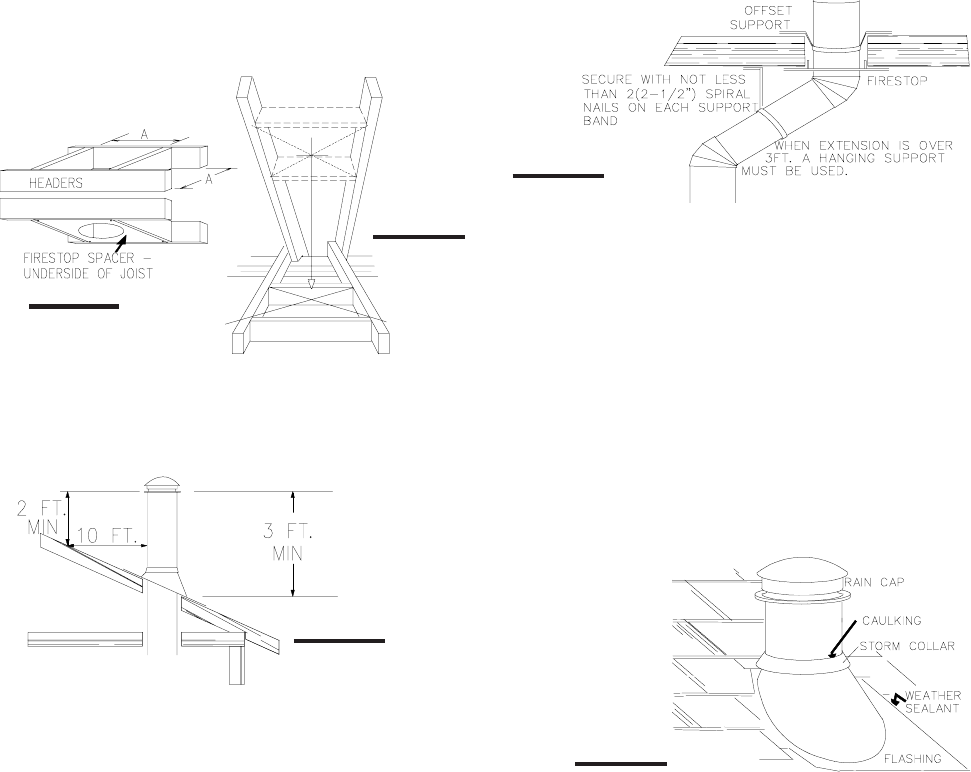
2. Cut and frame an opening in the ceiling to provide a
minimum clearance of 2" between the outside of the chim-
ney and any combustible material. DO NOT FILL THIS
SPACE WITH ANY TYPE OF MATERIAL! Nail headers
between the joists for extra support. Firestop spacers must
be placed on the bottom of each framed opening in any
floor or ceiling that the chimney passes through.
3. Hold a plumb bob from the underside of the roof to
determine where the opening in the roof should be. Cut
and frame the roof opening maintaining proper 2" clear-
ances.
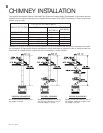
ADDING CHIMNEY SECTIONS
Add chimney sections, twist locking (clockwise) securely,
to the required height. Use a rafter radiation shield when-
ever the chimney system is enclosed within an attic area.
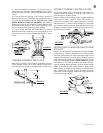
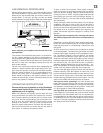
OFFSET CHIMNEY INSTALLATION
An insulated elbow must be used when it becomes nec-
essary to offset the chimney in order to clear a joist or to
pass through an upstairs closet.
Attach an elbow to the chimney section, angled toward the
offset. Secure with 3 - #8X1/2" sheet metal screws. To
achieve the minimum offset, attach and secure a return
elbow to the first. To achieve longer offsets, you may install
any available length of chimney pipe between the elbows.
Supports must be used on the first vertical chimnney sec-
tion after a return elbow.
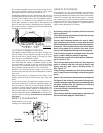
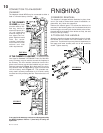
INSTALLING FLASHING AND STORM
COLLAR
Remove the nails from the shingles above and to the sides
of the chimney. Place the flashing over the chimney pipe
and slide underneath the sides and upper edge of the
shingles. Ensure that the chimney pipe is properly centered
within the flashing, giving a 3/4" margin all around. Fasten
to the roof on the top and sides. DO NOT NAIL through the
lower portion of the flashing. Make weather-tight by seal-
ing with caulking. Where possible, cover the sides and top
edges of the flashing with roofing material. Apply water-
proof caulking, provided with the flashing, around the chim-
ney, 1" above the top of the flashing and push the storm
collar down into the caulking. Insert a rain cap onto the top
of the last chimney section.
FIGURE 14
FIGURE 11
FIGURE 12
FIGURE 15
FIGURE 13