HTN- SERIES • RIDE-ON POWER TROWEL — OPERATION MANUAL — REV. #0 (06/06/07) — PAGE 29
HTN-SERIES — MAINTENANCE
Checking The Drive Belt
The drive belt needs to be replaced as soon as it starts to show
signs of wear. Indications of excessive belt wear are fraying,
squealing when in use, belts that emit smoke or a burning rubber
smell when in use.
Under normal operating conditions, a drive belt may last
approximately 150 hours. If your trowel is not reaching this kind
of life span for drive belt wear, check the drive belt for proper
pulley alignment and spacing.
To gain access to the drive belt, remove the drive belt guard
cover (item 1 Figure 17), then visually inspect the drive belt for
signs of damage or excessive wear. If the drive belt is worn or
damaged, replace the drive belt.
DO NOT remove the drive belt guard cover
until the muffler has cooled. Allow the entire
trowel to cool down before performing this
procedure.
DO NOT attempt to insert hands or tools
into the belt area while the engine is
running. NEVER run the engine with the
safety guards removed. Keep fingers,
hands, hair and clothing away from all
moving parts to prevent bodily injury.
WARNINGWARNING
WARNINGWARNING
WARNING
WARNINGWARNING
WARNINGWARNING
WARNING
zz
zz
z
Leave the existing drive belt intact until instructed to cut it.
zz
zz
z
Leave the engine in place for this procedure. It is not
necessary to slide the engine to replace the drive belt.
zz
zz
z
Have a 3/4 X 1 X 3-1/4 inch wooden block available.
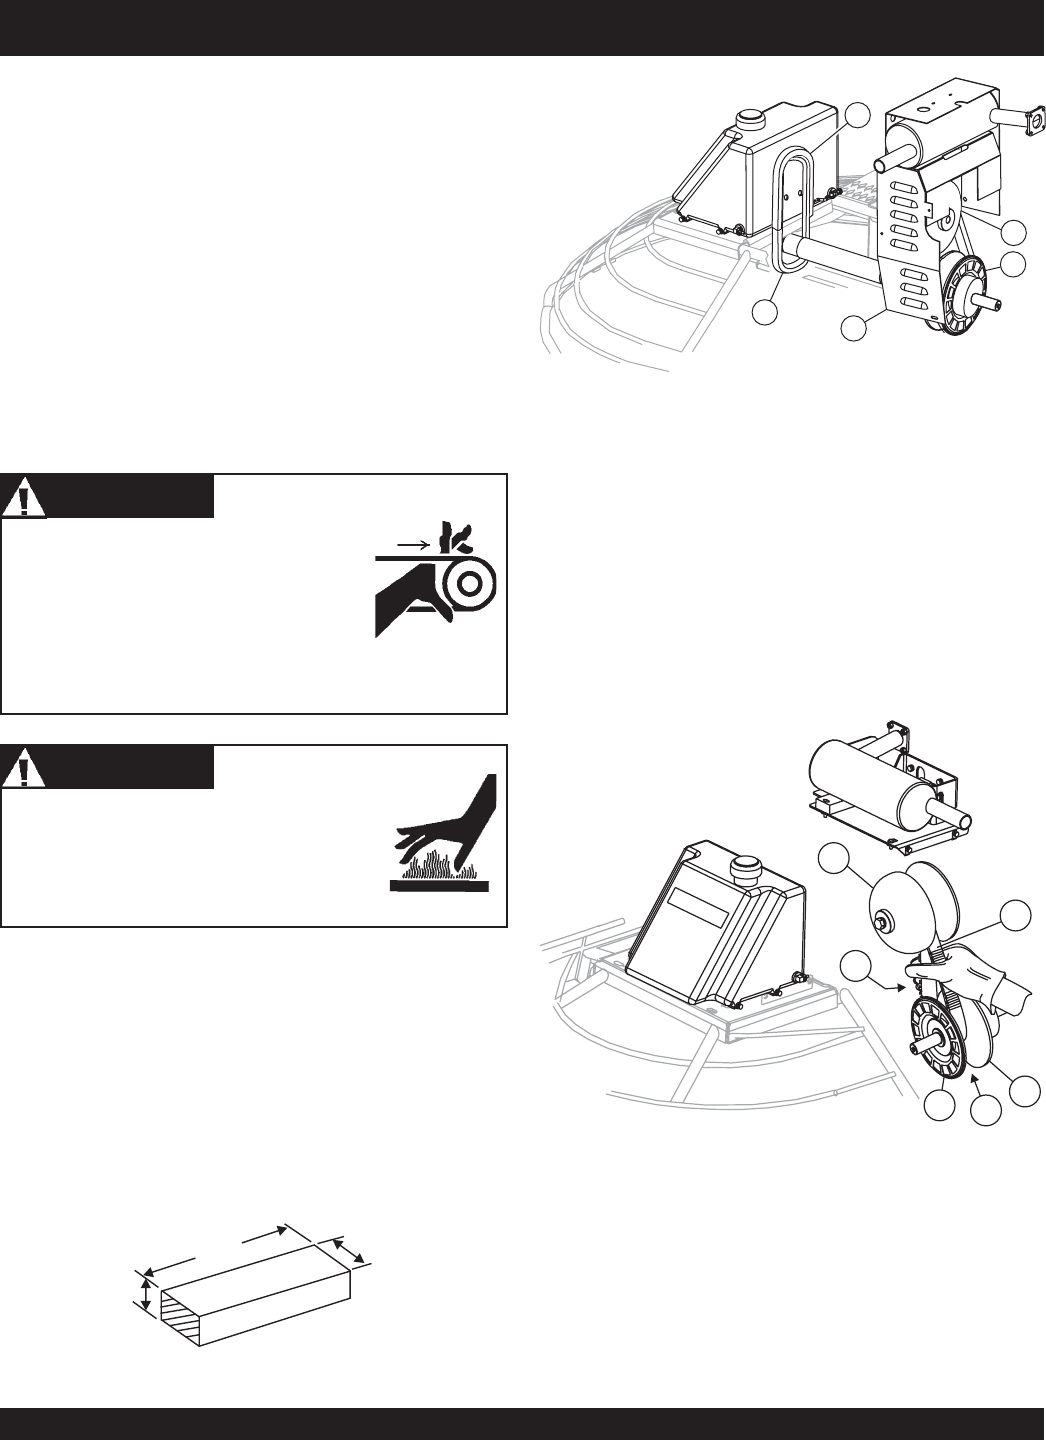
Removing the Drive Belt
Figure 17. Drive Belt Guard Cover
1. Remove Drive Belt Guard Cover (item 1 Figure 17).
2. Squeeze the drive belt as shown in Figure 18, and pull the
V-belt upwards. This will spread open the faces of the
lower
drive pulley.
1 Drive Belt Guard Cover
2 Lower Pulley
3 Upper Pulley
4 Spare Drive Belt
5 Spare Drive Belt Holder
WOODEN BLOCK
LENGTH
3.25 IN.
HEIGHT
.75 IN.
WIDTH
1.00 IN.
Figure 16. Wooden Block For Spacer
4
5
1
2
3
Figure 18. Expanding Lower Drive Pulley
5
6
3
2
4
1
1 Upper Pulley
2 Drive Belt
3 Lower Pulley Fixed Face
4 Lower Pulley Spread Apart
5 Lower Pulley Movable Face
6 Squeeze and Pull Up To Spread
Lower Pulley


