


CHAPTER 5: QUICKFLY RIGGING
20
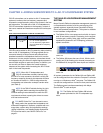
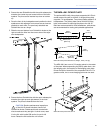
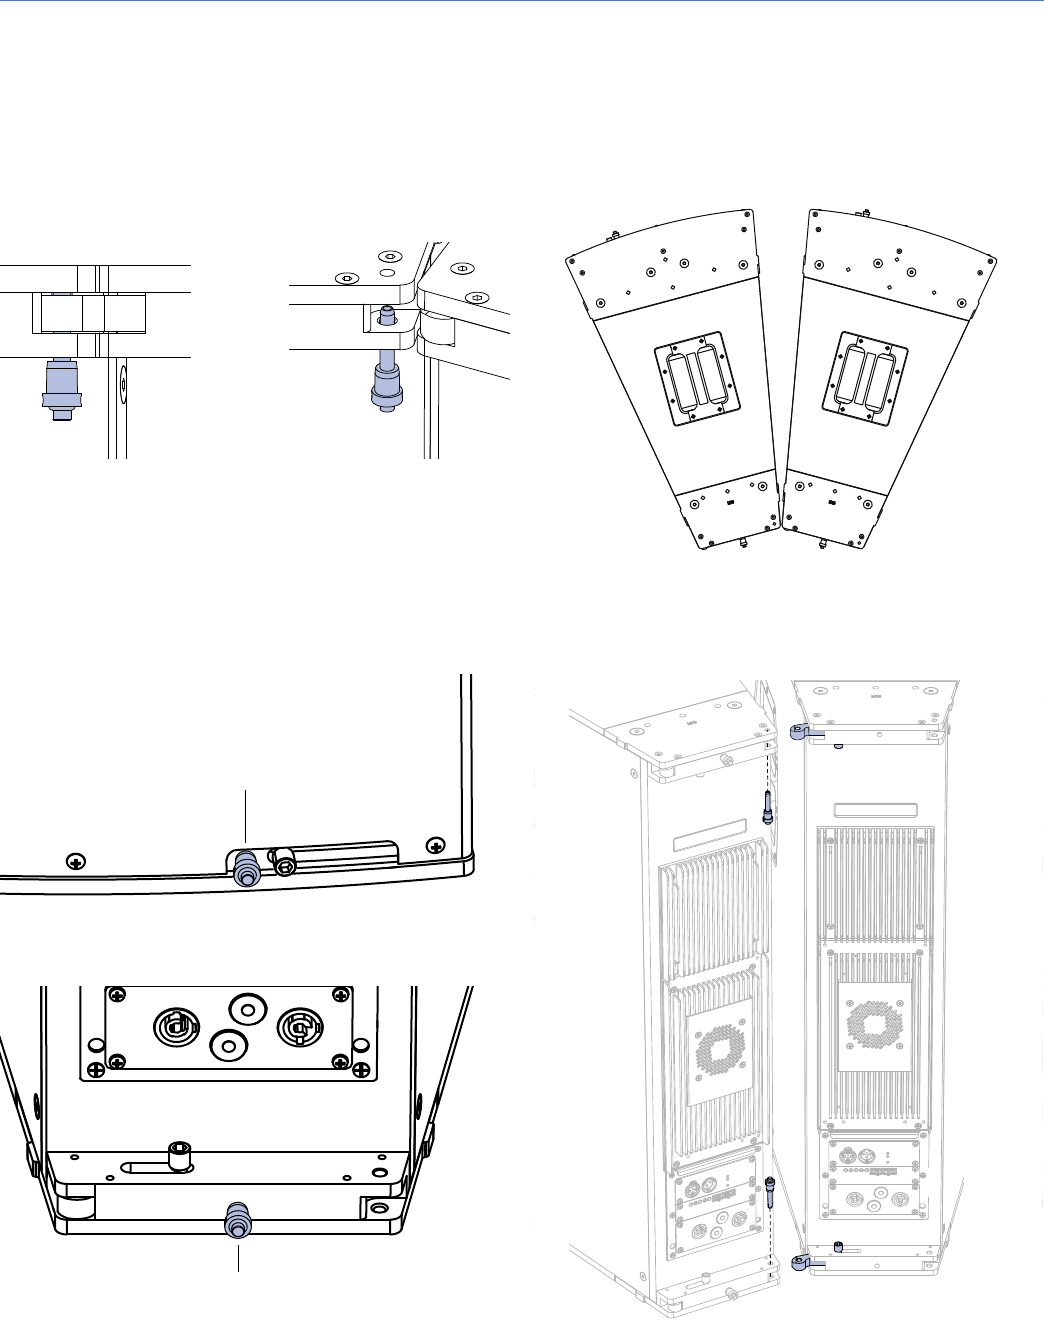
The JM-1P Quick-Release Pins
Each JM-1P ships with four quick-release pins that secure
the units when they are linked. When inserting and removing
the pins, press the button at the top of the pin to disengage
it. When inserted in the GuideALink holes (in the front left
corners and rear right corners), the pins latch and lock to the
links inserted into the corner slots.
When the GuideALinks are not present in the corner slots,
the quick-release pins should be removed from the corner
link holes and placed in their stowed location: in the front,
just to the left of the top and bottom GuideALink knobs; and
in the rear, in the top and bottom center holes.
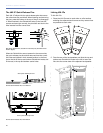
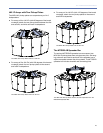
Linking JM-1Ps
To link JM-1Ps:
1. Place the JM-1Ps next to each other on a flat surface
and align the adjacent back corners so they are as close
as possible to each other.
2. Face the rear of the loudspeakers and slide the top and
bottom rear GuideALink knobs to the left to insert the
links into the corner slots of the adjacent loudspeaker.
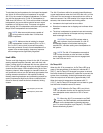
Rear Quick-Release Pin, GuideALink Inserted (Left); GuideALink Not
Present (Right)
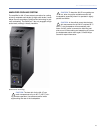
Stowed Quick-Release Pin, Front Bottom
Stowed Quick-Release Pin, Rear Bottom
Stow quick-release pin here
Stow quick-release pin here