


1. Strip wire insulation leaving only 3/8 in. (9.5mm) bare wire ends, and clean off
any corrosion present.
2. Fill the wall opening with non-combustible insulation to prevent drafts from
affecting the thermostat’s normal operation.
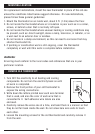
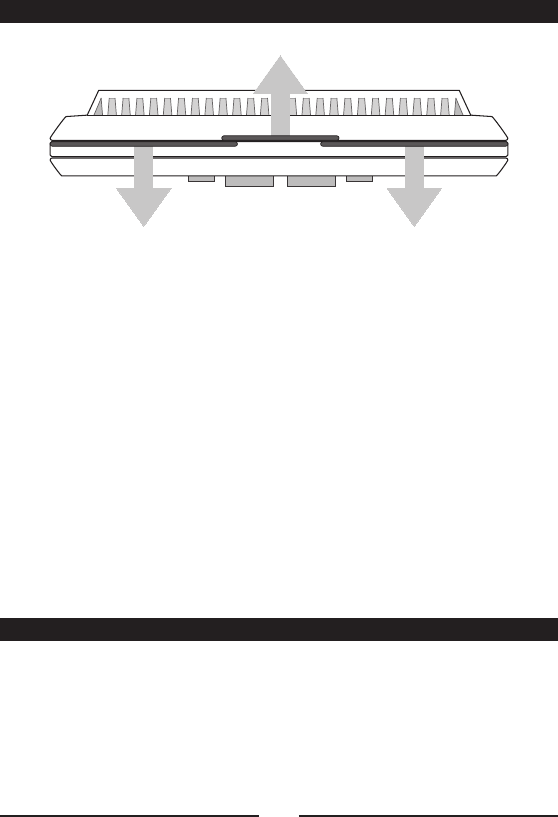
3. Separate new thermostat housing using your thumb and index finger. Provide
pressure in opposite directions to the release tabs on the top of the housing,
in the directions shown in the diagram shown above.
4. Route the wires through the opening in the new thermostat base plate, and
hold the base against the wall. Try to line up the screw holes from the prior
thermostat, and install the mounting screws.
5. If the previous holes cannot be used, hold the thermostat base against the
wall so that it appears straight and level (position the base for best
appearance) and mark for the new screw holes. Attach the base to the wall
using the screws provided (use the supplied plastic anchors if needed when
mounting to a soft material such as drywall).
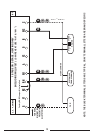
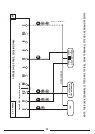
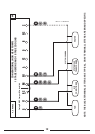
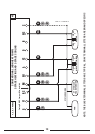
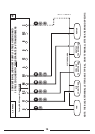
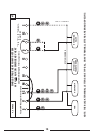
CONNECTING THE WIRES:
When attaching the wires to the thermostat, please ensure that the bare wire
ends are held ALL the way into the terminal block while the screw is being
tightened.
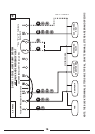
WIRING INFORMATION:
6
INSTALL THERMOSTAT BASE:
THERMOSTAT TOP VIEW