


12
NOTE: DIAGRAMS & ILLUSTRATIONS ARE NOT TO SCALE.
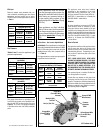
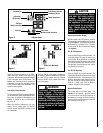
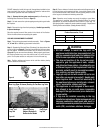
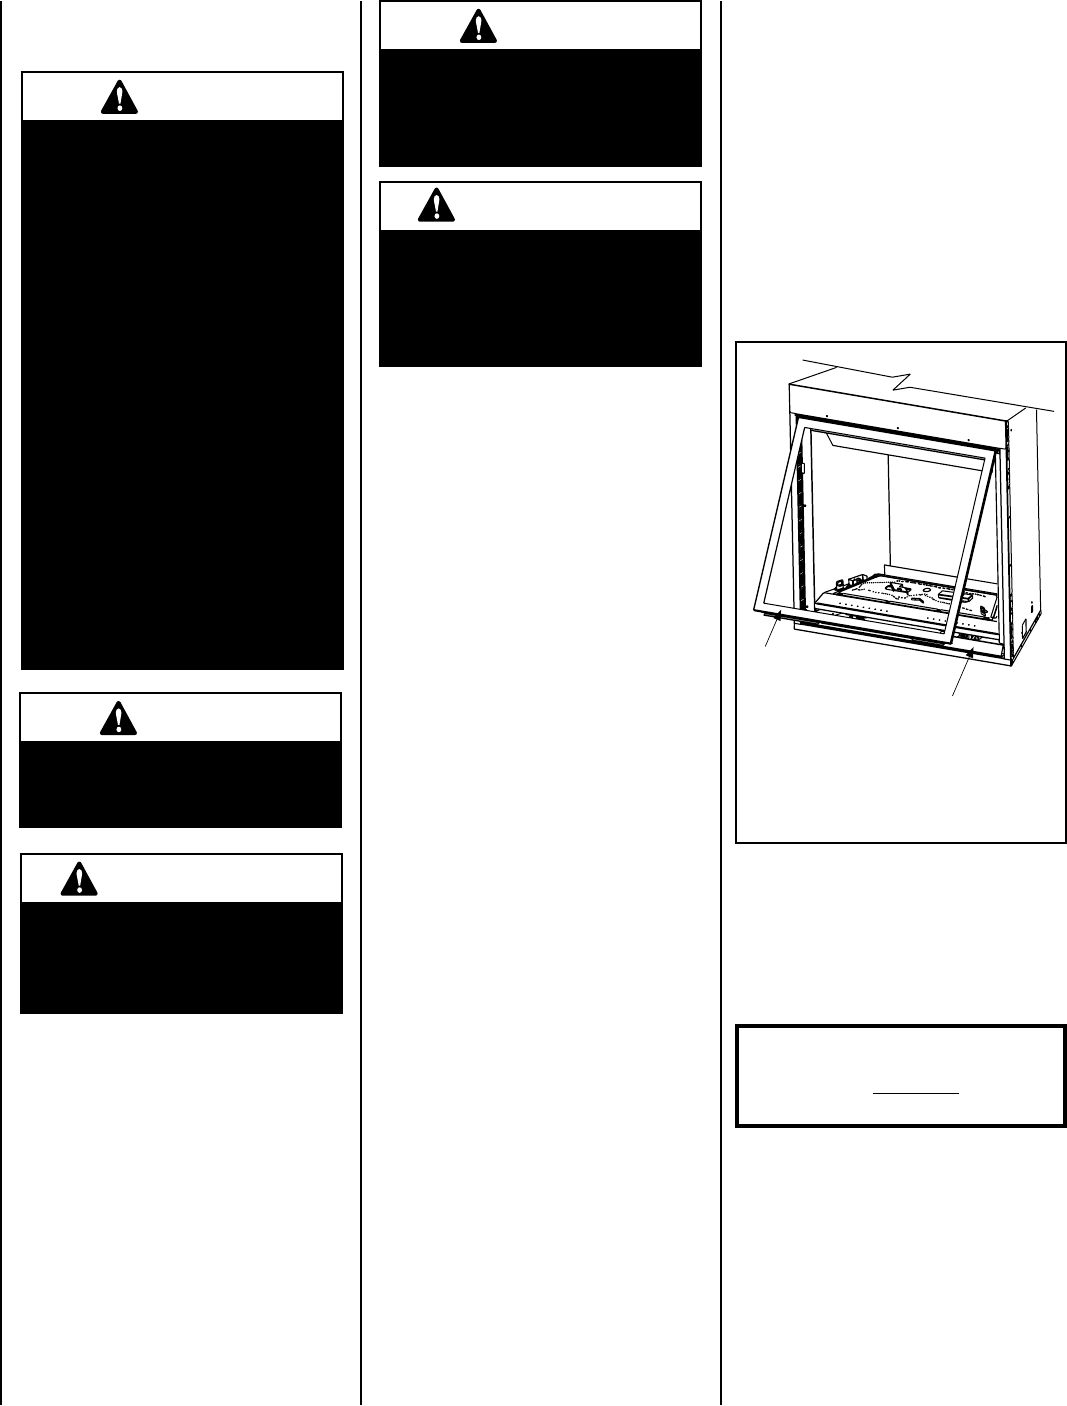
Figure 8
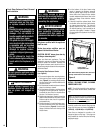
6. Let the bottom of the door frame swing
gently in towards the fireplace ensuring
that the gasket seats evenly as the door
frame draws shut. Fasten the two latches
located underneath the firebox floor to the
door's vee-flange. Close both the latches
securely.
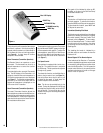
7. If desired, install the optional hood. Note
the location of the three clips inside the top
air channel above the door. The clips are
equally spaced on the top surface of the
air channel opening. Use a screwdriver to
open the clips slightly if needed. Engage
the back edge of the eyebrow into the clips
to secure.
Front Glass Enclosure Panel, Removal
and Installation
WARNING
Any safety screen or guard
removed for servicing the appli-
ance must be replaced prior to
operating the appliance.
AVERTISSEMENT
Tout écran ou protecteur retiré
pour permettre l’entretien de
l’appareil doit être remis en
place avant de mettre l’appareil
en marche.
WARNING
• Do not attempt to substitute the
materials used on this door,
or replace cracked or broken
glass.
• Handle this glass with extreme
care! Glass is susceptible to
damage – Do not scratch or
handle roughly while reinstall-
ing the glass door frame.
• The glass door(s) of this appli-
ance must only be replaced as
a complete unit as provided
by the manufacturer. Do not
attempt to replace broken,
cracked or chipped glass sepa-
rately.
• Do not attempt to touch the
front enclosure glass with your
hands while the fireplace is in
use.
WARNING
Do not operate appliance with
the glass front removed, cracked
or broken.
AVERTISSEMENT
Ne pas utiliser l'appareil si le
panneau frontal en verre n'est
pas en place, est craqué ou
brisé.
Only doors certified with the appliance
shall be used.
Seules des portes certifiées pour cet
appareil doivent être utilisées.
CAUTION: DO NOT abuse glass door by
striking or slamming shut.
These are direct-vent appliances. They are
designed to operate only when the front glass
enclosure panels are installed. Generally the
front glass enclosure panel should not be re-
moved except to gain access to the components
within the firebox.
Removing Glass Enclosure Panels
(see Figure 8)
1. To access the glass door securing latches,
first open the lower control compartment
door (Figure 8) by inserting a finger behind
the door at the right or left side and then tilt
the door forward.
2. Pull the latches forward and down to release
them from the door channel.
3. Pull the bottom of the door out a few inches
and grasp it on the right and left. Gently lift
to release the door from its channel above
the door. Pull the door forward.
4. Retrieve the glass door. Visually inspect the
gasket on the backside of the frame. Gasket
surface must be clean, free of irregularities
and seated firmly.
5. Position the door in front of the firebox open-
ing with the bottom of the door held away
from the fireplace (Figure 8). Hook the top
flange of the door frame over the top of the
firebox frame.
Note: When installing the glass door, ensure the
spacing on both sides is even and equal.
Door
Assembly
Lower Control
Compartment Panel
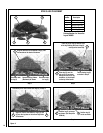
INSTALL VOLCANIC STONE, GLOWING
EMBERS AND LOGS
NOTE: Turn off all electricity to the appliance
before you install volcanic stone, embers and
logs.
Note: The log set and fire are artistically ar-
ranged to provide a random asymmetric look
to the fire. The fire intentionally does not burn
in the left rear quarter of the log set.
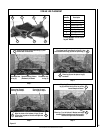
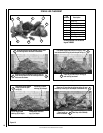
Carefully position the ceramic fiber logs and
twigs over the burner as shown in Figures 11
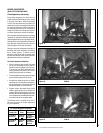
(SYM-35), 12 (SYM-40) or 13 (SYM-45).
These fires are designed to provide a rich
orange/red glow on the logs. If the logs are
being installed for the first time, the following
paragraphs apply: