


35
NOTE: DIAGRAMS & ILLUSTRATIONS ARE NOT TO SCALE.
Glass/Door Maintenance
Cleaning: When cool, the glass may be cleaned with a clean, soft cloth
and a household glass cleaner. For cleaning white condensation from
the interior glass use a gas fireplace glass cleaner available from your
fireplace dealer. Use of caustic or abrasive cleaners may damage glass.
Gold or nickel plated doors must be cleaned with a household glass
cleaner or denatured alcohol and a soft cloth before firing or fingerprints
and stains will remain permanently. Never use abrasive polish to clean the
gold or nickel as it will ruin the finish. DO NOT spray commercial glass
cleaner with ammonia on the door and glass gasket as it may dissolve
the gasket glue.
Glass Replacement: This replacement glass assembly is available
from your Lennox Hearth Products dealer. The glass is neo-ceramic and
alternative types must not be used.
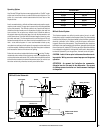
Fuel Conversion
Converting the Ravelle™ 30 gas fireplace between natural gas and LP can
be accomplished by either changing the cassette (valve and pilot assembly)
or installing a conversion kit (regulator, burner orifice and changing the
orifice position on the pilot). Only a qualified service technician should
perform the conversion.
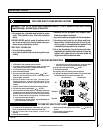
Cassette Removal:
1. Be sure the gas supply is shut off and the fireplace electrical supply is
shut off at the electrical panel before beginning the cassette removal.
Disconnect the gas supply from the fireplace, being careful not to apply
pressure to the valve in the process.
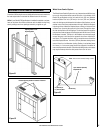
2. Remove the log set and brick panels (see Brick Panel and Log Set
Installation).
3. Remove the two allen head screws at the left and right rear of the firebox
securing the air control panel. Lift out the air control panel.
4. Remove the one allen head screw holding the burner in place. Grasp
the burner air shutter with your left hand and the burner with your right
hand and pull the right end of the burner up and to the right, releasing
the air shutter from the air shutter linkage wire.
5. Disconnect the wire from the back of the piezo igniter (push button
igniter).
6. Mark and disconnect wires on valve terminals #1 and #3 connected to
the burner on/off switch or thermostat.
7. Remove all six allen head screws (around the perimeter of the cassette
panel) fastening the cassette to the firebox. The cassette is sealed to the
fireplace using a high temperature gasket. Handle the gasket carefully
for use in reinstalling the cassette.
8. Grasp the air shutter linkage wire in your left hand and pull it up as you
lift and rotate the rear of the cassette panel up and through the firebox.
9. Install new, converted, or serviced cassette in the reverse order of
removal. Reuse the cassette panel gasket to ensure an air tight seal
between the firebox and the cassette.
10. All parts and wires must be correctly reinstalled to ensure safe and
proper operation of the unit. Check for gas leaks prior to burning the
fireplace.
Conversion Kit: Please see instructions provided with conversion kit.
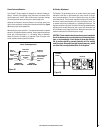
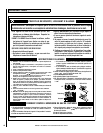
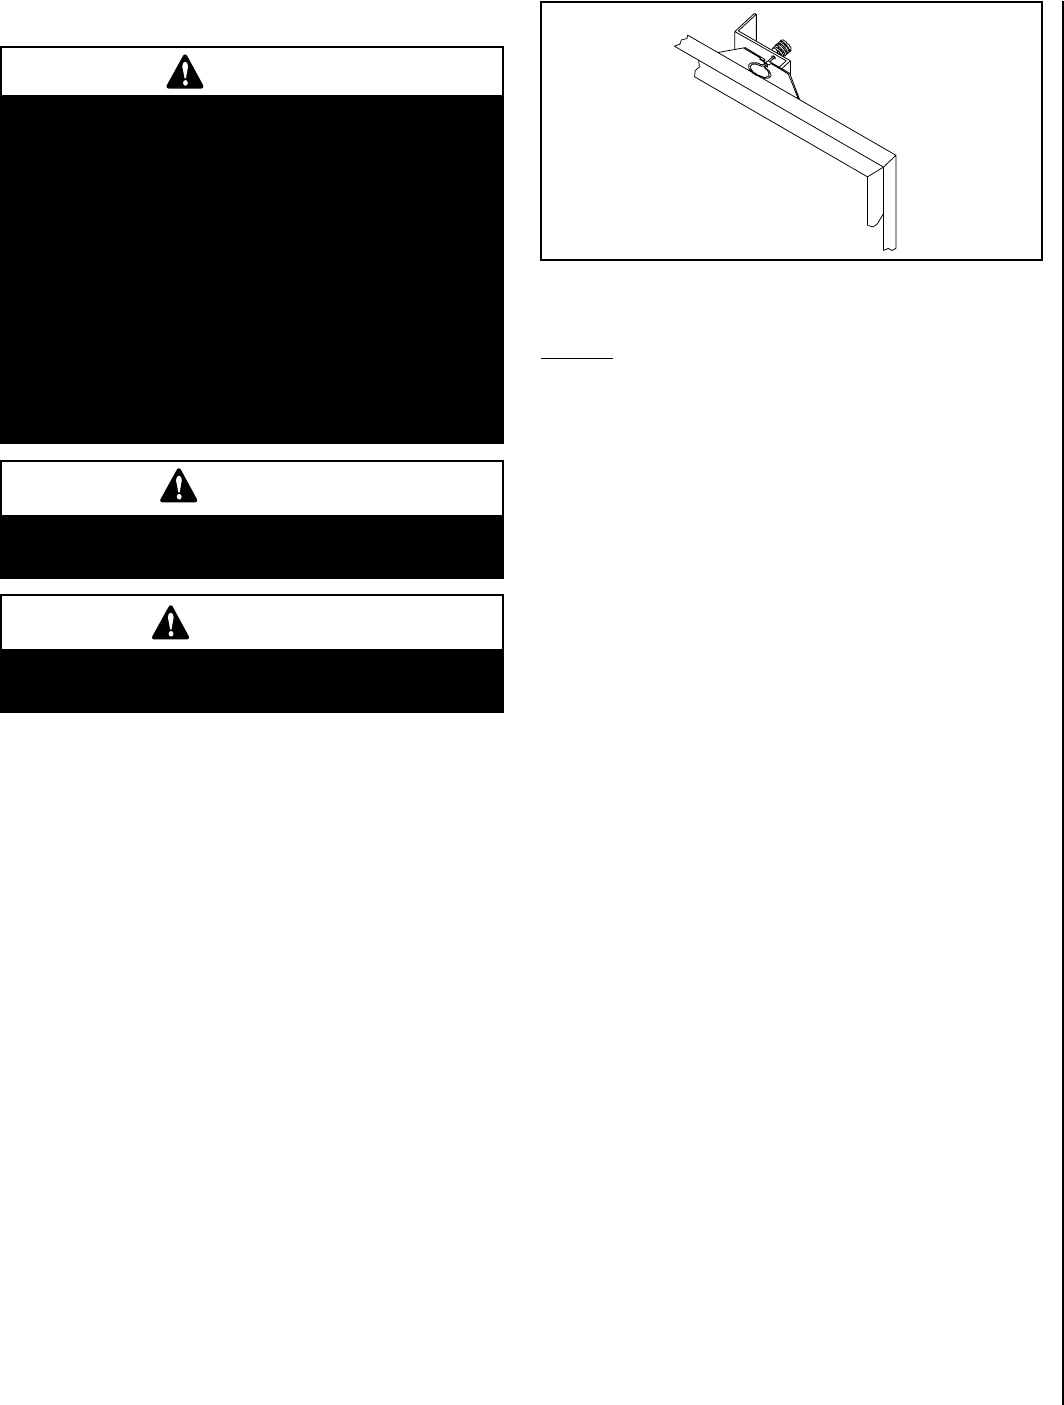
Opening and Removing Door
Only doors certified with the appliance shall be used.
Seules des portes certifiées pour cet appareil doivent être
utilisées.
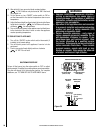
CAUTION: DO NOT abuse glass door by striking or slamming shut.
Do not remove glass door while the appliance is hot.
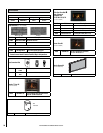
CAUTION: Do not open the glass door when the fireplace is
burning. Let the unit cool before opening the door. At the top
of the glass door are two spring-loaded latches. While holding
the door against the firebox, pull each latch forward and up -
releasing the top of the glass door. To remove the door, grasp it
firmly with both hands and lift it up so the two tabs at the bottom
of the door are lifted out of their retaining slots. The glass door
is quite heavy, so it is important to place it in a secure spot until
reinstalled. To reinstall the door, the tabs at the bottom of the
door must be inserted in the slots at the bottom of the firebox.
The spring loaded latches must be pulled forward and down to
apply pressure against the door.
WARNINGS
• Do not attempt to substitute the materials used on
these doors, or replace cracked or broken glass.
• Handle this glass with extreme care! Glass is
susceptible to damage – Do not scratch or handle
roughly while reinstalling the glass door frame.
• The glass door(s) of this appliance must only be
replaced as a complete unit as provided by the
manufacturer. Do not attempt to replace broken,
cracked or chipped glass separately.
• Do not attempt to touch the front enclosure glass
with your hands while the appliance is in use.
• Do not use abrasive cleaners. Never clean the
glass when it is hot.
CAUTION
Do not operate the appliance with glass removed,
cracked or broken.
ATTENTION
Ne pas utiliser l'appareil si le panneau frontal en
verre n'est pas en place, est craqué ou brisé.
Figure 39
Door Latch