


12
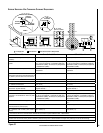
vent parts list
Direct vent pipe Security™ Secure Vent™ * may be used
with the Vision™ gas stove. Please see the lists below to
verify the components available from each direct vent pipe
manufacturer. Snorkel terminations are available for ap
-
plications which may require vertical rise on the building
exterior. The components listed below come in a galvanized
finish. Most of the components are also available in a painted
black finish. Add a “B” to the end of the part number when
ordering if a black part is desired.
seCurity - seCure vent 6-5/8”x 4” pipe
Part Number Description
SV4LC 6” Pipe Length
SV4L12 12” Pipe Length
SV4L24 24” Pipe Length
SV4L36 36” Pipe Length
SV4L48 48” Pipe Length
SV4LA 6” Pipe, Adjustable
SV4LA12 12” Pipe, Adjustable
SV4FA Flashing, 1/12 to 6/12 Roof Pitch
SV4FB Flashing, 7/12 to 12/12 Roof Pitch
SV4RSM Wall Radiation Shield
SV4E46 45º Elbow
SV4E90 90º Elbow
SV4VS Vinyl Shield Protector
SV4FC Storm Collar
SV4CGV Vertical Termination Cap
SV4BF Firestop
SV4CHC Horizontal Termination Cap
SV4STC36 Snorkel Termination Cap (36”)
SV4STC14 Snorkel Termination Cap (14”)
SV4BM Wall Band
Simpson Dura-Vent GS 6-5/8”x 4” Pipe
Part Number
Description
908 6” Pipe Length
907 9” Pipe Length
906 12” Pipe Length
904 24” Pipe Length
903 36” Pipe Length
902 48” Pipe Length
911 11” to 14-5/8” Pipe, Adjustable
942 Wall Thimble
940 Rnd Support Box/Wall Thimble Cover
941 Cathedral Ceiling Support Box
943 Flashing, 0/12 to 6/12 Roof Pitch
943S Flashing, 7/12 to 12/12 Roof Pitch
945 45º Elbow
990 90º Elbow
950 Vinyl Siding Standoff
953 Storm Collar
963 Ceiling Firestop
988 Wall Strap
981 Snorkel Termination (36”)
982 Snorkel Termination (14”)
984 Horizontal Termination Cap
985 Horizontal Termination Cap (High Wind)
980 Vertical Termination Cap
991 Vertical Termination Cap (High Wind)
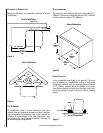
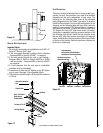
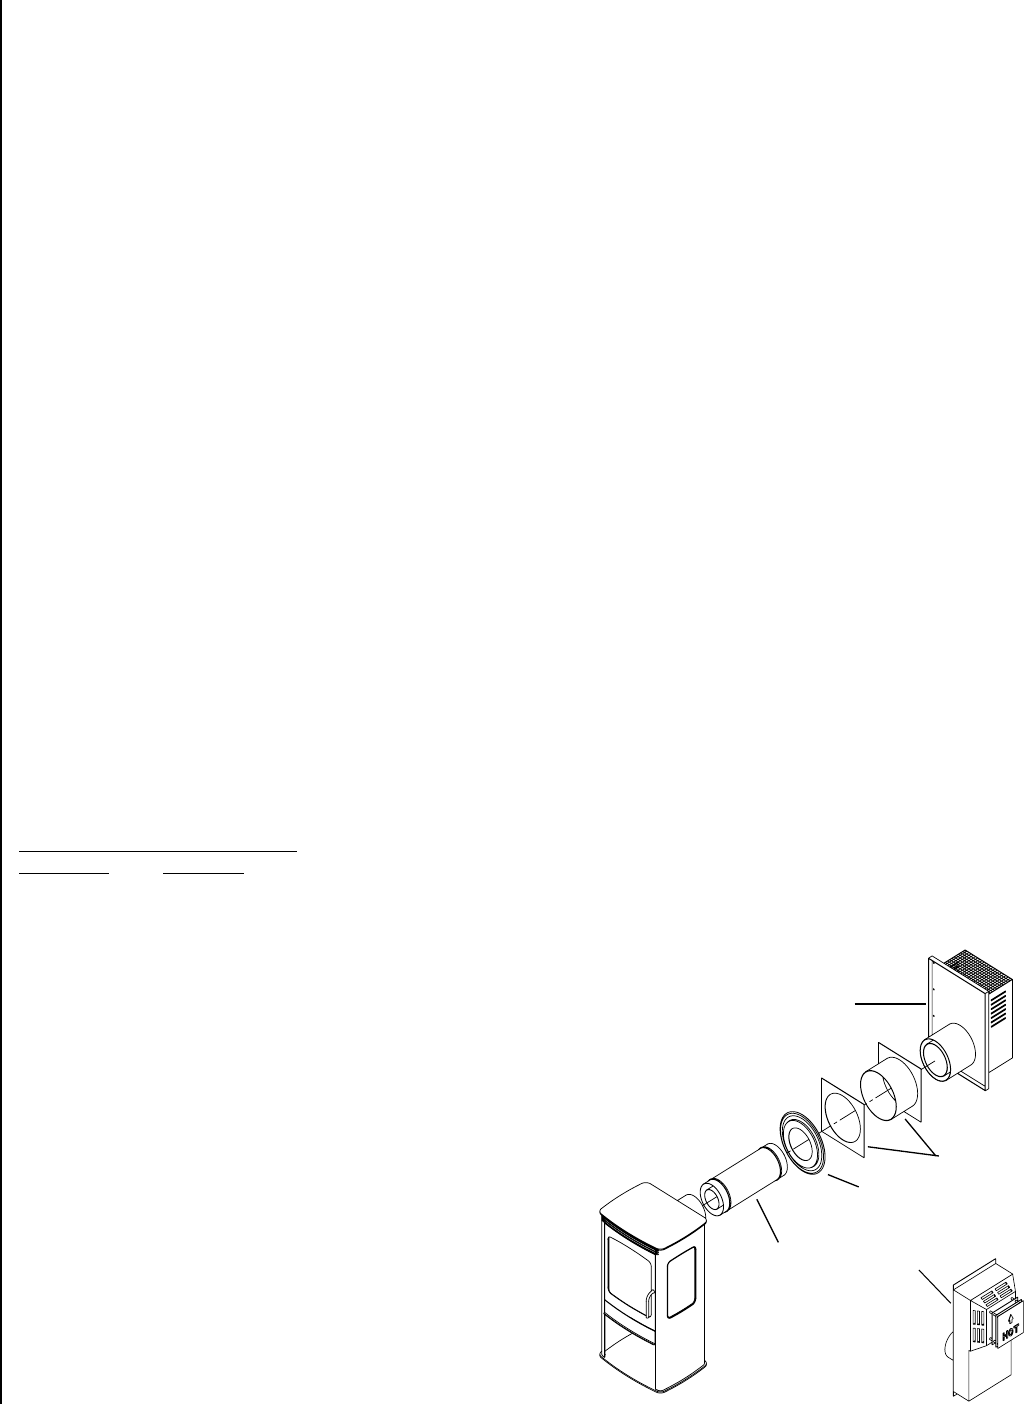
horizontal vent installation
venting terminals may not be reCessed into a wall or
siding.
1) Set the unit in the desired location. Check whether or
not wall studs are in the way when the venting system is
attached. If wall studs are in the way, you may want to
adjust the location of the unit.
2) Assemble the desired combination of pipe and elbow to
the appliance adaptor with pipe seams facing down. Off
-
setting the pipe seams as double seams in one place will
cause the outer pipe to take an oval shape. The Horizontal
Termination Kit comes with 18” of straight vent - 6-5/8”
black outer pipe and 4” inner vent.
3) With the pipe attached to the stove, slide the stove into
its correct location, and mark the wall to the dimensions
of the wall thimble (9-1/4” x 10-1/4”). The center of
the round hole should line up with the centerline of the
horizontal pipe. (9-1/4” is side-to-side dimension and
10-1/4” is vertical dimension) If the wall being penetrated
is constructed of non- combustible material (i.e. masonry
block or concrete), a 7” diameter hole is acceptable.
4) The horizontal run of vent should have a 1/4” rise for every
1 foot of run toward the termination. Never allow the vent
to run downward. This could cause high temperatures
and may present the possibility of a fire.
5) The location of the horizontal vent termination on an ex
-
terior wall must meet all local and national building codes,
and must not be blocked or obstructed. For External Vent
Termination Locations, see page 13.
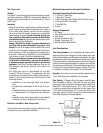
Snorkel Terminations: For installations requiring a vertical
rise on the exterior of the building, 14-inch and 36-inch tall
Snorkel Terminations are available, as well as the standard
Riser Vent. Follow the same installation procedures as
used for standard Horizontal Termination. NEVER install the
snorkel upside down.
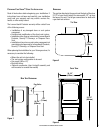
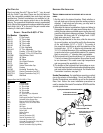
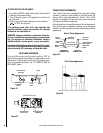
Typical parts needed for a horizontal installation.
14” Snorkel for Vision 35
Standard Horizontal for Vision 25
Wall Thimble
Decorative Wall Trim
Pipe Length
max
min
Snorkel required for Vision 35 or
Vision 25 if horizontal run
exceeds 3 feet.
Figure 15