


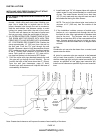
INSTALLATION
PAGE 11
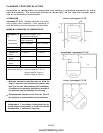
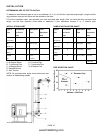
INSTALLING SURROUND ASSEMBLY - Advantage II-T
C INS (to be done after venting system is installed)
The surround kit (purchased separately) comes with a set
of metal panels that enclose the fireplace opening when
fitted together. Put the surround assembly together accord-
ing to the following instructions (ref. see illustration below).
1. Remove panels from package.
2. Verify that you have all three panels and a package with
“pop” rivets and #8 self-tapping screws. If you do not have
a “pop” rivet tool, you should arrange to buy or borrow one
for this installation.
3. Set the stove on the hearth so that the rear of the stove is
accessible to complete all pipe connections.
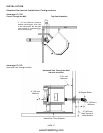
4. Verify that the hopper cover is all the way to the front and
open as high as your fireplace opening will allow. Secure
the hopper cover with at least two #8 screws on all three
sides. Tip: Spreading the side panels slightly may be nec-
essary to complete this step.
5. Place four rivets and your “pop” rivet tool beside the stove
and line up the right side panel (with control door) with the
holes in the side of the stove. (When the side panel is
properly installed, the hinge flange will be to the rear of the
stove.) Attach the panel to the stove with four “pop” rivets.
6. Secure the left side surround panel to the stove using the
procedure described in step #5.
7. Before proceeding further, check pipe connections to en-
sure that all joints are sealed with high-temperature RTV
silicone and properly secured. Refer to detailed venting in-
structions on pages 16, 19 and 20.
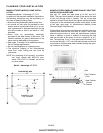
8. The stove may now be pushed into the fireplace cavity to
within 1 1/2” of the face of the fireplace.
9. Set the top surround panel in place over the two side pan-
els. Carefully slide the panel downward into the “U” clips
attached to the back of the Advantage II-T C INS. Tip: Be
careful to align the notched cutouts in the top surround
panel with the stove side panels. Adjust side to side if nec-
essary to align with the surround side panels.
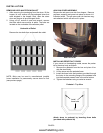
10. Unwrap the control board carefully without touching
any electrical components. Holding the sides of the
control board, lower the bottom edge into the slot in
the bottom of the control door opening Install the
control board onto the right side panel (with door) us-
ing the #8 hex head screw provided.
11. Connect the wiring harness from the Advantage II-T C INS
into corresponding connector on control board.
12. Check the Advantage II-T C INS placement in the
fireplace. To reposition, open the door and make any
needed adjustment by pulling forward and then push-
ing sideways. Once the unit has been centered to
your satisfaction, close the door and push the Advan-
tage II-T C INS back into place so the surround is
flush with the face of the hearth. Tip: Before com-
pleting this step, verify that the control board will not
hit the edge of the fireplace opening.
If using the optional gold surround trim, remove the trim
from its packaging and place the piece with the two mi-
tered ends along the top panel. Place the two remaining
side pieces on the surround so that the mitered ends
align. Cut the non-mitered ends of the shroud trim with
scissors, if necessary.
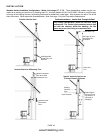
In factory built and masonry fireplaces, a means
must be provided to prevent room air passage to the
chimney cavity of the fireplace. This may be accom-
plished by sealing the damper area around the chim-
ney liner or pipe.
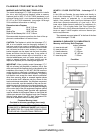
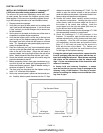
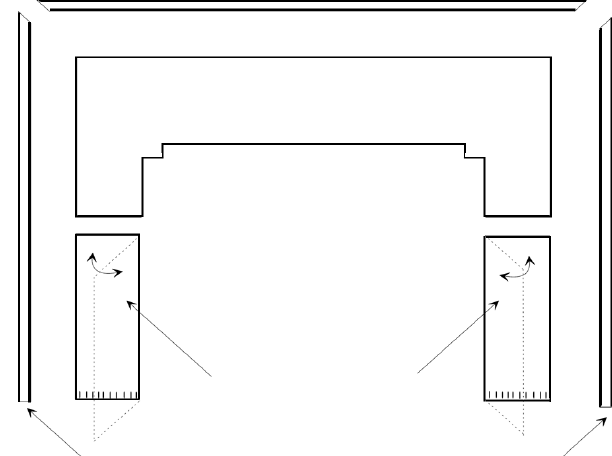
Top Surround Panel
Left Hinged
Surround Panel
Right Hinged
Surround Panel
Optional Trim Optional Trim
www.PelletKing.com