


NOTE: DIAGRAMS & ILLUSTRATIONS ARE NOT TO SCALE
8
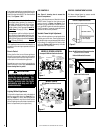
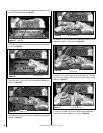
PROCEDURE FOR REMOVING THE STANDARD GLASS DOOR
ASSEMBLY
Figure 16
Remove the front door assembly from insert as follows:
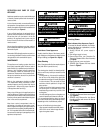
1) Pull off top louver and hinge down lower louver (see
Figure 15).
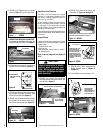
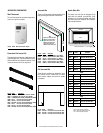
3) Swing the bottom of the door outward (see
Figures 17 & 18) and
lift it off of the flange on unit (where door hooks onto, at top). Set
door aside in a safe place.
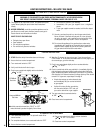
Pull door hook forward until it releases
Door hook is located below glass door
Figure 17
Swing bottom of
door outward
Figure 18
Lift top of door off this flange
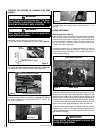
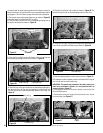
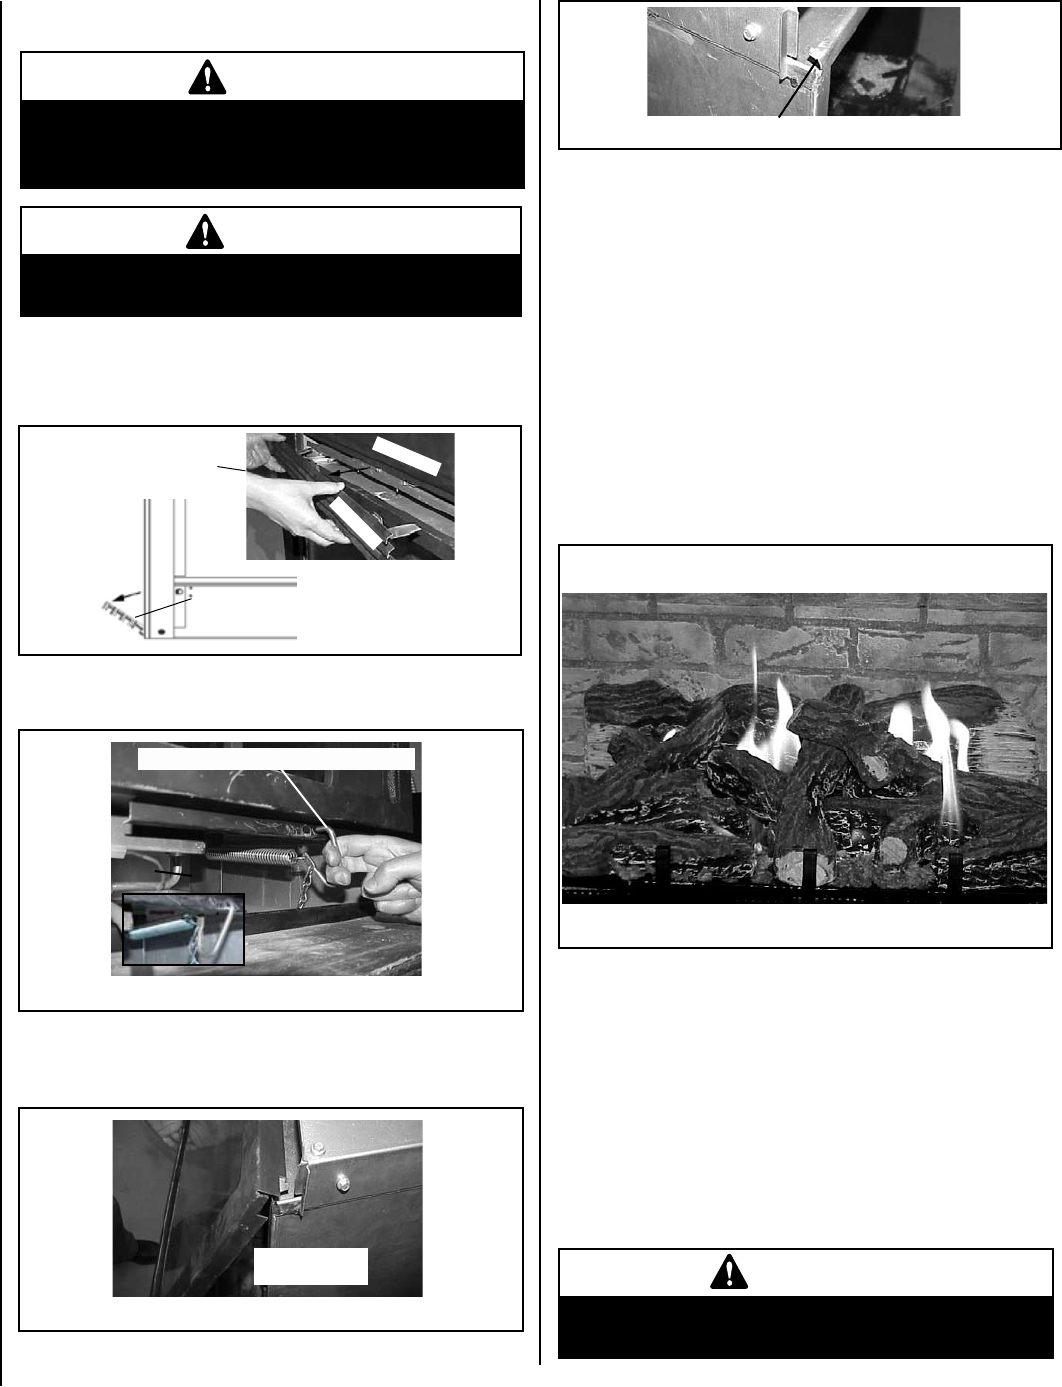
Burner Flame Appearance
To reinstall glass door assembly panel, reverse instructions 1 - 3 on
this page.
BURNER ADJUSTMENT
Flame Appearance and Sooting
Proper flame appearance is a flame which is blue at the base and becomes
yellow/orange in the body of the flame. When the insert is first lit, the
entire flame may be blue and will gradually turn yellow/orange during
the first 6-8 minutes of operation. If after 6-8 minutes the flame stays
blue, or if the flame is orange with evidence of sooting (black tip), the
air shutter may require adjustment.
An appliance operated with an air shutter opening that is too large will
exhibit flames that are blue and transparent. These weak, blue and
transparent flames are termed anemic. If the air shutter opening is too
small, sooting may develop.
Sooting is indicated by black puffs developing at the tips of very long
orange flames. Sooting results in black deposits forming on the logs,
appliance inside surfaces and on exterior surfaces adjacent to the
vent termination. Sooting is caused by incomplete combustion in the
flames and lack of combustion air entering the air shutter opening.
To achieve a warm yellow-to-orange flame that does not soot, the
shutter opening must be adjusted between these two extremes.
No smoke or soot should be present. Reposition the logs if flames
impinge on any of them. If the logs are properly positioned and
sooting conditions exist, the air shutter opening on the main burner
tube should be adjusted.
Pull Off
Top Louver
Top Louver
Top Surround
Pull down lower louver (hinged)
(side view)
Glass Front
Figure 15
2) Locate the spring hook under the glass door assembly (see
Figure 16).
Pull hook forward until it releases out of the bottom door frame.
EDVI35 Shown
Figure 19
WARNING
Handle glass door with extreme care! The glass
door assembly is susceptible to damage. Do not
scratch while handling or while reinstalling.
WARNING
Never operate unit without the front glass door
panel in place and secure.
IMPORTANT
Ensure that the front glass panel is in place and
sealed during adjustment.