


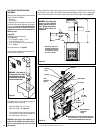
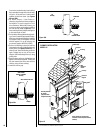
Figure 28
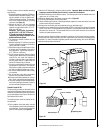
THE CHIMNEY SYSTEM
Chimney Installation Notes
1. If possible, install an interior chimney as it
will provide better performance. In areas
with continuous temperatures below 0°F
(18°C), the use of an exterior chimney in-
creases the likelihood of operating problems
such as low draft, high rate of creosoting,
and poor start-up characteristics. Exterior
chimneys are also prone to down-drafting
and flow reversal. Installations which are
located on lower floors in the house, such
as in a basement, in combination with an
outside chimney, are especially prone to
flow reversal.
2. The Lennox Hearth Products fireplace model
Cambria™ fireplace is listed only with Se-
curity Chimneys International Ltd 10” dia.
chimney systems model Secure Temp
ASHT+
/ Nova Temp
HT6103+
or AC.
3. A chimney venting a fireplace shall not vent
any other appliance.
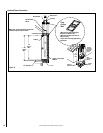
4. The minimum chimney height is 15 feet (4.6
m) excluding the fireplace.
5. All chimney installations must include at least
one support in order to be able to take any
lateral load. The maximum chimney length
that can be supported by the fireplace is 12
feet (3.7 m) for Secure Temp
ASHT+
/ Nova
Temp
HT6103+
and 26 feet (8m) for AC chim-
ney. In altitude, add 18” (450 mm) to the
chimney for every 2000 feet (600 m) above
sea level.
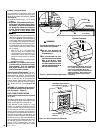
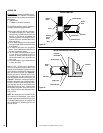
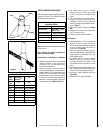
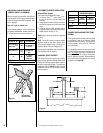
6. The chimney must extend at least 3 feet (915
mm) above its point of contact with the roof
and at least 2 feet (610 mm) higher than any
wall, roof or building within 10 feet (3m) of
it (Figure 28).
7. If the chimney extends higher than 5 feet
(1500 mm) above its point of contact with
the roof, it must be secured using a roof
brace.
8. A rain cap must be installed on top of the
chimney. Failure to install a rain cap may
cause corrosion problems.
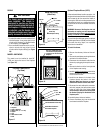
9. Cut and frame square holes in all floors,
ceilings, and roof that the chimney will go
through to provide a 2” (50 mm) clearance
between the chimney and any combustible
materials. Do not fill this 2” space with
insulation or any other combustible mate-
rial.
10. Portions of the chimney which may extend
through accessible spaces must be enclosed
to avoid contact with combustible materials
or damage the chimney.
Ten (10) Feet
3.1 Meters
Three (3) Feet
.6 Meters
Minimum
Two (2) Feet
.6 Meters
Minimum
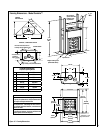
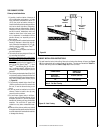
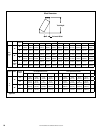
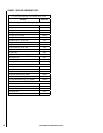
CHIMNEY MODEL SQUARE HOLE
SIZE OPENING
Secure Temp
ASHT+
Nova Temp
HT6103+
16-3/8 in. (416 mm)
AC: 17 in. (432 mm)
Note: See Table 3 for Sloped Roof Framing
Table 2 - Flat Roof Framing
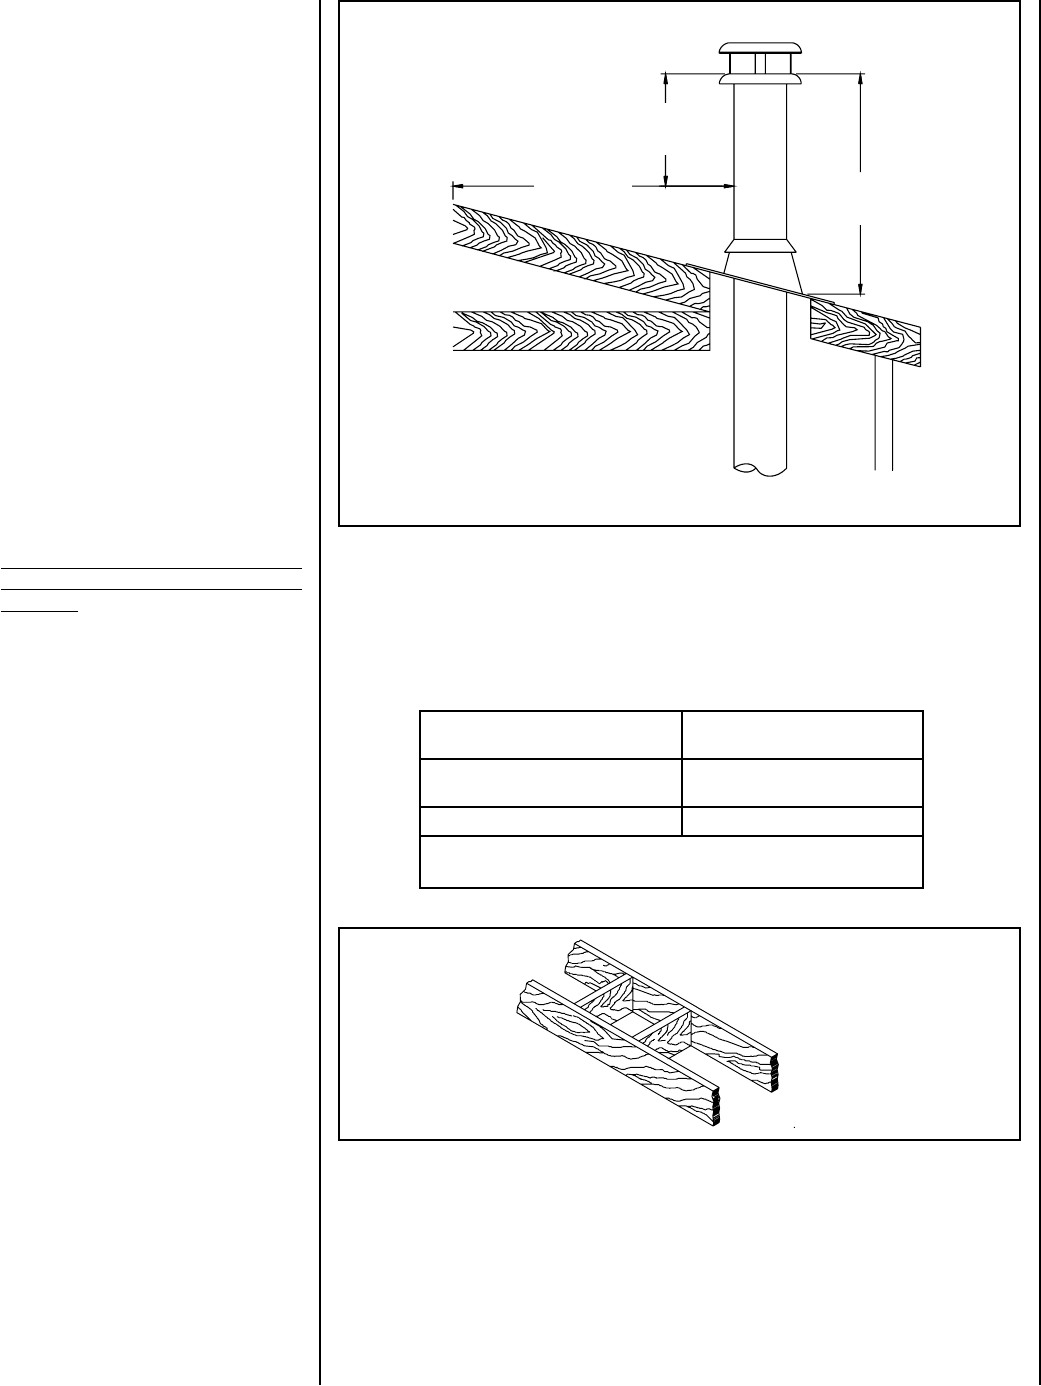
Figure 29 - Roof Framing
CHIMNEY INSTALLATION INSTRUCTIONS
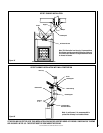
1. Cut and frame the holes in the ceiling, floor and roof where the chimney will pass (see Figure
29). Use a plumb-bob to line up the center of the holes. The sizes are indicated in Table 2 for
the floor and ceiling holes and Table 3 (Page 19) for the roof holes.
NOTE: DIAGRAMS & ILLUSTRATIONS ARE NOT TO SCALE.
17