


21
NOTE: DIAGRAMS & ILLUSTRATIONS ARE NOT TO SCALE.
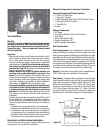
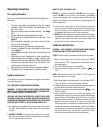
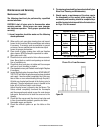
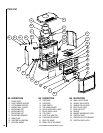
Pilot Flame Appearance
Figure 31
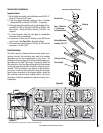
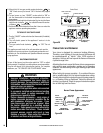
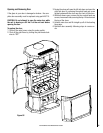
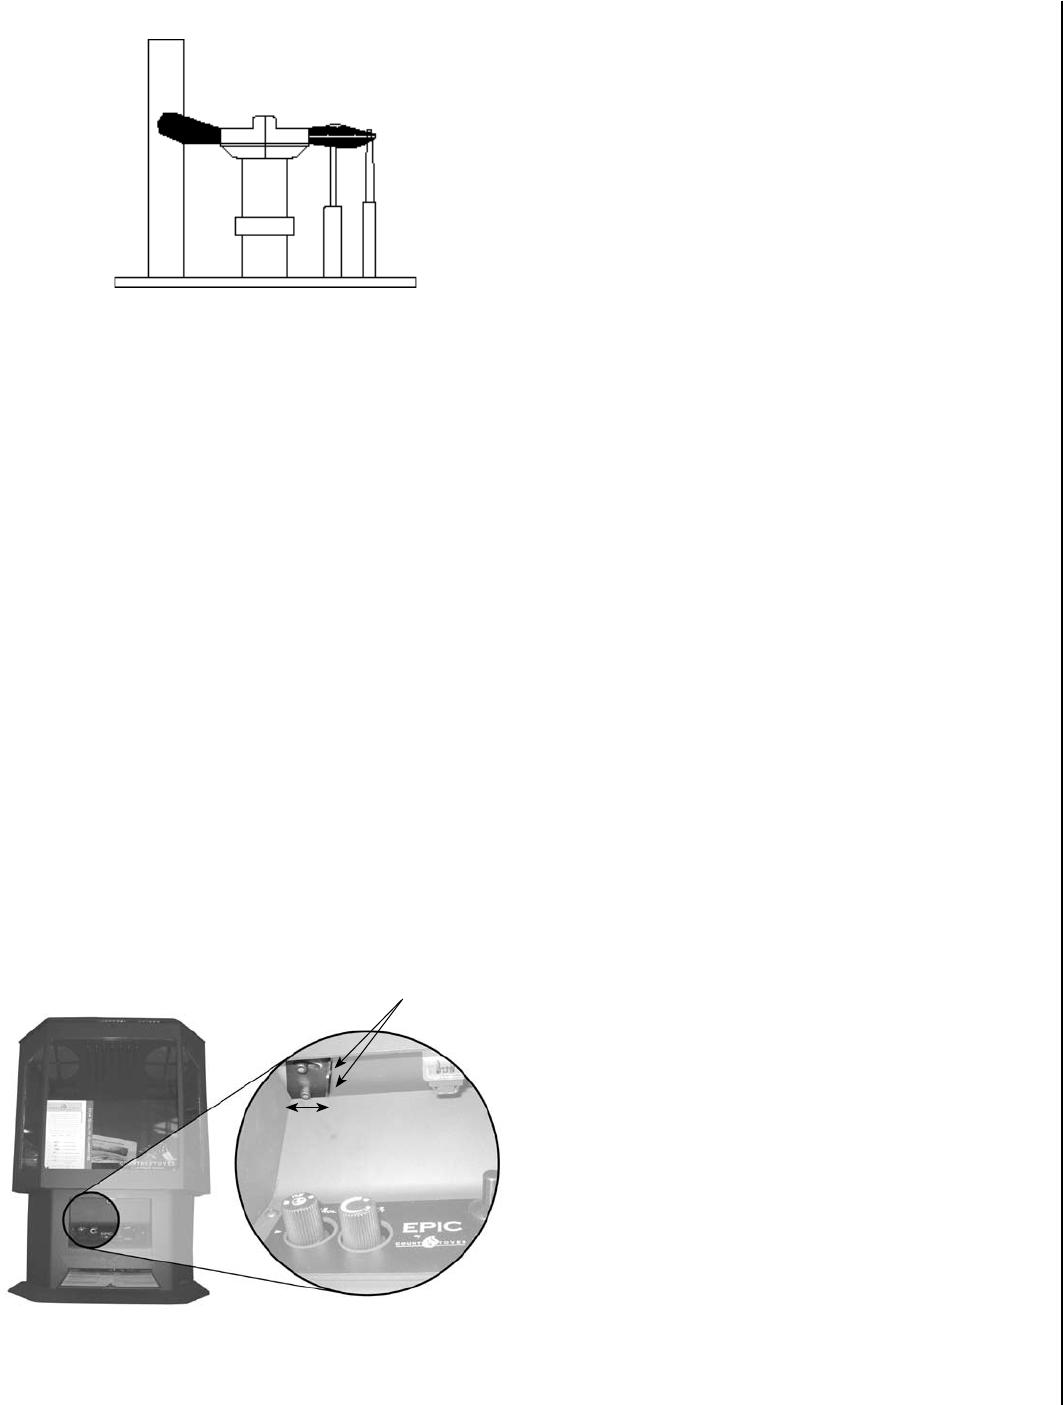
Air Shutter Adjustment
CAUTION: Air shutter is hot while the Epic™ gas stove
is operating and should only be adjusted using a heat
resistant glove.
The air shutter control lever is located inside the main
control door above the control panel. The lever is linked to
the primary air shutter on the main burner. The air shutter
regulates the amount of primary air the burner receives
and, therefore, how clean the stove burns. The air shut
-
ter should only be adjusted by a qualified gas technician.
The stove should burn for about 15 minutes with the logs
installed before adjusting the air shutter. Moving the lever
to the left (closing the shutter) will raise the height of the
flames as well as turn them more yellow/orange. Moving
the lever to the right will open the shutter, turning the flames
to a cleaner transparent blue and enhance the glow of the
logs.
CAUTION: The air shutter should never be set so as
to make the tips of the flames sooty or create sooting on
the viewing glass, logs, or firebox ceiling. If soot begins
to form after burning, the air shutter should be opened
gradually until the sooting condition stops. Gas quality
and gas pressure may vary, which can affect the burning
characteristics of the stove.
Quiet Operation
As the Epic gas stove is burning, a number of normal op-
erational sounds may be heard. The flow of gas through the
gas valve and orifice may make a rushing or whistling noise.
If this noise is objectionable, it can be reduced by turning
down the flame. Turning down the flame can reduce total
heat output by more than 30%. When the blower turns on,
the sound of rushing air may be heard. The blower sounds
may be reduced by adjusting the speed control located on the
blower assembly. Also, a slight clicking sound may be heard
as the gas valve or blower switch is turned on and off.
Paint Curing
This stove has been painted with Stove Bright high tempera-
ture metallic paint. It leaves the factory dry to the touch, but
completes the curing process as the stove is used. To cure
the paint, burn the appliance four successive times for ten
minutes each time with a five minute cool down between
each firing. Also some parts of the appliance may be lightly
coated with machining oil. Ventilate the house during these
first firings as the paint and oil give off carbon dioxide and
unpleasant odors. It is recommended that persons sensi
-
tive to an imbalance in the indoor air quality avoid the stove
during the curing process.
Optional Wall Thermostat
If an optional wall thermostat is to be installed, install the
thermostat per the manufacturers instructions (provided with
the thermostat). Failure to follow manufacturers instructions
could result in a malfunction. Pay special attention to the
thermostat location requirements. If the location require
-
ments are not adhered to the appliance, erratic operation
or failure may occur.
Do not mount the thermostat where it may be affected by:
• Radiant heat from this appliance, fireplaces, sun or other
heat sources.
• Drafts or dead spots behind doors or in corners.
• Hot or cold air from ducts.
Air Shutter Adjustment Handle, highlighted
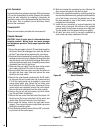
Closed Open
Loosen screws to adjust, tighten
screws when adjustment is complete.
Figure 32