


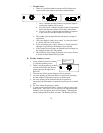

26
VII. MOUNTING
Note:
Before permanently mounting, ensure that the indoor weather station is
able to receive signals from the sensors and WWVB signal at the desired
location. To achieve a true temperature reading, avoid mounting the remote
thermo/hygro sensor (or any sensor) where direct sunlight can reach the remote
sensor. We recommend that you mount the remote sensor on a North-facing
wall or under an eve. The sending range of the remote thermo/hygro sensor is
80-ft (25m) however obstacles such as walls, concrete, and large metal objects
can reduce the range. Place all units in their desired location, and wait
approximately 15 minutes before permanently mounting to ensure that there is
proper reception. If the indoor weather station loses the signal from the remote
sensor, it will display the last temperature reading for 15 minutes. After 15
minutes of not receiving any signals, the remote temperature will display “- -.-”.
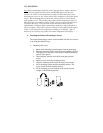
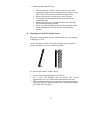
A. Mounting the Remote Thermo/hygro Sensor
The remote thermo/hygro sensor can be mounted with the use of screws
or by using the adhesive tape.
1. Mounting with screws
a. Remove the mounting bracket/receptor from the packaging.
b. Place the mounting bracket over the desired mounting surface.
c. Through the 2 screw holes of the bracket, mark the mounting
surface with a pencil.
d. Where marked, start the screw holes using the provided
screws.
e. Remove screws from the mounting surface.
f. Align the mounting bracket with the started screw holes.
g. Screw mounting bracket onto the mounting surface. The
screws should be flush with the bracket.
h. Fit the mounting post (on the back of the sensor) into the
receptor of the mounting bracket.